
 |
| First Seven Blocks of Lars's Drunken Dragons Quilt Completed |
Anyway, I had seven blocks finished by this afternoon. I'm starting to get the hang of this. Initially, I was having some issues rotary cutting with my templates -- the templates were slipping, shifting slightly on the fabric between cuts. I tried out these Fabric Grabbers, which remind me of the little rubber stickies that you put on the edges of cabinet doors to prevent slamming.
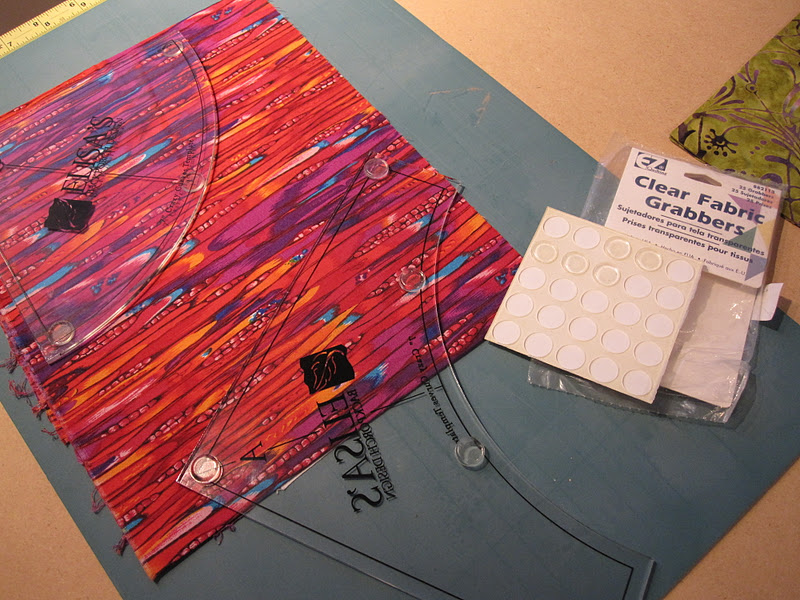 |
| Fabric Grabbers applied to Drunkard's Path Templates |
UPDATED December 3, 2011: I ended up taking the Fabric Grabber dots off all of my templates and rulers and I will not use them again. Because they raise the templates up off the fabric, use of this product results in fabric shifting under the template while I'm cutting, creating a level of distortion that is unacceptable to me. I'll be on the lookout for something thin and flat that I could put on my rulers and templates to reduce slipping without sacrificing accuracy, and I'll post about it if I find something that works. I'm considering trying plain old double stick Scotch tape, but I'm guessing that so much fabric lint would get on the tape that I'd have to replace the tape on my ruler after each and every cut, which would be really annoying...
Here you can see I have quite a few pieces cut. I'm not keeping count, but I've cut four of each shape from most fabrics. Now I'm playing around with them, matching them up as I go along.
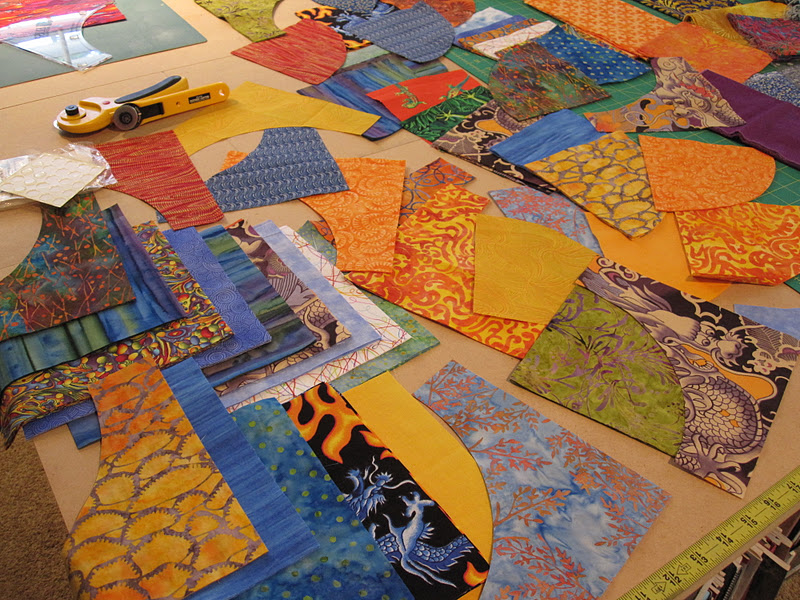
The batiks are my favorites, and because they tend to be a little stiffer and more tightly woven, they are also more stable on the bias curved edges than some of the other fabrics.
You know, when I was researching construction options for these blocks, I found some sources who said pinning the pieces together prior to sewing them was "optional," but for me, it's been absolutely crucial. With these 7" blocks I'm getting the best results when I use eight pins. First I fold each piece in half to locate the center, and then I fold the edges in to the center mark to find the center of each half. I line up the fold marks on the two pieces (making sure the straight fabric edges remain parallel to one another), and the first pin goes in the center, like this:

Next, I pin the outside edges together, like this:

Then I match up the quarter marks on the top and bottom pieces and put a pin there as well. The pins I'm using are extra-fine silk pins, and they go perpendicular to the fabric edge and go through the fabric twice.

In the photo above, you can see how the opposite curved fabrics still twist away from one another on the left, where I haven't yet placed the final pin, but the curves are lined up nicely on the right where the additional pin is in.

There, now this block is completely pinned and ready to stitch. It's important to pin in this order -- center, end, quarters, and then eighths -- because it helps evenly distribute the fullness so you have a nice, flat edge to stitch. You'll use your finger to flatten the area between pins as you stitch, making sure those fabric edges remain perfectly aligned with one another and with the edge of your presser foot (if you're using Bernina Foot 37) or whatever else you're using for your scant 1/4" seam guide.
 I know my fingers look creepy so much larger than life, but I wanted you to see how my left hand is keeping any pleats or creases from forming in the stitching line. Honestly, the trickiest thing about these Drunkard's Path blocks is getting them pinned together well, and after that it's as easy to sew them together as any straight-edged pieces would be.
My eyes started to get tired and the little crease marks I was making to divide my fabric pieces into halves and fourths were difficult to see on some fabrics, so I eventually started to mark little ticks with a piece of tailor's chalk in the seam allowance instead of folds. I have a big cigar box full of these little wedges of tailor's chalk that my mother-in-law gave me -- my husband's grandparents on both sides were tailors and this box of fabric markers belonged to them. So Lars's quilt is being made with notions used by his great grandparents. How cool is that?

MUCH easier to see then little folded crease marks!

Here's that block from before, all sewn together. There's just a sliver of the blue fabric peeking at the edge, but the seam is pretty darned accurate. Let's press it open and take a look at the finished block:

Ta-da! Piece of cake!
You know, I've thought about it some more, and the oversized Drunkard's Path blocks I'm making might actually be MORE difficult than the smaller ones, because the curved seam is longer and if you don't get it pinned well, there's a greater chance something will slip or stretch along the long, bias-curved seam. The bigger blocks are probably easier to cut with the rotary cutter, but maybe the smaller blocks would be easier for begginers to sew after all.
Now that I've worked out my process, I don't have to continue one block at a time. I sat down and pinned several blocks at once so I could chain-stitch the patches. Here they are, all ready to be fed to the Sewbaby:

When I called it quits for today, I had a total of seventeen blocks finished for Lars's quilt:

By the way, this is not how I intend to lay the blocks out in the quilt. I'm just moving them around right now to get a sense of what colors and values I have, so I know what to make more of and what to back away from.
3 comments:
going nicely! I have not been brave enough to do a lot of circle stitching yet, but you have inspired me!
Hi Rebecca! Thanks for stopping by my blog and commenting about the drunkard's path QAL - since you don't have your email in your profile I replied to your comment back on my post but I'll also put the reply here so you don't have to check back :) Love how your quilt is shaping up!
In response to your question about block construction - I actually find cutting the blocks less precisely and sewing with out pinning, and then worrying about precision just at the trimming part to be easier - if you look back at the block tutorial it shows how to trim the blocks precisely so they all match up (it's not that hard, I swear!). That being said, I'm glad you found a technique that works for you! This QAL is all about approaching the block whichever way you prefer, and we're glad to have you joining in!
Oh my, I just swooned looking at your fabrics!!! It is going to be such a stunning quilt.
Post a Comment