Showing posts with label Hand Sewing. Show all posts

Sunday, January 25, 2026

Rosettes for Stonefields Quilt Border + Ongoing Experiments with English Paper Piecing

Happy Slow Stitching Sunday!  You guys, I have finally been sewing again for the first time since moving back to North Carolina!  I had so much fun making the tiny 3/8" hexie rosettes for Stonefields Quilt blocks #14 & 15 back in September, so I decided that making a few of the 168 larger 3/4" hexie rosettes that I will need for my border might be a good task to ease myself out of my stitching slump.  It turned out to be the perfect choice.  As Tula Pink says, you have to eat your elephant one little bite at a time.


3 Rosettes Completed, 165 More Needed for Stonefields Quilt Border

I would have finished more than three of these, but I spent about two hours ransacking my studio closets, bins and drawers searching for my All Points Patchwork: English Paper Piecing Beyond the Hexagon... book by Diane Gilleland.  (This post contains affiliate links).  To my supreme irritation, I never did find it.  I was also unable to locate my little black and gold pack of John James size 12 Milliners needles, even though I swear I remember finding them mixed in with unrelated supplies when I was unpacking.  Where, oh where did I put those needles?  Before I moved, I could put my hands on just about any book, tool or notion in less than 5 minutes.  A place for everything and everything in its place and all that.  Well, I caved and ordered more needles on Amazon, but I did not buy another copy of the book as it's sure to turn up sooner or later.

My Stonefields Quilt (pattern by Susan Smith is getting harder to find, but there is still one copy available on Etsy here) was purchased from a quilt shop and came kitted with the necessary EPP template papers for 3/4" hexagons.  I can't remember whether this nifty windowed acrylic template for fussy cutting came with the kit as well, or if I purchased it separately from Paper Pieces.  For hexies that I wanted to cut from stripes or centering specific printed motifs from my fabric, I traced around the template with a mechanical pencil and sandpaper beneath the fabric, then cut the hexies out individually with scissors.


Tracing Acrylic Template Prior to Cutting Hexies With Scissors


These flowers from my Tilda fabric were cut in the same way, centering the template window on the flowers and tracing around them one by one with pencil, then cutting out each shape with scissors.  So much fun!  But OH SO SLOW...


More Fussy Cutting With Window Template


There was a silver lining to the chaos in my studio and the missing EPP book, because after wasting two hours looking for things I never found, I wasted invested a couple more hours going down a rabbit hole of YouTube English Paper Piecing tutorials, trying to find the method I used successfully for the smaller hexie rosettes I made four months ago.  Remember that I am an EPP newbie, and making two of something is not enough repetition to ingrain everything indelibly in my brain.  

Wednesday, September 17, 2025

Stonefields Blocks 14 & 15: Bordered 3/8" Hexagons

Hello, hello, HELLO, my Lovelies!  Look what I made yesterday and today, instead of packing or working on quilting my Deco quilt!  Behold, the Adorable and Delicious Little Bordered 3/8" Hexagon Blocks for my Stonefields sampler quilt project!  I had so much fun making these blocks!  (This post contains affiliate links).

6" Finished Stonefields Blocks 14 & 15: Bordered 3/8 in. Hexagons


The directions in the Stonefields Quilt pattern by Susan Smith are sparse, which is fine by me as I have difficulty following instructions anyway.  The pattern designer assumes everything, and I mean EVERYTHING, is stitched by hand.  That's fine if Methuselah is making this quilt, but those of us whose life expectancy is less than 900 years need to make peace with compromises from time to time.  I enjoy hand stitching but I am really, REALLY slow at it, so I'm mixing in machine work where it makes sense to me to do so.

For instance, why would I hand piece this square in a square block background when it is so easy to foundation paper piece this block and I can print my foundation paper patterns right from my EQ8 software to whatever size I need them to be?


Foundation Paper Pieced Background


I rough cut all my patches before FPP stitching and lay them out next to my machine.  Those fabrics in the lower left corner of the above photo are the ones I've selected for the hexie rosette that will be appliquĆ©d to the center of this block later.


 6" Finished Block Background Ready for Hexie Rosette


And now, for the rascally little EPP hexies!  This was my first ever experience making EPP hexies.  Five years ago, I sewed an EPP monogram letter C block for a baby quilt (read about that here) and in August of 2016 I made unsuccessful experiments combining both FPP (foundation paper piecing) and EPP (English paper piecing) methods to piece a tricky block from the Farmer's Wife Sampler book (read about that here).  

Well, I've got more experience and better skills now than I had back then, and this time around I'm a lot happier with my results.  


Thread Basted 3/8 in. Hexies


Notes to Self (and to Other Interested Parties):

  • I'm using commercially made hexagon templates with 3/8" sides.  They came in an optional kit that I purchased with my pattern.
  • After reading a blog post from the Brimfield Awakening EPP gurus where they experimented with different stitching methods and threads, I decided to thread baste my hexies using 50/3 cotton Guttermann thread and a size 10 milliners needle, but switched to 100 wt polyester Microquilter thread with a size 11 milliners needle to whipstitch the edges of my hexies together.  Microquilter from my long arm quilting thread stash was the closest thing I had to the 100 wt poly Invisafil thread that Brimfield Awakenings recommended.

Whipstitching With 100 wt Microquilter + Size 11 Milliners Needle


Even in the ultra-fine, thinnest weight available, so skinny that you can't see the stitches as you're making them, 100 wt polyester still has the strength of 50 wt or even 40 wt cotton thread.  I wish I'd known this for my previous EPP attempts!  The thread really does make a huge difference.


Whipstitched Seam in 100 wt Microquilter Thread


See?


Zoomed WAY In to See the Stitches


And here that seam is from the right side, again, this is a zoomed-in photo which is why the fabric weave looks like a waffle.


Same Seam, Right Side


I needed just one Wonder Clip to hold things securely positioned while I was hand stitching.  I made my first hexie rosette by attaching all six outer ones to the center first, then stitching the outer hexies together one short seam at a time.  On this second rosette I tried attaching each outer hexie completely, in an "L" seam, and preferred doing it that way.


Wonder Clip Love


Here's my completed hexie rosette.  I really have absolutely no idea how long it took me to make this little cutie because I was zoned out in my Happy Place, giggling and smiling like a fool and paying no attention to the sun's travels across the sky...


HEE HEE HEE HEE HEE!!!  šŸ˜


And then all of a sudden it was four o'clock in the afternoon and I was wondering where on Earth did my day go, and what about all of those other things on my To Do list!!  Having reprogrammed and saved my own personal preferred invisible appliquĆ© stitch on my Bernina B990 sewing machine (read about that here), I decided that I'd spent enough hand stitching hours on each of these tiny hexie rosettes and gave myself permission to appliquĆ© them to their respective block backgrounds by machine.


Invisible Machine Applique on My Bernina B990


More Notes to Self:

  • I gave each hexie rosette a good starching and pressing before and after removing the template papers.  Then I used tiny dots of Roxanne's Glue Baste It to secure them in position on my block backgrounds.  The starch and the extremely narrow width of my appliquĆ© stitch precluded the need for any stabilizer during machine stitching
  • I used invisible monofilament thread in a size 60/8 Microtex needle, with Microquilter in my bobbin
  • I used my open toe presser foot #20D and turned on the B990's laser feature, which shines a dot of red light precisely in the location of the next needle penetration.  That made it really easy to ensure that every stitch landed exactly where I needed it as I navigated around the perimeter of the rosettes
  • I did not use my machine's auto securing or auto trim features.  Instead I held onto my thread tails at the beginning, ended stitching at the exact point where I'd begun, threaded the tails into a hand needle and pulled them to the back of the work to tie off

Tra-la-la-la-laaaaaaa!  


So, what do y'all think?  Is this sacrilege?  Hand sewn EPP hexagon rosettes machine appliquĆ© to the block!  I should note that it IS possible to sew EPP with the sewing machine; I hunted down and watched several different methods of doing so on YouTube.  I decided that either the results shown in the tutorials didn't meet my personal standards, or that the machine  methods looked too fiddly to bother with.  Not that I wouldn't try them ever, on some other project, perhaps one where I was working with larger patches.  

Machine appliqueing the rosettes to my backgrounds made sense because I am really, REALLY pleased with how closely my new machine applique stitch resembles my hand stitching, doing this step by machine prevented any fraying of my already-to-exact-size background block due to scrunching and handling the block during hand applique stitching, and I felt I had invested my hand stitching time into the aspect of the block where I got the biggest payoff for those efforts.


How Do I Love My Sewing Machine?  Let Me Count the Ways...


Side note about how that laser feature works on the B990, because the marketing materials do a terrible job of explaining why anyone would want this for reasons other than machine embroidery.  I stopped my machine with the needle in the down position for the photo above, which is why you don't see any red dot of light on the work.  When the laser light is turned on, each time the machine's needle goes to the UP position, it shines that red dot of light onto the next place where the needle is going to go DOWN, and that helps ensure that the needle is landing in the background fabric for the straight stitches and biting just barely into a thread or two of the appliquĆ© fabric at each swing "bite" zigzag stitch.  You can also tell as you're approaching an inside or outside corner exactly when to pivot your work.  No more guessing and getting that "almost right!"  


Backing Trimmed Away


Not sure whether it was all the starch I used to ensure my hexie rosettes held their shape after template removal, but it felt like there was a lot of bulk at the center of these finished blocks so I trimmed the background fabric away behind each rosette.  Remember that these are 3/8" hexies with 1/4" seam allowances so each one is already two to three layers thick.  Not sure whether this is a "done thing" with English Paper Piecing but it's "done NOW!"

Here are all of my completed Stonefields blocks on my design wall together:


Stonefields Completed Blocks 1-15


Two things: the blocks I finished today may look "out of place" with the others from a value perspective, but I'm not worried.  They will be fine once they are joined by other blocks that have more "stage presence."  Second, most of those appliquĆ© blocks still have oversized backgrounds.  Part of me thinks I ought to wait to trim them down until I'm ready to assemble the blocks into a finished quilt.  Sometimes I think maybe I should wash the blocks to remove the starch and basting glue, and then trim them down.  And then another part of me thinks I ought to trim them down RIGHT NOW because it's harder to get a sense of how the whole quilt is taking shape when some of my blocks are 6 1/2" and other blocks have excess fabric around the edges.  Anyone have any advice?  When I take all of the blocks off my design wall for my upcoming move, I'll be storing them neatly in a project box and I don't think they are going to ravel and fray no matter what I do.  Also, it would be stressful and unpleasant to have to trim down ALL the appliquĆ© blocks near the end of the project.

Alright, enough about this for today. Gosh, I don't even know what day it is.  Wednesday?  Thursday?  I need to get back to the stitch in the ditch quilting on my Deco quilt again tomorrow for sure!

I'm linking up today's post with the following linky parties:

Sunday, July 28, 2024

New Project In My Pipeline: Seven Sisters or Seven Stars Quilt for Hand Piecing

Inspiration: Seven Sisters Quilt Top by Martha Dellasega Gray (2014)


Isn't that Seven Sisters quilt top glorious?!  It was completed in 2014 by Martha Dellasega Gray and you can read all about it on her Q is for Quilter blog here.  I can't help myself, I have to make one, too (or at least START one!).  But before we start talking about the new project, I should do a quick recap of all my preexisting sewing projects for the sake of accountability:

  • My StyleArc Nova Midi Dress: Fabric purchased, nothing cut out yet, found my Swedish Tracing Paper but still need to clear off my cutting table before tracing off the pattern pieces and making a start.  Still weighing pros and cons of sizing/pattern alteration options and bodice construction methods, and need a good stretch of uninterrupted time to work on that (I've had mostly fits and snatches of time here and there for sewing lately).
  • My Deco Quilt: Remaining blocks for the entire quilt have been all cut out and ready to sew since before the move, but I haven't touched this one in over two months.  I am finding that I really miss having a big design wall where I can arrange/display a work in progress.  Seeing the quilt take shape on my design wall while working on the blocks was a major motivator in my previous studio, whereas completed blocks packed away in the closet are literally out of sight and out of mind.  There is one large wall in the central hallway of our new home that would work for a design wall, just to the left of our shared office and directly across from my little sewing room...  I have suggested a design wall in this location to my husband several times but the idea has not been well received thus far.  šŸ˜ž.  
My Deco Quilt In Progress, On My Old Design Wall, Boo Hoo...

Thursday, January 13, 2022

Whig Rose Applique Progress, Christmas Tumbler Top + a Sizzling Star Quilt Finish

Hello, my friends!  How is your January shaking out so far?  Our Christmas decorations are packed away, my sons are out of my house and back at their respective colleges, and I've been sewing up a storm.  I won't get my hands on the first patterns for my Sarah Fielke BOMs until the LAST day of January, so I've been working on the backlog of client quilts in my queue and moving personal projects along so I'll be ready to kick off an Applique-Palooza on January 31st. Today I have two personal projects to share and one client's quilt to showcase.  I'll be linking up with all the usual suspects (favorite linky parties, listed on my blog sidebar).

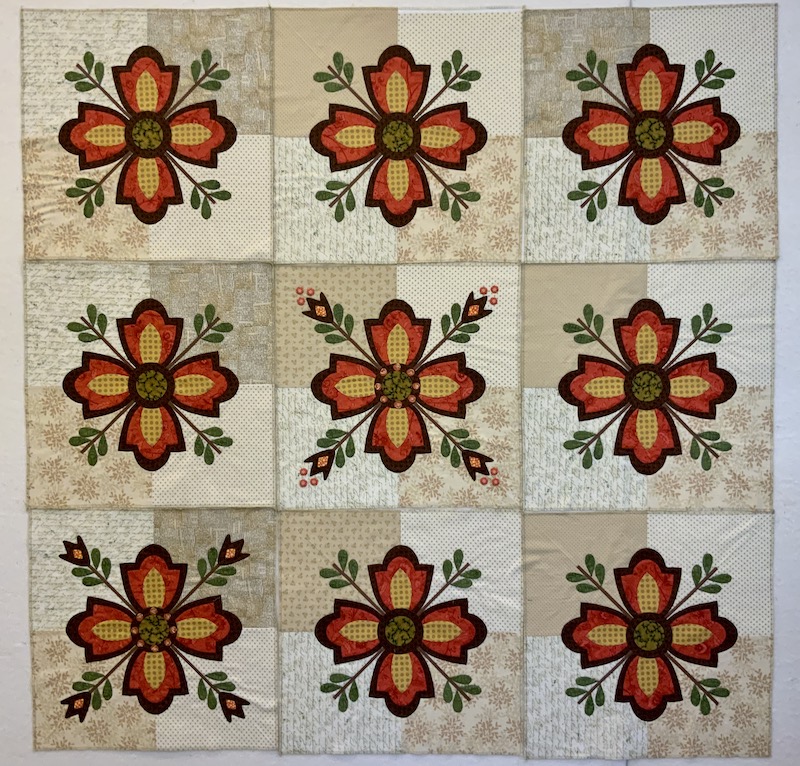
FrankenWhiggish Rose Applique

Thanks largely to the Medici the Magnificent series on Netflix, I stitched the last of the leaves on my Whig Rose blocks last night.  Woo-hoo!  

FrankenWhiggish Rose Needleturn Applique In Progress

This is the first time I've had all nine blocks in progress on my design wall and I've gotta say, it's looking really encouraging!  The center block is the only one that's 100% finished, but I had forgotten that I had a second block (bottom left) that was nearly finished except for the stuffed berries near the corner tulips.  

Tuesday, November 23, 2021

Rebecca's Ultimate Etsy Gift Guide for Quilters and Crafters

 Hello, friends, and happy Nearly Thanksgiving to those of you in the United States!  Today's post is something I've never done before -- a shopping guide chock full of gift-worthy goodies that I personally would love to find under my tree on Christmas morning.  If you have quilters, sewists, or embroiderers on your shopping list this year, I have some suggestions that are sure to be received with delight.  (If YOU are the quilter/sewist/embroiderer reading this post, you may find a few items for your OWN wish list).  What's more, every item on my list is in stock and coming from a small craft business owner via Etsy -- and none of them contains those pesky microchips that are delaying just about everything else you might want to buy for the holidays this year.

A Few of My Favorite Tools

Each of the items on this list is something I personally own and love, or something I currently have on my own wish list.  Feel free to share this post with others, post on social media or wherever.  Disclaimer: this post does contain affiliate links, which means I may receive a small commission (at no additional cost to you) if you make a purchase after clicking my link.  I do appreciate your support of my wicked thread addiction!  šŸ˜‰

 Beautiful Tools: Where Form Meets Function

The items in this section are a pleasure to own and use because they combine the finest craftsmanship with beautiful design.  Bonus: They make great Instagram props to "style" your work-in-progress photos.

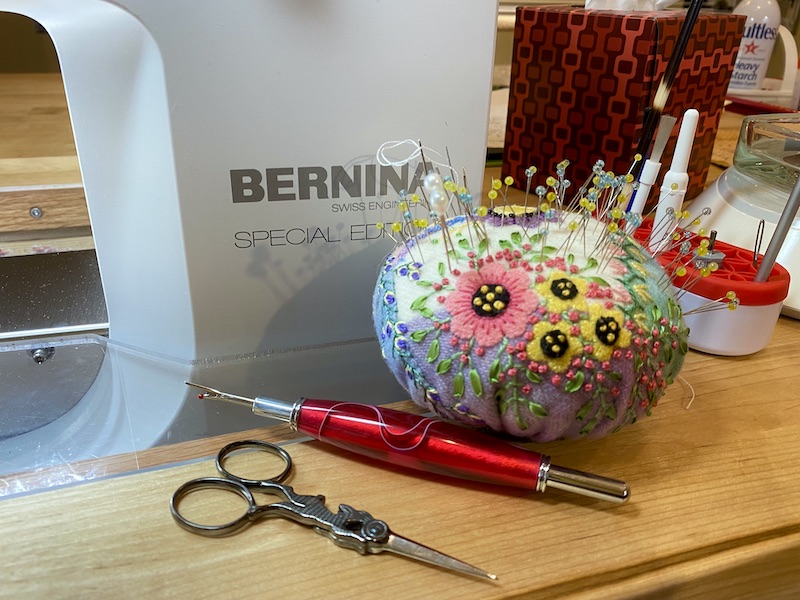
1. Hand Embroidered Felted Wool Pin Cushion from Etsy maker Martha of Quilt Shenanigans.  Who is this good for?  Anyone who does any kind of sewing at all can use a pin cushion, and these must take Martha hours to individually hand stitch and embellish with tiny beads.  Her hand stitching is exquisite, the felted wool is soft and luxurious to the touch, and the pin cushion is well-packed to hold its shape and is stable on a flat surface.  Even the slenderest pins slide in and out with ease, and she has lots of beautiful designs in stock to choose from.   

My New Favorite Pin Cushion, made by Martha of Quilt Shenanigans on Etsy 

2. Handmade, Hand Paired Embroidery Scissors from Maison Sajou.  These are manufactured by a 200-year old company in France, but available in several Etsy shops.  I got mine from Penelope Textiles' Etsy shop.  A few things to know: There are lots and lots of cheap imitations out there for a fraction of the price, but while the mass-produced knockoffs might look just as cute as photo props, there is no comparison to the way they actually cut.  It's like the difference between a Wustof steak knife versus the plastic knife that comes with your takeout order.  The lesser version SORT of cuts, but not cleanly or easily and it's not a joy to use!  Authentic Maison Sajou scissors are individually handmade by French craftsmen, with hand paired blades that are kept together throughout the entire production process to ensure that they match up perfectly. They are sharp, accurate, and cut smoothly and cleanly all the way to the tip (which is absolutely crucial for snipping the inside corner seam allowances in needle turned applique).  Who is this good for?  Anyone who enjoys any kind of hand stitching like cross stitch, embroidery, needle turned applique, or hand quilting would love to receive a pair of Sajou scissors!  In addition to the Hare design that I own, there is also a cute Eiffel tower version, gorgeous Art Nouveau Peacock scissors, and other historic reissue designs to choose from.  Of course, if you just want a cute pair of scissors for a photo prop, those cheaper knockoffs will suit you just fine!

Hand Paired Hare Embroidery Scissors from Maison Sajou, via Penelope Textiles on Etsy

Monday, January 14, 2019

SQUIRREL!! Needle-Turn Applique Tangent Delays Completion of Jingle BOM Quilt Top

Good morning!  Yes, I'm aware that it's afternoon, but I'm running sluggish this morning even after my second high-test espresso beverage, so it's still Monday Morning Mode for me.

I've been having so much fun working on this needle-turn applique block from the workshop I took two weekends ago, taught by Christa Smith of Cottonberry Quilts.  I deliberately chose wild and wacky fabrics for my block to give myself a break from the monotony of the soft, traditional color palette of my Frankenwhiggish Rose needle-turn applique WIPFAE (Work In Progress Forever And Ever), and I fussy-cut my leaves and berry-circle-thingys, out of Tula Pink's snail print and Kaffe Fassett's feather print fabrics.  There have been some unanticipated benefits to all of this reckless abandon!


My Workshop Block In Progress, Which I Have No Business Working on Right Now
First of all, the FUN FACTOR.  I am enjoying these bright, playful colors!  Second, since I cut each leaf out of a different section of the feather print, each one is different.  Each one is a delightful surprise as I finish stitching it and see what it's going to look like!  And, with these wacky fabrics and each leaf having a different part of the print anyway, it takes some of the pressure off that comes from trying to sew a block that is 100% symmetrical with every block 100% identical.  I think that the prepared edge applique method is probably better for when I want identical shapes that need to be placed precisely symmetrically on the block.  The drawn turning line for needle-turn smudges as I'm handling the piece during stitching and it's just more difficult to get each leaf to turn out exactly the same as the last one when I'm turning the edge under as I'm stitching it down.  


Happy, Happy, Joy, Joy...
I started this piece using the Aurifil 80 weight cotton thread that Christa had on her supply list, but I quickly switched back to my YLI 100 weight silk thread as the Aurifil was constantly -- CONSTANTLY breaking on me.  Everyone hand stitches differently, and I'm not aware that any of the other students were having trouble with their Aurifil thread breaking, but I gotta do what works for me.  My suspicion is that my tiny stitches have something to do with it.  The more stitches per inch on your project, the more times each section of your length of thread is getting abraded by being dragged through your fabrics before it gets made into a stitch.  But hand stitching is incredibly personal, and everyone does it a little differently -- definitely a situation where "your mileage may vary."  Thread that works great for others snarls or breaks for me, and needles that work for others immediately bend on me, too.  


Jingle BOM, My First Applique Stitches in 2013 (Still a WIP)
See?  I'm sure a psychiatrist could diagnose me with half a dozen personality disorders based on the size of those stitches.  I've tried to make my stitches bigger because I know they are way smaller than necessary (small enough to cause distortion, IMPOSSIBLE to remove, like weaving the two fabrics together instead of stitching them) and most importantly -- those neurotic microscopic stitches make a slow stitching process even slower so nothing ever gets finished, but I'm on autopilot when I get into a stitching groove and this is what comes out.  I think I'm doing better now, but when I look at the back side of other quilters' applique -- GORGEOUS applique, skillfully made by quilters who know what they are doing -- I can still see that my stitches are closer together than they need to be:


My Applique Stitches Today
It would be easier to compare the stitch length if I'd included a penny in the photo from today, but if you click on the photos to enlarge them you can see that in 2013 there were places where I had more than one applique stitch on a single thread of the background fabric.  In the photo from today, most of my applique stitches span SEVERAL threads of background fabric.  I'm calling that PROGRESS, in my applique skills as well as in my mental health!  ;-)


Backside View, So You Can See What's Stitched Down and What's Just Pin Basted
Silk thread is just as fine as the 80 weight cotton, and it disappears just as well as I stitch it into the applique, but it is much, MUCH stronger.  Also slippery so it doesn't need any Thread Heaven or beeswax, and it shimmers in my sewing kit like jewels.  

So, speaking of that Jingle BOM (and speaking of WASTED EFFORT that no one will notice or appreciate in a finished quilt)...


Jingle BOM in Progress, On My Design Wall.
I spent some time in the studio over the weekend and finished cutting the stripes I wanted from my border print fabric.  In the photo above, I decided that I didn't like the small scale of the yellow/gold poinsettias in the outer border.  I like them in the INNER border near the applique medallion, but I'm cutting the flowered stripe out of the outer borders and seaming the adjacent stripes together to make it look like the flowers were never there.  


Delicate Border Print Stripe Surgery In Progress
I didn't think about how long it would take to cut these pieces in a single layer, carefully lining the stripe up with the quarter inch mark on my ruler all the way down both sides of each stripe for all four border lengths.


Sewing the Border Back Together Without the Poinsettias
Anyway, I've got all these border stripes cut now, and all but one of them is sewn back together, and then I'll have the outer borders ready to attach.  Meanwhile, I determined that I might not be able to live with my most recent plan for the inner border stripes.  I was going to "fill in" between the border stripe and the medallion with a green fabric, but when I measured and did the math it just seems like the green fabric would be too wide next to the skinnier stripes of the border print and the proportions might be off.  That would mean I need to do divide that space between more than one fabric border rather than just the green...  Delays, delays, delays!  UGH!  I want this project FINISHED already!!

And meanwhile that baby to whom I've promised a quilt is already over four weeks old with her quilt not started yet, and my church is sending me threatening letters about Quillow Sunday deadlines for June.


My EQ8 Design for the Baby Clam Shells Quilt That Isn't Started Yet
Okay, they are not intended to be threatening letters.  I PERCEIVE them to be threatening letters because my son's graduation quilt is a HIGH PRESSURE project with a hard deadline, and I haven't started that yet, either.  Aaargh!!!!!


My EQ8 Design for Lars's Graduation Quilt, Not Yet Started
Hey, I did another thing, though.  I got the binding made for the guild outreach cuddle quilt and hand stitched the label onto the back of the quilt yesterday:


Label Attached!  Bottom Edge Will Be Secured By Binding
This outreach quilt was pieced by another quilter and when I picked it up at the October(!) guild meeting, it was packaged into a little kit with batting, backing, label, and binding strips for me to finish.  But the binding fabric was a stripe, and now that we have seen my obsessive-compulsive applique stitches no one should be surprised that I was unable to join those binding strips without carefully aligning the stripes and glue basting each seam like a crazy person...  Binding is done now, ready to be sewn to the quilt.


Binding Made, Ready to Attach (After Quilt Label)
Sorry those two photos ended up out of order -- I took the picture of the binding before I attached the quilt label.  I was supposed to finish this quilt and bring it back to the NOVEMBER meeting, by the way, but it wasn't finished in time for the November meeting.  Or in time for the December meeting, or the January meeting...  We're rooting for the February meeting, and I don't think I should sign out any outreach quilt kits anymore.  If I'd made the whole thing out of fabrics in my own stash I wouldn't feel like I was "late" turning it in.

Whatever.  I'm headed upstairs to either work on the Jingle borders OR bind the outreach quilt, depending on my mood when I get to the top of the stairs.  Have a great week, everyone!  I'm linking up with:


Tuesday, May 15, 2018

...And Now, Hand Stitching the Machine Embroidered Quilt Label

Appliqueing the Label to the Quilt Back Prior to Binding
So remember the label for my Tabby Mountain quilt that I designed in my Bernina v8 Designer Plus embroidery software and stitched out on my B 750QE sewing machine?  I designed and stitched out the label back in March, and stuck it on my design wall until the quilt was finished.  

Machine Embroidered, But Sewn to the Quilt Backing By Hand
There is a fatigue that sets in near the end of the quilting process, a desire to just be DONE WITH IT already, and I think that's why so many quilters don't label their quilts at all.  They want to "just get it done," and plan to add a label "later," but then they get excited about a new project and later never comes.  I try to combat that tendency by getting my label ready BEFORE I start quilting, so that it's ready to go as soon as I trim the finished quilt.

Hand/Machine Wash COLD Gentle, Dry Flat or Tumble LOW, DO NOT OVERDRY!
This quilt does have a wool batting, so I've included care instructions on my label.  I don't want to scare off my gift recipient from using her quilt with overly involved care instructions, but the main points to convey are washing in COLD water instead of warm, GENTLE cycle if machine washed (less vigorous agitation and a less aggressive spin cycle) and to avoid overdrying the quilt.   I used this batting on my son Lars's Drunken Dragons quilt several years ago and, even though I confess that I have not always followed those care instructions myself, that quilt is aging nicely.  The wool batting is warm and snuggly and has a nice drape, even with a densely quilted quilt, and I can tell as I'm hand stitching the label that it's a great batting for hand quilting as well.  My needle is just gliding through it like a hot knife cutting into a stick of butter. 

I like to put my quilt label in one of the corners of my quilts so that only two sides of the label need to be appliqued to the quilt backing.  The other two sides will be secured by the binding stitches.  That helps to ensure the label won't ever fall off the quilt (although my hand stitches are spaced as close together as machine stitches, so they're pretty secure).  

One funny thing -- I'm using 60/2 cotton embroidery thread to applique the label to the quilt backing, and it feels like I'm sewing with ROPE now that I've grown accustomed to using YLI silk thread for needle turned applique!  

I did end up having to buy binding fabric, but I found a pretty purple fabric at my local Bernina dealer 5 minutes from my house rather than having to travel to my not-quite-local quilt shop (also a Bernina dealer, coincidentally) that is between 40 minutes and an hour and a half away, depending on whether I hit rush hour traffic on the Interstate.  I wish my local Bernina dealer carried more fabric inventory, and more contemporary fabric lines (Tula Pink, Kona and Bella Solids, Kaffe Fassett), like the faraway dealer does.  Anyway, today I didn't need a whole bunch of different fabrics; I just needed ONE fabric that would complement the fabrics in my quilt for a binding, and I'm glad I found it at my Bernina dealer's shop.  It's so nice to walk in and be greeted people who treat me like family and call me by name.

Eagerly Awaiting Binding!
And now, here it is nearly 9 PM, and I have prewashed/preshrunk my binding fabric but haven't yet cut and joined the strips, let alone sewn it to my quilt.  

So obviously, my To-Do for Tuesday has got to be BINDING THIS QUILT!  And that's it, folks, because whenever I try to come up with a list of weekly goals for this linky, I just end up feeling badly about not reaching them.  ONE goal, that's all: Just the binding!

I'm linking up with: 


Thursday, August 4, 2016

VICTORY! FW1930s Block 88 "Prudence," Second-Try Success

FW1930s Block 88, Prudence
Second time's the charm!  I am SO glad to be finished with the Pernicious Prudence block.  I set my first awful attempt aside, the one I was trying to save with EPP, and started over on this block.  I found several tutorials online from other quilters who had simplified the block construction by adding seams in various places, but I really wanted to challenge myself to make the block exactly as it appears in he book. 

This time around, I precut ALL of my shapes using the templates printed off the CD, but with seam allowances enlarged to 3/8".  I was more careful with my FPP to be sure that my fabric pieces completely covered the foundation papers, and one thing that made a huge difference was that this time I did not sew through any of the seam allowances of any of the angled or Y-seams.  I marked my foundations with a little red "X" to remind myself where I had to start right on the seam intersection, and backstitched those seams.  That made it MUCH easier to precisely align the raw fabric edges on the wonky crooked seam lines, because each seam allowance became a little "hinge" where I could pivot the fabric. 

I also was more careful in trimming the seam allowances of each completed foundation paper segment this time.  I always trim the block segments with my ruler and rotary cutter, laying the 1/4" ruler line right on top of the seam line on the foundation pattern, and then slicing next to the ruler edge rather than trimming the segments to size by cutting along the dotted line with a scissor.  Well, this is not an easy feat when you have pieces with inside angles like with this Prudence block.  In my first attempt, I just cut those inside corners on the dotted line.  But on my second, more successful go, I opened the loose seam allowances up at those corners and cut the fabric straight at the overlaps so the raw edges at the crucial intersections would be straight and flush.  I should have taken a picture to explain this better, but my phone was playing music from the stereo in the other room...  So, no pictures from those stages.

Lots of Seams Pressed Open in Prudence Block
I pressed the center seams open on the center octagon as well as the side triangles to reduce bulk: 

Center Seam on Side Triangle Sections Pressed Open to Reduce Bulk Around Octagon
Everything comes along nicely in this block right up until this point, when you realize that you have to sew the big corner sections to the center thingy that is shaped like a vintage Christmas ornament: 

Prudence's Point of No Return
Yikes, right?!  But this time, it wasn't that bad.  Tedious and time-consuming, but actually POSSIBLE.  I stitched one side to the center completely by machine, one little straight edge at a time, pinning and backstitching and clipping, then pivoting, pinning, backstitching, and clipping again.  On the second side, I decided it would be faster AND more accurate to stitch the seams around the octagon by hand, so that's what I did. 

Hand Stitching Around Octagon for Greater Control
I just drew my 1/4" seamline in chalk from the start of one seam to the beginning of the next, and backstitched along the chalk line.  It's easier to keep your seam allowances out of the way when stitching by hand than when you have to flatten everything and fold the rest of the block out of the way so you can stitch these itty bitty angled seams by machine.  Once I had the seam around the octagon completely stitched all the way around, it wasn't a big deal to machine stitch the rest of that seam alongside the skinny red triangles and then closing the green corners of the block.

So Prudence is done.  She's not perfect, but she's pretty accurate considering what a pain the in the arse she was.  And best of all, she measures precisely 6 1/2".  I'm calling it a win.

Prudence Finished at 6 1/2" Square
I did the foundation paper piecing of this block on my Bernina 750QE with 9 mm Patchwork foot 97D, because I love the bright lights and auto knotting features for sewing right down those FPP lines and it's so easy to center the stitching line between the narrow open toe area on that foot.  Then, after trimming the completed FPP sections and removing the papers, I finished piecing the blocks on my 1934 Featherweight with my vintage Singer Cloth Guide screwed into the machine bed at 1/4" from the needle and the original multipurpose foot that came on that machine.  I really prefer my Featherweight for Y-seams because the computerized Bernina sometimes takes an unpredictable extra stitch in the wrong direction when I press the reverse button.  The all-mechanical Featherweight immediately changes direction when I flip the lever up or down, so every stitch is controlled as precisely as if I was stitching by hand.  I also love the narrow feed dogs of the Featherweight for piecing.  It took some measuring and fiddling to get that seam guide attached at exactly the right distance from the needle, so I just leave it on the machine.  That's the other reason I'm doing the FPP part on my Bernina, so I don't have to remove the seam guide from my Featherweight.

Here's my collection of 6" sampler blocks so far, from The Farmer's Wife, Farmer's Wife 1930s, and Charise's Vintage Block Quilt Along:

Completed 6" Sampler Blocks
I'm linking up with Needle and Thread Thursday at My Quilt Infatuation and Can I Get A Whoop Whoop at Confessions of a Fabric Addict, and then I'm headed out for a belated birthday girls' night in celebration of my good friend and theatre sister (yes, that's a Thing).  Happy Thursday!