Tuesday, December 19, 2023

Advent Parade of the Christmas Quilts, 2023!

Happy Hanukkah to my Jewish friends and Happy Final Week of Advent to my Christian friends!  Have you finished your shopping yet?  I've shopped, wrapped, packed, and shipped all the gifts that need shipping, but still have some shopping left to do for my husband my sons.  I've finished the client quilts in my queue that had holiday deadlines so now I can officially switch gears into Santa Mode!  Meanwhile, in keeping with the holiday spirit, I thought everyone might like to see a few of the Christmas quilts I've worked on this year.

Anna's Frosted Pines Tree Skirt

Up first is a Christmas tree skirt that I quilted for my client Anna.  Anna used the Frosted Pines Tree Skirt pattern by Stacey Day for Windham Fabrics, available as a FREE PDF download here.  I just love her fabric choices!

Anna's 48" Frosted Pines Christmas Tree Skirt

Quilting something round on a long arm frame is a little trickier than doing a square or rectangular quilt.  This was one of the rare times that I "floated" the quilt top, since there is no straight edge along the bottom to pin to my leader canvas.  A lot more extra backing and batting are needed, the same amounts as if the quilt top had been a 48" square instead of a circle, and it took a little longer to trim each row of the quilting design at an angle each time I advanced the quilt on the frame to ensure that the quilting fully covered the circular quilt top without wasting too much time and thread quilting beyond the edges of the skirt and onto the batting.  I used the Angle Trim feature that had just been released with an update to my Bernina QMatic software a few weeks before this quilt went on my frame.

Tuesday, December 12, 2023

Custom Deco Quilt Palette for 2024 + QAL Week 4, 108 Weeks Behind Schedule

56 x 68 Deco Throw Quilt, PANTONE Pairings Palette for 2024

This is the time of year for sleigh bells, twinkling lights, caroling... and complaining on social media about how much we disagree with the design industry's color forecasters' predictions for Color of the Year.  PANTONE Europe's Color of the Year for 2024 is Peach Fuzz:


And Robert Kaufman's Kona Solid Color of the Year for 2024 is a pale aqua they're calling Julep: 


Looking at these two "new" color trend predictions side-by-side, many of us are getting flashbacks of  Margo and Todd's bedroom decor from the 1989 holiday movie National Lampoon's Christmas Vacation.  

Pantone Peach Fuzz Walls with Kona Julep Vase and Window Blinds

"Why is the floor all wet, Todd?"

"I don't know, Margo!!"  

"Why does Pantone think our 1989 bedroom set will be the embodiment of global lifestyle trends at the macro level in 2024?"

"I DON'T KNOW, MARGO!!!" 😆

Thursday, November 30, 2023

Mary's Turquoise Stars Quilt, Preeti's Syzygy Quilt + December Quilting Goals

Good morning, quilting friends!  I have a folder on my computer desktop containing a huge backlog of gorgeous clients' quilts waiting to be shared with you, and every time I open that folder I waste at least 45 minutes trying to decide which quilts deserve to be chosen for their moment in the spotlight.  When I started long arm quilting for clients I was really good about posting each finish right away, but either I quilt too fast (not!) or I write too slow (more likely!) and at this points I have photos of at least 150 quilts in that folder and more photos of more quilts get getting added every week...

The quilts I'm sharing today were both quilted quite awhile ago and I can't believe I never wrote about them because I LOVE them so much.  Without further ado:

Mary's Turquoise Stars

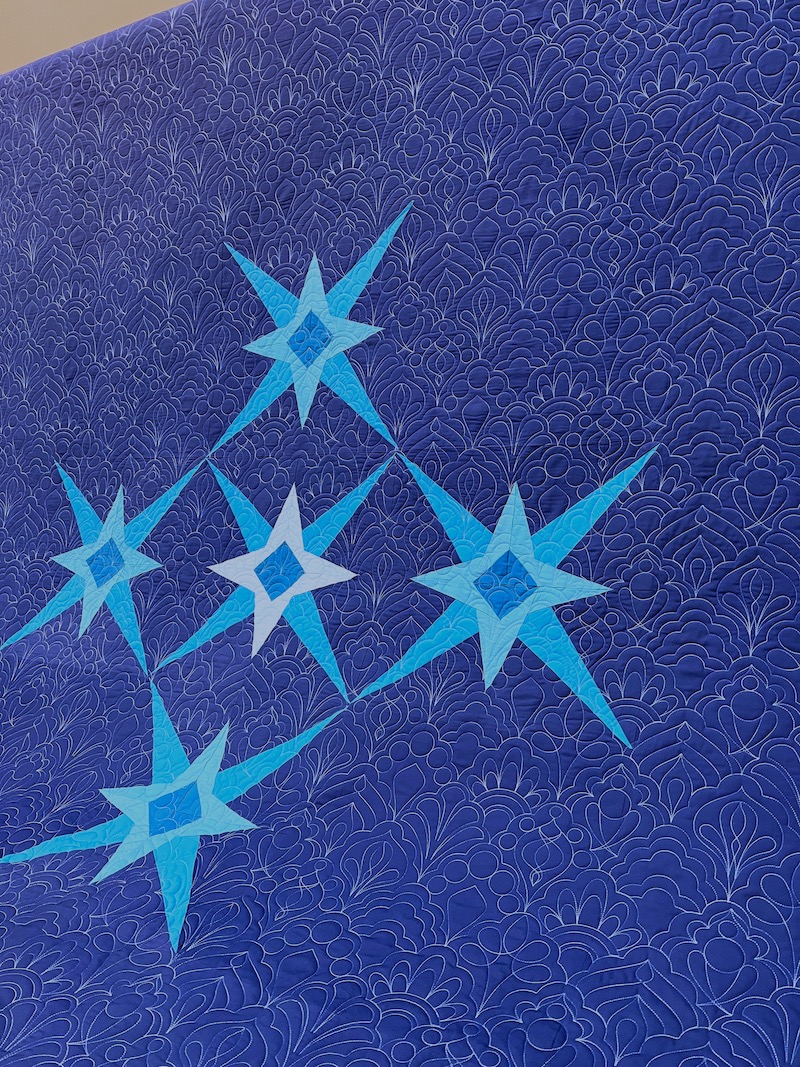
Mary is one of my favorite clients to quilt for -- she ships her quilt tops to me all the way from New Mexico even though there must be a thousand long arm quilters closer to her, she chooses striking, modern patterns and beautiful fabrics, and she often reinterprets the pattern creatively to create something fresh and unique, as she did with her Turquoise Stars quilt, shown below.  Mary used the star block from the Chevron Star Quilt pattern by Lee Heinrich Designs (formerly known as Freshly Pieced, available here on Etsy (this pot contains affiliate links).  

Mary's 67 x 87 Turquoise Stars Quilt with Billowy Combo E2E Quilting

One reason I didn't share this quilt immediately is that I was frustrated with my inability to get accurate color representation in my photos -- I was probably taking these shots late at night and trying to color correct in software, with limited success.  Mary's fabrics for this quilt are Art Gallery PURE Solids, and her background fabric is a deep, muted navy blue with a gray undertone called Night Sea.  The color is a little better in the photo below, but it's still too vivid and royal blue looking: 

Billowy Combo Custom Layout E2E Quilting

More to love about Mary: She lets me do fun things with the quilting!  Instead of just picking one allover E2E ("edge-to-edge") quilting design for Turquoise Stars, I combined nine different design motifs from Karlee Porter's "Billowy" collection, setting them up to alternate in three separate rows.  It took a lot longer to set that up in the computer, but it essentially created a larger scale design repeat, exceeding the depth of the throat of my long arm machine even, that creates more interest in the vast negative space of Mary's quilt than we would have if we'd chosen just one of these motifs to repeat over and over again across the entire surface of the quilt.

Sunday, November 26, 2023

FrankenWhiggish Setting Options: To Further Complicate, Or To Finish In This Lifetime?

Hello, Quilting Friends, and Happy Thanksgiving weekend to those of you in the United States!  In between the cooking and the baking and the holiday decorating of the past few days, I've been spending an inordinate amount of time in my EQ8 quilting design software, exploring my options for the Frankenwhiggish Rose hand stitched needle turn appliqué blocks that I started in March of 2014 (you'll find that post from nearly a decade ago here).  

At this point, all that stands between me and the end of making the nine identical Whig Rose appliqué blocks is 48 broderie perse rosebuds and 96 fussy-cut stuffed berries.  However, I remain undecided about what I'm going to do with those nine blocks once they are finished.  I have tried out so many options in EQ8, each one more complicated than the last:

70 x 70 On-Point with Mariner's Compass and Pieced Setting Triangles

In the EQ8 rendering above, I've just duplicated a photo of one finished appliqué block and the EQ8 software lets me see how all nine appliqué blocks will look together when they are finished, combined with any combination of thousands of other blocks, borders, sashings, etc.  It's one of my favorite ways to use EQ8 software, and although designing on the computer can suck up a lot of time, every 10 minutes trying something out on the computer saves me weeks/months/years of cutting up fabric, sewing it together, putting it all together on the wall and then hating what it looks like!  So in this version of the quilt, I'd be making four mariner's compass blocks using scraps of my applique block fabrics mixed with other fabric scraps from the same color family and style.  The centers of the mariner's compass blocks could even be the birds from my Vervain Monado-Havana fabric, the luxe drapery fabric I've been chopping up for my broderie perse rosebuds.  Although the mariner's compass blocks look complicated, the EQ8 software lets me print out foundation paper piecing templates in exactly the right size for my quilt, directly onto newsprint paper (I get mine on Amazon here; this post contains affiliate links), which makes it so easy to get sharp, crisp, perfect points.  I'd appliqué the center circle to each compass.  As of right now, I like the way the pieced setting triangles create an illusion of scallop curves to frame the body of the quilt, but they feel a little heavy -- might reduce the scale and use smaller strips and squares for those so as not to overpower the dainty rosebuds and berries.  

But how nice it would be to just be FINISHED with this already once I have the blocks done?  This quilt, like the 8-year skirt project I finished a couple weeks ago, really has no purpose other than educational.  I wanted to try needle turn appliqué, and I know how to do it now, so it's a "win" for me already and I'd like to move on to something else!  So this is the other, simpler option I'm considering:

Keeping It Simple, 66 x 66 Straight Set with Harlequin Border

In this version, I trim my appliqué blocks to finish at 16" square and set them straight with a harlequin border and little X corner blocks to repeat the X shape of the tulip stems in the appliqué blocks.  Then I've slapped on a 6" wide plain outer border, for feather quilting or whatever.

Sunday, November 19, 2023

New Look 6708: The Eight-Year Skirt Project is Finally Finished

If you only come here for the quilting, be forewarned -- today's post is not for you.  Today's post will be all about how I spent $78 and eight years of my life making a skirt that I will probably only wear a handful of times, using a pattern (New Look 6708, now out of print) that I have no intention of ever making again.  Today I will relate the saga/review the pattern of what my mom and I have been calling "That Dumb Skirt!"  

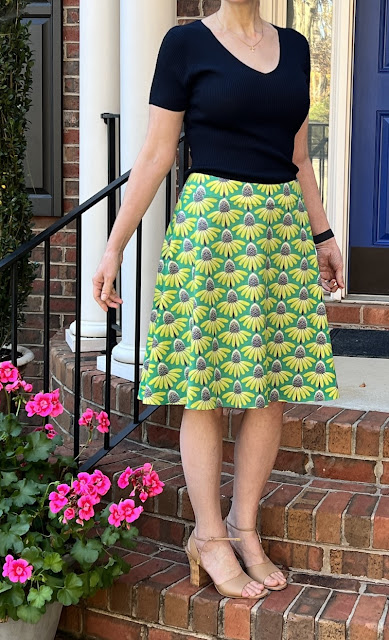
New Look 6708 Skirt Finish

New Look 6708 (OOP) View B

I made my skirt using New Look pattern 6708, which is out of print from the manufacturer but you can still find uncut used copies for sale.  At the time I'm writing this, you can get a copy of this pattern on Etsy here and I saw a few copies available on eBay as well (This post contains affiliate links).  This A-line, lined Misses skirt with side zipper did not actually take 8 years to sew -- it just got abandoned for long intervals while I was sidetracked by other projects.  If you want to read the post from June of 2015 when I first started this skirt, you can find that here.


I made View B, the above-knee version of the skirt, and I used "Pretty Potent Echinacea" cotton voile fabric from Anna Maria Horner with solid navy cotton voile for the lining.  Although I was unable to find an online source for my skirt fabric in voile today, Anna Maria Horner has reissued this print in new colorways for Free Spirit Fabrics recently, calling it simply "Echinacea," and you can find those on Etsy here.  (Just be aware that the current versions are printed on quilting weight cotton fabric that has more body and less drape than the voile I used for my skirt).  I prewashed both my fashion fabric and my lining fabric prior to cutting out my skirt.

I used Pellon Shape Flex Woven Cotton Interfacing SF101 in White for my waistband and I'm happy with that interfacing choice for the cotton voile, but wish I'd chosen the same SF101 interfacing in Black in hindsight.  Because my fashion fabric is semi-sheer, the waist yoke with the white interfacing behind it looks like a slightly different color than the body of the skirt that has navy lining fabric behind it:

White Interfacing Makes Waist Yoke Look Lighter/Brighter than Navy-Lined Body of Skirt

Ah, well.  It's subtle and no one else is going to notice this or care.  I've only tucked my shirt in to show the top of the skirt for these project review photos; normally the waistband or waist yoke or whatever you want to call it won't even be visible.

Thursday, November 9, 2023

Carrie's Modern Baby Quilt with Mister Marbles E2E + Quilting Inspo from the Interior Design World

My quilting clients bring me the best quilts!  Seriously!  I am so inspired by this 40" x 40" baby quilt that I quilted for my client Carrie recently:


Mister Marbles E2E Quilting in King Tut 40 wt Cotton Thread, Color Temple


I love this quilt because it's so striking, modern, and abstract, making it a perfect choice for new  parents who prefer to avoid gender stereotypes in their nursery themes.  I also love that this baby quilt looks so sophisticated and artsy, yet the construction is simple and straightforward, ideal when the shower is next week and you're scrambling to come up with a gift.  All you need is an assortment of black and white print fabrics paired with a solid, sew a total of 64 HST (half square triangle) units that all have one solid color triangle sewn to one black and white print, and then you rearrange those units on your design wall until you have a fabulous layout like Carrie's...  And before you know it, you're done and it looks amazing.  I have quite a few black and white prints in my stash, so I'm tucking this idea away for the next time I need to make a baby quilt.

I quilted this for Carrie using my Mister Marbles design, using a heavier 40 weight King Tut cotton thread in color Temple (White) to ensure the quilting design would stand out so nicely against the solid green fabric -- I knew the quilting design would disappear in those busy black and white prints (this post contains affiliate links).  I like the energy and movement of those wiggly, ripply lines and circles in the quilting for this quilt.  The batting is Quilters Dream Bamboo, a blend of bamboo, silk, cotton, and Tencel that is my absolute favorite for baby quilts, so I stock it in the 60" wide bolts.  

Here's the whole quilt again in all of its fabulousness:

Carrie's 40 x 40 Baby Quilt with Mister Marbles E2E


Sunday, October 15, 2023

Halloween Quilts for Paula and Mary + Broderie Perse Rosebud Secrets Rediscovered

Part One: The Halloween Quilts!

I recently had the pleasure of quilting a couple of really cute Halloween wallhangings for clients that I thought my readers would enjoy.  First up is Mr. Bones, an adorable machine appliqué project made by my client Paula.  This is a pattern from the Quilt Factory that is available on Etsy here (this post contains affiliate links).  

Paula's 32 x 60 Mr. Bones Wallhanging with Spider Spinners B2B

Wouldn't this be perfect to display on your front door on Halloween night, or in your entryway to greet trick-or-treaters?!  This pattern calls for some embellishments that you're not seeing in these photos -- fortunately, Paula knew to wait and add the buttons etc. after having her project long arm quilted.

We chose the Spider Spinners B2B design to play up the whimsy of the appliqué design.  I liked that it had playful spirals and spiders hanging down instead of just cobwebs alone, and I envisioned the whole quilt as an illustration in a children's book as I scaled the digital quilting design, trying to size the spiders and the cobwebs proportionately to the skeleton and Jack-O-Lantern the way they would be if the whole scene had been drawn by a single illustrator.  The perfect thread color turned out not to be gray, silver or white, but a true orange shade of Glide called -- what else? -- Halloween!  

Detail of Spider Spinners B2B Stitched in Glide Thread, Color Halloween

I'm so glad Paula trusted me on the orange thread!  If I'd used gray, silver, or white thread, the cobwebs would have blended in and disappeared against the gray background fabrics and the white and gray skeleton fabrics.  I really wanted those spiders and cobwebs to be "part of the scene" and visible in those areas, and I love how it turned out.  We used Quilters Dream Cotton Deluxe loft batting for that extra oomph to the quilting texture.

Saturday, October 14, 2023

Deco QAL Week 3, Completed Only 101 Weeks Behind Schedule!

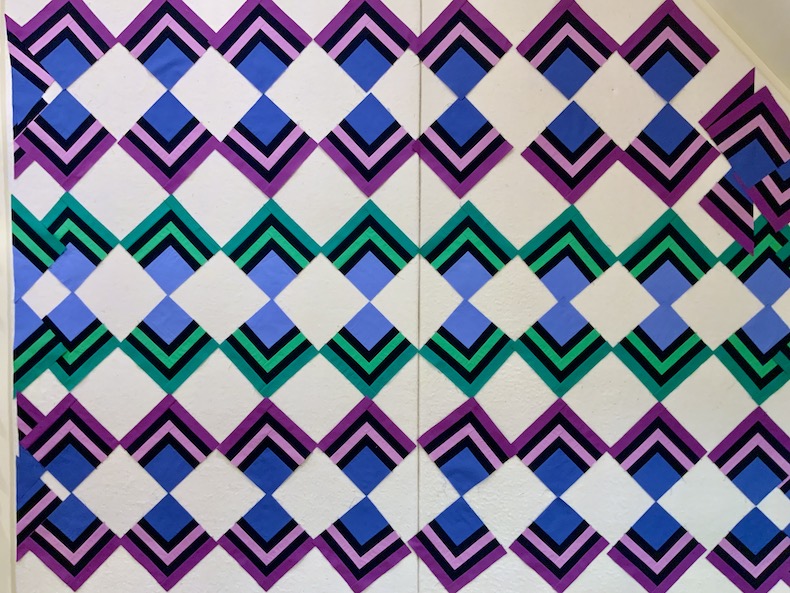
You guys, if this was the year 2021 instead of 2023, I would be SO AHEAD OF SCHEDULE for my Deco QAL!!  Here it is, only October 14th, and I have finally finished all of my log cabin blocks for Week 3 (Nov. 1-8, 2021) of Lo & Behold Stitchery's Deco Quilt Along.  

16 Blue-Green Blocks, 32 Blue-Purple Blocks, and 12 Half Blocks

Unfortunately, it is NOT 2021, so instead of being ahead of schedule I'm actually 705 days behind schedule, or 100 weeks plus 5 days behind schedule.  Sadly, I am no longer eligible for winning any of the prizes.  😆. Good thing I still like this quilt!

My 102 x 102 Deco Bed Quilt, pattern available here

In case anyone out there is interested in making a Deco Quilt of their own, the pattern from Lo & Behold Stitchery is available as an instant PDF download on Etsy here (this post contains affiliate links). 

I'm making the largest 102" x 102" bed sized version of Deco, but the pattern also has instructions for making the more manageable baby and throw sized versions and those are striking, too.  I quilted a baby sized Deco for my client Liz back in 2021 and a throw sized Deco more recently for my client Megan.  I've seen this quilt made up in so many different color combinations and I haven't seen any that I didn't like.  I had a great time coming up with my own color palette of Kona Solids and then tweaking it to complement my Anna Maria Horner floral print backing fabric (it's Hindsight "Honorable Mention" in Turquoise from Free Spirit Fabrics, available on Etsy here).

(Note to Self: It would have saved a lot of time to pick the backing print FIRST and then just pull the solid colors from the selvedge instead of coming up with a custom palette first and then trying to find a print that had exactly the same colors in it!)


My Deco Quilt Fabrics with Anna Maria Horner Backing Print

Monday, October 2, 2023

Margaret Willingham's Reverse Appliqué Workshop, Charlotte Quilters' Guild + My Deco Quilt Progress

Happy Fall, Quilters!  Guess what -- I took an actual, in-person workshop with the Charlotte Quilters' Guild last month AND I finished my workshop block after I got home!  I'm so proud of myself for 1. Taking a day off, 2. Trying something new, 3. FOLLOWING DIRECTIONS during the workshop 😬, and then 4. Adapting what I learned in class to suit my personal preferences once I got home to my own studio.  

My 12 x 12 Block from Margaret Willingham's Reverse Appliqué Workshop


I'll tell you more about the workshop in a minute.  First, I have other news to share -- I've made some progress and gotten over the Cutting and Kitting Hurdle with my Deco Quilt that has been in-progress/abandoned for the past two years!  Well, better late than never.  I am supremely pleased with my clear plastic tote bag containing all of the pieces for all of the blocks, neatly organized and labeled in little Ziplock bags.  Our guild has lots of social sewing opportunities throughout the month and, as President of the guild, I try to attend as many of them as possible.  Having a project packed up and ready to go (versus strewn around my studio!) is my biggest challenge, but now I'll just be able to grab a Ziplock bag of block pieces and wheel my travel machine out the back door.  I have a feeling this project is about to pick up STEAM!

My Deco Quilt Completely Cut Out and Kitted, Block One Variations In Progress

Now that I've finished ALL of the cutting for my Deco Quilt, I am officially caught up with Week Two of the Deco QAL (Quilt-Along) that I committed to in the Fall of 2021!  😂. Week Two was cutting out all of the fabric pieces for the entire quilt.  I am like that last straggling marathon runner who crosses the place where the finish line used to be, two years after the race has ended...  Not only am I caught up with Week Two, but I'm also about a third of the way through with Week Three of the Deco QAL, which is the week where you piece all of the Block One log cabin variations.  All 16 blue/green log cabin blocks are finished and all 12 of the half blocks in both colorways are finished and I have 32 blue/purple log cabin blocks remaining to be sewn. The cutting for this quilt was monotonous, but the actual sewing is pretty easy.  I think that completely finishing this quilt top was supposed to be my OMG (One Monthly Goal) for November of 2021; maybe I can get it finished by November of 2023 instead!

Sunday, September 24, 2023

Graffiti Quilting on Jan's Bear Tracks Quilt + DIY Bernina Mastery Classes

HAPPY FALL, everyone!  Time to get snuggly with this wool-batted bear paw quilt made with beautiful jewel-toned batik fabrics!

Graffiti 13 E2E on Jan's 69 x 69 Bear Tracks Quilt

Jan used the Bear Tracks Quilt pattern from Island Batik Ambassador Jackie O'Brien, available as a FREE PDF download on her web site here.  When Jan brought this quilt top to me for quilting, she had seen pictures of the bear paw quilt "Color Outside the Lines" I made a couple years ago that I quilted with one of Karlee Porters digital Graffiti edge-to-edge designs, and Jan requested something similar for her quilt.

Graffiti 13 E2E with Fantastico Variegated Thread, Color Molokini

For an even bolder impact on Jan's quilt, we chose Superior's Fantastico variegated trilobal polyester thread in color Molokini (this post contains affiliate links).  On my own bear paw quilt, I'd used a very thin, 60 weight thread in a pale silvery color that blended and disappeared into my fabrics.  One isn't better than the other, but they give very different looks.

Thursday, September 14, 2023

Cheryl's Modern Double Wedding Ring Quilt, Final Reveal

Good morning, quilters!  I need to stop giving "sneak peeks" of customer quilts on the blog because I keep forgetting to follow up and show you the whole thing once the quilt has been delivered to its owner.  Take this stunning modern Double Wedding Ring quilt made by my client Cheryl -- I couldn't resist including a teaser close up shot of the quilting back in July, but then I never got around to showing you the whole thing.  Well, here it is in all of its magnificence and glory!

Cheryl's 98 x 122 Modern Double Wedding Ring Quilt, Pattern by Tara Faughnan

I actually can't show you a photo of the entire quilt, because it was too large for me to get the whole thing in the camera frame.  This king size quilt measured a whopping 98" x 122" -- that was a LOT of curved piecing, y'all, and Cheryl did a fantastic job.  She used Tara Faughnan's Double Wedding Ring pattern and Cherrywood hand dyed solid fabrics.  (This post contains affiliate links). 

Detail of Roller Coaster Ties Quilting in YLI 40 Tex Cotton Variegated Pastels

Sometimes the perfect quilting design is really simple, like this Roller Coaster Ties design.  It's a similar effect to the "just-straight-lines" quilting that we see on so many modern quilts, but that subtle wavy movement is a wonderful complement to the curved piecing and I love the way the quilting moves the viewer's eye across the surface of the quilt without upstaging the piecing design.

Sunday, August 20, 2023

Hooray! My Halo Quilt is Finished!

 YOU GUYS!!!  Today is August 20th, and I finished my first quilt of the year yesterday.  I keep looking out my window for the parade but they must be stuck in traffic somewhere...  Surely there will be fireworks, or at least I'll get a mention on the news tonight???  😐. Seriously -- does anyone else feel a little anticlimactic about finally finishing a quilt, or is it just me?  So much work and effort, and then it's just OVER.  It feels so abrupt!

My 66 x 66 Halo Quilt Finish, Pattern by Jen Kingwell

I started this project in mid-March, so it took me five months from start to finish to cut, piece, quilt, label, and bind it.  The pattern for this quilt is available in Jen Kingwell's Jenny From One Block pattern booklet and there's a set of acrylic templates for the Halo quilt sold separately that are worth their weight in gold.  The curved patches for Halo can be cut with a 28 mm rotary cutter (a larger diameter blade is too big to follow the curves, but a smaller diameter blade is too shallow to glide along the edge of the acrylic templates -- the screw holding the blade in place would get in the way).  The other product I highly recommend for this project is Odif Grippy, a spray-on translucent nonslip coating for the acrylic templates that greatly reduces their tendency to slide on the fabric when you need them to stay put for accurate cuts (this post contains affiliate links).  

Halo is suitable for either hand or machine piecing; I hand pieced just one block just to see if I liked it better than machine piecing.  The verdict?  Hand piecing these blocks is easier but slower than doing it by machine, and I wanted to get this done as quickly as possible so I opted for machine piecing the rest of the blocks.  I used lots of Karen Kay Buckley's Shorter Perfect Pins to machine piece all of those curves.

Halo Pattern Booklet, Halo Templates and Tilda Pie In the Sky Fat Eighths

The Tilda Pie in the Sky fabrics pictured above were my starting point for this quilt, but I pulled lots and lots of fabrics from my stash, from my scrap bins (and from the treasure trove of scraps sent to me by Nann!).  What most intrigued me about Jen Kingwell's original version of this quilt was the way her quilt initially seems "random scrappy," but carefully planned elements reveal themselves on closer inspection (Most blocks are scrappy, but several blocks are planned.  Several blocks are planned to create an entire matching circle with a matching ring where the corners come together, and several other blocks are planned to create a scrappy circle with a solid matching ring).  She set general guidelines for value placement within her blocks (such as generally using darker/higher contrast fabrics for the rings and lighter value/lower contrast fabrics for background patches), but then only followed those "rules" about 60-70% of the time.  This resulted in a really interesting effect where some rings, circles and squares come forward visually in the composition and others appear to recede.  I attempted to recreate these "special effects" in my own version of the quilt and I'm pleased with how that turned out.
Wednesday, August 16, 2023

Progress on My Scandi Deco Quilt + Florida Deco Quilt Finish for Megan

No, I don't have a 100% finished Halo quilt to show you yet.  I'm still working on hand stitching the binding.  Meanwhile, though, I've finished piecing the first sixteen "Block One" log cabin blocks for my Scandi Deco bed quilt.  Look how cute they look, lined up in crooked rows on my design wall!  The Kona Solids colors I'm using for these blocks are Copen, Indigo, Leprechaun and Kale.

All 16 Blue/Green Log Cabin Blocks Completed!

In my custom coloring from EQ8 (below), you can see that these are the blue and green log cabin blocks needed for the center row of my bed size quilt.  I still need to make the four half blocks that go at the row ends, and then I need to make 32 full blocks and eight half blocks for the ends of the top and bottom rows.

My 102 x 102 Scandi Deco Plan in Kona Solids

Deco Quilt is a pattern by Brittany Lloyd of Lo & Behold Stitchery and it's available in three sizes: Baby, Throw, and Bed.  The pattern is available to purchase as an instant PDF download directly from the pattern designer on Etsy here (this post contains affiliate links).  Brittany's Deco pattern includes instructions for either a 2-color version or a 5-color version, and -- because I like to make my life difficult -- my version of the quilt is made up of 12 different Kona Solid colors: Indigo for the background with Willow, Cactus, Amber, Thistle, Citrus, Tangerine, Magenta, Hyacinth, Leprechaun, Kale, and Copen for the blocks.  I should note that the pattern directions would have been much, MUCH easier to follow if I'd limited myself to either two or five colors.  Brittany gives yardage requirements and cutting charts for both of those options, but my rogue plan of twelve different colors meant I was on my own to calculate yardage for each color and to figure out how many of each shape needed to be cut from each color.  Do as I say, not as I do...  😉.  I am a willfully disobedient quilter who doesn't follow all of the directions anyway, so I'll be pressing my seams to the side instead of open and disregarding some of Brittany's instructions (which are geared toward frugal use of fabric and ease/speed of construction) in favor of wasting more fabric and time (personal preference!).

I've actually quilted two versions of this Deco quilt already, for two different clients.  My client Liz made a two-color baby sized Deco quilt back in 2021 (see that one here), and my client Megan recently made a multicolor throw sized Deco quilt inspired by the vibrant pastel Art Deco buildings in historic Florida neighborhoods.  That's the finished quilt I'm sharing with you today.

Monday, August 14, 2023

Scrappy Star for Carrie, Swiss Cross for Nancy + a Label for Maria Elizabeth

Happy Monday, quilting friends!  I have two client quilts to share with you today, plus glimpses of my so-closed-to-being-finished Halo quilt, and an update on Mister Puppy Pants' recovery from ACL surgery.  Lots of ground to cover, so I'll try (and likely fail) to be brief...

Carrie's Scrappy Star Baby Quilt

This first quilt I'm sharing with you was made by my client Carrie.  There is no pattern for this one; Carrie just made it up as she went along.  Don't you just love how her star is mostly made up of squares, but with a couple pinwheel blocks and a half square triangle thrown in here or there for interest?  I think the pinwheels make it look like her star is twinkling!

Carrie's 42 x 42 Baby Quilt, No Pattern Available

We chose Judi Madsen's Flower Swirl E2E design to give this baby quilt a fun, playful vibe, and the batting is Quilter's Dream Bamboo blend for a super soft, snuggly baby quilt without too much bulk (this post contains affiliate links).  Here's a photo of Carrie's sweet baby quilt before I quilted it for her:

Carrie's Baby Quilt Before Quilting

Since we wanted to really notice the whimsical quilting design against the background fabrics, I used YLI 40 Tex Variegated Machine Quilting Cotton in color Paris Boutique.  

Saturday, August 5, 2023

Lindsay's Ultraviolet Radial, Halo Quilt Top Completed + Deco Quilt Begun!

Good morning and Happy August, y'all!  I have lots to share today: a stunning modern quilt made by one of my quilting clients, the Big Reveal of my finished (!!!) Halo quilt top, and glimpses of the Deco Quilt that I've finally started piecing (nearly two years after buying the pattern and committing to a QAL 😳).  That's a lot of ground to cover and I have limited time available for writing this blog post, so let's get on with it!

Lindsay's Ultraviolet Radial Quilt

Look at this incredible Ultraviolet Radial quilt, pieced by my client Lindsay.  Can you believe Lindsay has only been quilting for two years?!  I can't wait to see what she'll be making ten years from now!  

Lindsay's 60 x 60 Ultraviolet Radial Quilt

Lindsay began this class in a virtual workshop with Ultraviolet Radial pattern designer Audrey Esary of Cotton & Bourbon.  The pattern is available on the designer's web site here.  I love Lindsay's color palette for this quilt and I was impressed by how flat and smoothly pieced these challenging curves were, especially when she told me she was a newer quilter.  Lindsay usually does her own quilting on her domestic machine but she was especially proud of this project and decided to splurge on professional quilting.

Monday, July 24, 2023

Halo, Modern Double Wedding Ring, and Baby Moose Quilts

Hey there, Quilter Peeps!  Behold, my Halo quilt top is finally nearing completion:

Center Blocks Sewn Together, Border Blocks In Progress

I hesitate to set personal sewing goals with actual deadlines, but doesn't it look like I could get this quilt top finished by the end of this week?  Now that I've said that out loud, my house will probably be carried off to Oz by a tornado.  Or my sewing machine will blow up.  I'm not even sure which of those scenarios would be more catastrophic -- that would depend on how backed up my Bernina dealer is for repairs, and whether or not there are any good quilt shops in Oz.

For those who haven’t seen this one before, Halo is a pattern by Jen Kingwell that is sold in the pattern booklet Jenny From One Block, available on Amazon here.  (This post contains affiliate links).  If you’re local here in Charlotte, North Carolina, the QuiltPatch shop in Matthews has been offering classes for this quilt (taught by the fabulous Teresa Raleigh), but if you’re already comfortable with curved piecing you will do just fine on your own with the pattern as I did.  The Halo acrylic template set is optional but really helpful for accurate cutting of these shapes, along with a 28 mm rotary cutter (the standard 45 mm rotary cutting blades don’t work well along curved edges).

It never ceases to amaze me how much smaller a quilt gets when the blocks are actually sewn together compared to how big it looks when the individual blocks are stuck on the design wall side by side.  All of those quarter inch seam allowances really add up.  Or rather, they really “subtract up” from the size of the quilt top.  So much work for such a relatively small lap quilt!  I think this is supposed to finish at 66” square.  Well, thank goodness I wasn’t trying to enlarge it to King size this time!

I always enjoy making blocks more than sewing them together, for whatever reason.  Maybe I’m just impatient by the time I’ve finished making enough blocks.  Still, these went together without too much trouble, just careful pinning where the seams need to match up.

Making Blocks is More Fun Than Sewing Them Together

So now all 36 Halo blocks have been sewn together into the main body of the quilt top and I'm just working on those rectangular pieced border blocks.  Which, by the way, is an interesting design choice from pattern designer Jen Kingwell -- the border blocks complete the half circles that would otherwise land on the outer edges of the quilt, deemphasizing and obscuring the block construction in favor of rings and squares that seem to float on a scrappy pieced background.  The borders also enlarge the quilt to a more useful size and create outer edges that can be easily bound without fretting about losing any triangle points or turning rings into flat tires.

That’s about all I have to say about Halo for now.  So let’s have a glimpse of the most recent client’s quilt fresh off my long arm frame:

Tara Faughnan’s Double Wedding Ring for Cheryl

Now, you only get a sneak peek at this one, because this quilt is still on a UPS truck headed back to my client Cheryl in Minnesota.  This is Tara Faughnan’s Double Wedding Ring pattern, and Cheryl’s version is a massive king size made up in Cherrywood hand dyed solid fabrics.

Glimpse of Cheryl's Double Wedding Ring Quilt

I just love the color palette Cheryl created for this one!  This quilt is truly magnificent in person.  I used Hobbs Tuscany Cotton/Wool batting for Cheryl’s DWR and quilted it with YLI 40 Tex cotton thread in variegated Pastels.  Pattern designer Tara Faughnan was new to me before Cheryl sent me this quilt, but I checked out her Instagram and her online shop and I really like her work.  

Sunday, July 9, 2023

It's Easier to Get Forgiveness Than Permission: Quilting The Godfather for Marguerite

The quilt I’m sharing today was made by my friend and fellow Charlotte Quilters’ Guild member Marguerite.  It’s a project she started during the Pandemic, experimenting with using Terial Magic in lieu of traditional tearaway or cutaway stabilizers, various decorative threads, programmed stitches on her Bernina sewing machine, etc.  When I saw this unquilted top hanging forlorn and forgotten in her studio, I asked if I could quilt it for her as payback for a HUGE favor she did for me in a time of need (that’s why I call this one The Godfather, because “Some day, I will ask of you a favor…”  😅)  Not only did Marguerite agree to let me quilt it, but she uttered the most dangerous words imaginable...

“Just Do Whatever You Want With It!”

Marguerite’s 60 x 60 Appliqué Quilt with Bee and Lady Bird E2E Quilting

I very rarely agree to select a quilting design without any input at all from the client.  My usual practice is to consult with clients about quilting designs, batting and thread options when they drop off their quilt top (or once they’ve shipped it to me), and then I make recommendations based not just on what I see but also on what drew the client to select that pattern and those fabrics, who the quilt is for, and how it will be used.  I can usually envision two dozen totally different quilting designs that would look great on every quilt top I see.  Listening to a client talk about her quilt is just as important as looking at her quilt if I want the client to be over-the-moon delighted once the quilt is finished.  But Marguerite insisted, "Just do whatever you want."

I Quilted Bugs All Over Marguerite’s Quilt, And She’s Still Friends With Me

I briefly considered custom quilting on this one: You know, this design for the sashing, that design for the corner squares, quilting some additional “ghost flowers” along the border vines and subdividing the center of the quilt with different fills in different sections.   But Marguerite does a fantastic job of her own custom quilting using rulers and free motion motifs on her hand guided sit-down long arm machine, and if she wanted it quilted that way she could have done that beautifully herself.  Moreover, in addition to saying "just do whatever you want," she'd also said "just do an edge-to-edge," so I settled on this Bee and Lady Bird design from Scottish designer Dastardly Line.  

Thursday, July 6, 2023

Aurifil 40/2 vs Forty3 Cotton Quilting Thread: Mary's My Happy Place, Ramona's Escher Connected + A Sneak Peek of Mary's Mid Century Mod Quilt

Good morning and welcome to the sultry, sweaty, swampy month of July!  Today I'm sharing two beautiful but very different quilts (and giving you a glimpse of a third gorgeous quilt) that were all quilted with "forty-weight" Aurifil cotton threads.  I'll be showing you the enormous difference between forty weight TWO-ply versus forty weight THREE-ply thread.  

When comparing two spools of thread that are labeled with the same weight but different ply, the 3-ply thread is a full 50% thicker than a 2-ply thread of the same exact weight.

There's a common misconception that if two cotton threads are both labeled "forty weight," they should be approximately the same thickness and should look and behave the same when stitched out.  In reality, that weight designation only refers to the weight and thickness of a single "ply" or strand of that thread, and the cotton threads we use for piecing and for quilting are typically either 2-ply (two strands twisted together) or 3-ply (three strands twisted together).  This explains why Aurifil's popular 50/2 cotton thread (the one on the orange spool) creates less bulky seams and performs better with smaller needles and sometimes different tension settings compared to 50 weight 3-ply threads such as Mettler, Gutermann, etc.  When comparing two spools of thread that are labeled with the same weight but different ply, the 3-ply thread is a full 50% thicker than a 2-ply thread of the same exact weight.  (This post contains affiliate links).

Aurifil 40/2 (Green Spool) Natural White Blends and Disappears Across Applique

In the photo above, I've quilted the Chantilly Lace E2E design across a client's appliqué sampler quilt using Aurifil's 40/2 cotton thread in Natural White.  This is their popular 2-ply forty weight thread that comes on a green spool and is widely available in quilt shops.  Although Aurifil 40/2 is a thicker, more pronounced thread than the Aurifil 50/2 that comes on orange spools (confusingly, bigger weight numbers indicate skinnier and finer individual strands or plies), 40/2 cotton is still what I consider a lightweight blender thread for long arm quilting.  Notice how the quilting stitches take on a greenish tint where this thread crosses green fabrics, but the thread seems to be a pale pink where it's stitched across the pink petal fabric.

Aurifil Forty3 Black Stands Out Dramatically, Even Against Busy Print Fabrics

In the photo above, I've quilted the Wishbone E2E design using Aurifil's Forty3 cotton thread in Black.  Aurifil has created this thread specifically for long arm quilters, it’s only available on giant yellow cones (not spools), and it’s not as widely available at quilt shops as their 50/2 (orange spool) and 40/2 (green spool) cotton threads.

I selected Aurifil Forty3 cotton thread for Ramona’s Escher Connected quilt because busy prints like these are notorious for rendering quilting designs all but invisible and we wanted a thread that would disappear against the black background fabric but show up more dramatically against the prints.  

Friday, June 23, 2023

Nann's Scrappy Largesse, Halo Quilt Progress + A Mini Curved Piecing Tutorial

I don't know about you, but when I've been slogging along forever on a project, trying to combine the same old scraps from my scrap bins in new ways to create blocks that don't look exactly like all the others on my design wall, there's nothing like a fresh injection of someone else's scraps to make the work feel fresh and exciting again.  

A month or so ago, Nann who blogs at With Strings Attached mentioned to me that she'd just finished reading a 1932 novel called The Sheltered Life by Ellen Glasgow.  When I expressed interest in reading the book, she offered to mail me her copy -- and she stuffed the flat rate postage box full of fabric scraps!!  I felt like I'd hit the scrappy jackpot!  I've been working in as many of Nann's scraps as possible and having a grand time with it.  Don't you love this sweet Wizard of Oz fabric?  The orange and blue arcs, pink quarter circle, blue and white dot, larger blue floral quarter circle, and the pink mini floral print are all Nann's fabrics in the block below.

This Block Contains 5 Scraps from Nann

In the block below, the yellow floral HSTs surrounding the blue center square are definitely Nann's, and I think that curved tumbler patch at the bottom that has sprigs of yellow flowers on a white background might also be from Nann.

Yellow Floral Print HSTs are Also Scraps from Nann

Although I've been busy long arm quilting this month, I've also had more social sewing opportunities on my calendar lately and that has really helped me keep the momentum going with this project.  Below you can see I have my Jen Kingwell Block Wrap all packed up with six different blocks planned out, ready to piece at a recent guild Sit & Sew event (this post contains affiliate links).  

Wednesday, June 21, 2023

Anna's Modern Memory Quilt with Lace 2 E2E

Hello, Quilt Lovers!  Today's post shares a memory quilt that my client Anna made from a collection of her father's shirts.  Isn't it beautiful?  I think this is my favorite memory quilt that I have ever seen.  It makes me wish we still had some of MY dad's old shirts and crazy plaid golf pants to cut up for a quilt, but I'm pretty sure my mom donated all of his clothing after he passed away.  My dad had some wild 1970s golf "slacks" that would make Kaffe Fassett fabrics look tame!  😎. But back to the quilt at hand...

Anna's 45 x 58 Memory Quilt with Lace 2 E2E

Anna's quilt feels more modern to me than most memory quilts I've seen.  I think that comes from the balance she achieved between the busy shirt fabrics and the generous use of plain unbleached muslin for "negative space."  The resulting composition is restful instead of chaotic, you can really see and appreciate each of the shirt prints (I'm sure each one conjures up a whole series of memories for Anna).  An added benefit of using clothing scraps in this restrained way for a memory quilt is that you can stretch the scraps farther and create memory quilts for multiple family members if you use more background fabric and less clothing scraps in each quilt.   

HSTs Cut From Anna's Father's Shirts

We chose the Lace 2 quilting design from Mike Fountain for this quilt because, like Anna's quilt top, Lace 2 has a "contemporary vintage" vibe.  Or Retro Chic, or whatever you want to call it.  (Word of warning to you long arm quilters out there, though -- Lace 2 is lovely but it's a PITA to stitch out.  There's significant backtracking in this design and the overstitching doesn't happen right away, so you have to watch this like a hawk to make sure double-stitched lines aren't off.  It is also No Fun Whatsoever trying to restart Lace 2 after a thread break!)