Showing posts with label Hoop Skirt. Show all posts

Tuesday, December 8, 2015

Victorian Caroling Costume: The Mind-Boggling, Massive, Monstrous, Magnificent Skirt

Finished Christmas Caroling Dress
The first thing I did after I got home from the store with my fabric and my costume pattern (Simplicity 1818) was to look for reviews and suggestions online from others who had already made this dress.  One common theme in those reviews was that people had trouble with the skirt and/or thought that it was way too full, with way too much fabric.  The skirt is made up of four panel widths and is approximately 170" in circumference at the waist and about 186" in circumference at the bottom.  That's a LOT of fabric!

Well, having done my research on mid-Victorian women's fashions, I knew that it wasn't an excessive amount of fabric; it was period-correct.  There are other patterns out there for "Victorian costumes" with way less fullness in the skirt, and those would definitely be easier to make, but less authentic.  Of course, my skirt was further complicated by the silk organza underlining that I felt my silk shantung fashion fabric needed in order to hold up to repeated wearings, resist wrinkling, and support the weight of the trims.  So the first thing we did after cutting out the skirt panels was to hand baste silk organza to the wrong side of each panel, with perpendicular lines of basting through the center of each piece to align the grain and then basting around the perimeter of each piece through the seamline.  Then, because my silk shantung frayed so badly and so immediately, as soon as I seamed the panel widths together I pressed the seams open and then serged both sides of the seam allowances to put an end to the ravelling.  (How do I love my serger?  Oh, let me count the ways...)
Inside of Skirt, Organza Underlining, Serged Seam Allowances, Skirt Facing Attached
There are several odd things about this skirt pattern, and one of them is that there is no hem allowance to press up at the bottom.  Instead, you create the hem with a deep facing out of lining fabric, as shown in the above photo.  The only reason for this that I can think of is that, although the side and back panels of the skirt are rectangular pieces of fabric, the center front panel is curved at the bottom and the facing is able to match that curve.  Unfortunately, this means that you cannot adjust the finished length of the skirt at the end of construction by taking a deeper or shallower hem. 

For my dress, I put on the hoop skirt and shoes that I would be wearing with the costume, held up the center front skirt pattern piece with the fold line right at the waistband of my hoop skirt, and looked in a full-length mirror to check the length of the skirt without adjustments, knowing that there was a 5/8" seam allowance at the bottom of the pattern piece.  I decided to add 2 1/2" to all of the skirt pieces before cutting them out (I'm 5'7" tall and my shoes have about a 2-3" heel).

My Hoop Skirt, Found on Amazon here
Ah yes, the hoop skirt -- Yes, you do need one with this pattern.  Not only do you need a hoop skirt, but you need a flouffy net ball gown petticoat as well, between the hoops and the dress itself. 
My Petticoat, Found on Amazon here

That's how these enormously full skirts were supported back in the day, and without those crucial undergarments to lift the skirt and spread it out in a graceful bell shape, this dress will be way too long and will look like a mess.  If you don't want to wear hoops and petticoats, this pattern is not for you.  My hoop skirt was very inexpensive, and it has given me a bit of trouble.  I thought it would be fine at first, but the finished skirt seemed kind of empty with just the hoop skirt, the rings of the hoops showed through as ridges on the front of the skirt, and the drawstring waist has a very skinny string like a shoelace that cut into my tummy uncomfortably.  My mom replaced the drawstring with a wide, firm elastic and again, I thought I was good.  But when my petticoat arrived (which makes my dress look SO MUCH BETTER), the weight of the petticoat was making the elastic waist of my hoop skirt slide down on my hips.  The bottom of the hoop skirt was hanging out beneath the hem of my dress and I tripped on it several times.  So I cut off the bottom hoop and serged the raw edge of the hoop skirt about an inch and a half below the 5th hoop.  So far, this is working much better.  My petticoat was a lot more expensive than the hoop skirt, but it is perfect right out of the box without any of these annoying trouble-shooting alterations.  It has a firm waistband that closes with Velcro, lining on the outside and inside of the voluminous ruffled netting layers that give it its fullness, and is a much more appropriate length to support a full, floor length dress without sticking out at the bottom. 

Steam-A-Seam 2 Lite, found here on Amazon
So, back to the skirt construction.  My pattern instructions told me to attach the facing to the bottom of the skirt, press it up, press under a 1/4" hem on the raw edge of the facing, and then slipstitch that to the skirt.  I rummaged around in my studio and came up with another handy notion to simplify that process, a 1/4" wide double-stick lightweight fusible web Steam-A-Seam 2 Lite that I've used in the past for securing narrow hems in slippery knit fabrics prior to cover stitching them on my serger.  That way I was able to secure my skirt facing to the organza layer on the inside of my skirt panels without pins and then slip stitch the facing only to the organza, with no stitching coming through to the right side of the skirt and no chance of pins catching and snagging the silk fabric during the hand stitching process.  The manufacturer says that this product "bonds permanently when ironed," but I wasn't taking any chances.  I'm not comfortable with nothing but glue holding my hem together, but if you feel like you have a strong enough bond with your fabric, you may be able to skip the hand stitching altogether with this product.

In Process of Turning Up Facing and Fusing to Silk Organza
At this point I have something that looks like a huge, 4-width drapery panel that was accidentally sewn into a tube.  I've got the side seams done and serged, the hem facing attached, but I have raw edges that are fraying wildly along the top of my skirt, so I serged along the top edge next.  I felt SO much better with all of the raw edges under control -- there were times when I was afraid the whole dress would disintegrate before I could finish making it!

Top Edge Of Skirt Folded Down, Stitching On the Fold Line
The next step in my directions was to turn the raw edges at the top of the skirt down along a fold line.  Since I had two slippery layers to my skirt rather than just one, I decided to stitch along that fold line first and I'm so glad that I did.  It prevented any shifting of the organza layer during the pleating and gathering phase that followed.  From this point on, the skirt was a lot like making an elaborate window treatment.  The fold line became my "board line," and the process of marking and folding in the thick, stacked pleats at the sides of the skirt was very much like pleating up an Empire Swag drapery valance (except that the stacked pleats on the dress skirt are all perpendicular to the top edge of the skirt, whereas the stacked pleats on a drapery swag would be angled). 

But before you start pinning in the folded and stacked pleats, you have to hand stitch gathering threads for your cartridge pleats at the back of the skirt.  Unlike the stitches you put in for regular gathering and easing, the stitches for the cartridge pleats must be perfectly aligned and identically spaced in order for the pleats to draw up properly like an accordion when the threads are pulled. 

Tiger Tape, available here at Amazon
The pattern instructions tell you to mark your stitches every 3/8" all along the back portion of the skirt, and mentions that Tiger Tape (originally intended to help hand quilters maintain evenly spaced quilting stitches) is helpful with this.  In my opinion, Tiger Tape is the ONLY sane way to do this.  I used the Tiger Tape that has 12 lines to the inch, and took a stitch every five lines along the top and bottom edges of the 1/4" wide tape.  This was much faster and more accurate than the alternative, using a ruler to mark a gazillion little dots every 3/8". 

Using Tiger Tape to Guide Hand Stitching

Gathering Threads for Cartridge Pleats, Ready to Go
Also, I should mention that the pattern called for "buttonhole twist" for these stitching lines.  I couldn't find anything called "buttonhole twist" on the thread wall at my local JoAnn's, but I knew this thread needed to be STRONG. 

Gutermann Polyester Upholstery Thread, available here
I used Gutermann Polyester Upholstery Thread in Dark Green for my gathering threads, and I also used this thread to hand stitch the entire skirt to the waistband.  It's ridiculously strong, as well as smooth and static-free so it glides through the thick fabric layers and resists kinking up and tangling.  Also, do yourself a favor and reach for a strong, sharp, NEW needle.  This is not a job for that needle that you've had in your pin cushion for the last 15 years!  I needed my very snug-fitting sterling silver Roxanne Thimble that I use for hand quilting for this task (which I realized after puncturing my finger with the EYE of my needle due to the tremendous force required to penetrate so many fabric layers) and a rubber needle grabber in order to sew through all of the layers of stacked pleats by hand.

Whipstitching Stacked Pleats to the Waistband, Catching All Fabric Layers

No, You Cannot Do This By Machine!
This skirt gets sewn to the waistband COMPLETELY BY HAND because the fabric thickness is way too thick for the sewing machine; plus, there is no seam allowance at the top to add bulk to the waistline.  You just whipstitch the top folded edge of the skirt to the bottom edge of the finished waistband, and you need to catch all the layers all the way through every pleat, all the way around the skirt, so it's crucial that you keep that top folded edge perfectly aligned as you're pinning in the pleats.   I used straight pins to secure each fold, but used Wonder Clips to secure the stacked pleats because they don't distort the edges of the fabric the way that pins do when your layers are this thick.  When you turn back the waistband after stitching it, the skirt merely abuts the waistband.  They are touching each other with no overlap whatsoever.  Very cool.  So, first I sewed the pleated sections of the skirt to the waistband at either side of the skirt opening (the skirt opening is to the left of center and, although some reviewers of this pattern mentioned that they could not figure out where the center front and center back were, both are clearly marked on the pattern piece for the waistband).  Then I pulled up the strings to gather my cartridge pleats in the back section of the skirt, fitting it to the remaining loose portion of the waistband.
Front Edge of Cartridge Pleats Pinned to Lower Edge of Finished Waistband

Folded Stacked Pleats Already Stitched to Waistband, Cartridge Pleats Ready to Stitch
Here's the cool thing about those cartridge pleats.  Looking at the photo above, you see that only the fold at the FRONT of each little pleat will get stitched to the waistband.  The backs of the pleats are pointing inward.  But when you put this skirt on over the hoop skirt and petticoat, those pleats rotate outward away from the waistband.  It allows you to attach a tremendous amount of fabric to a small waistband without any bulk at the waistline, which is crucial for the Victorian ideal of a "wasp waist" silhouette.  (In the photo above, you can also see that those stacked, folded pleats were basted about an inch below the fold line prior to whipstitching the top edge to the waistband.  Those basting stitches are subsequently removed).  Once the skirt has been sewn to the waistband, all that's left to do is sew on the hook and eye closures and tack the skirt to the inside of the bodice at key points (to each of the boned seam allowances). 
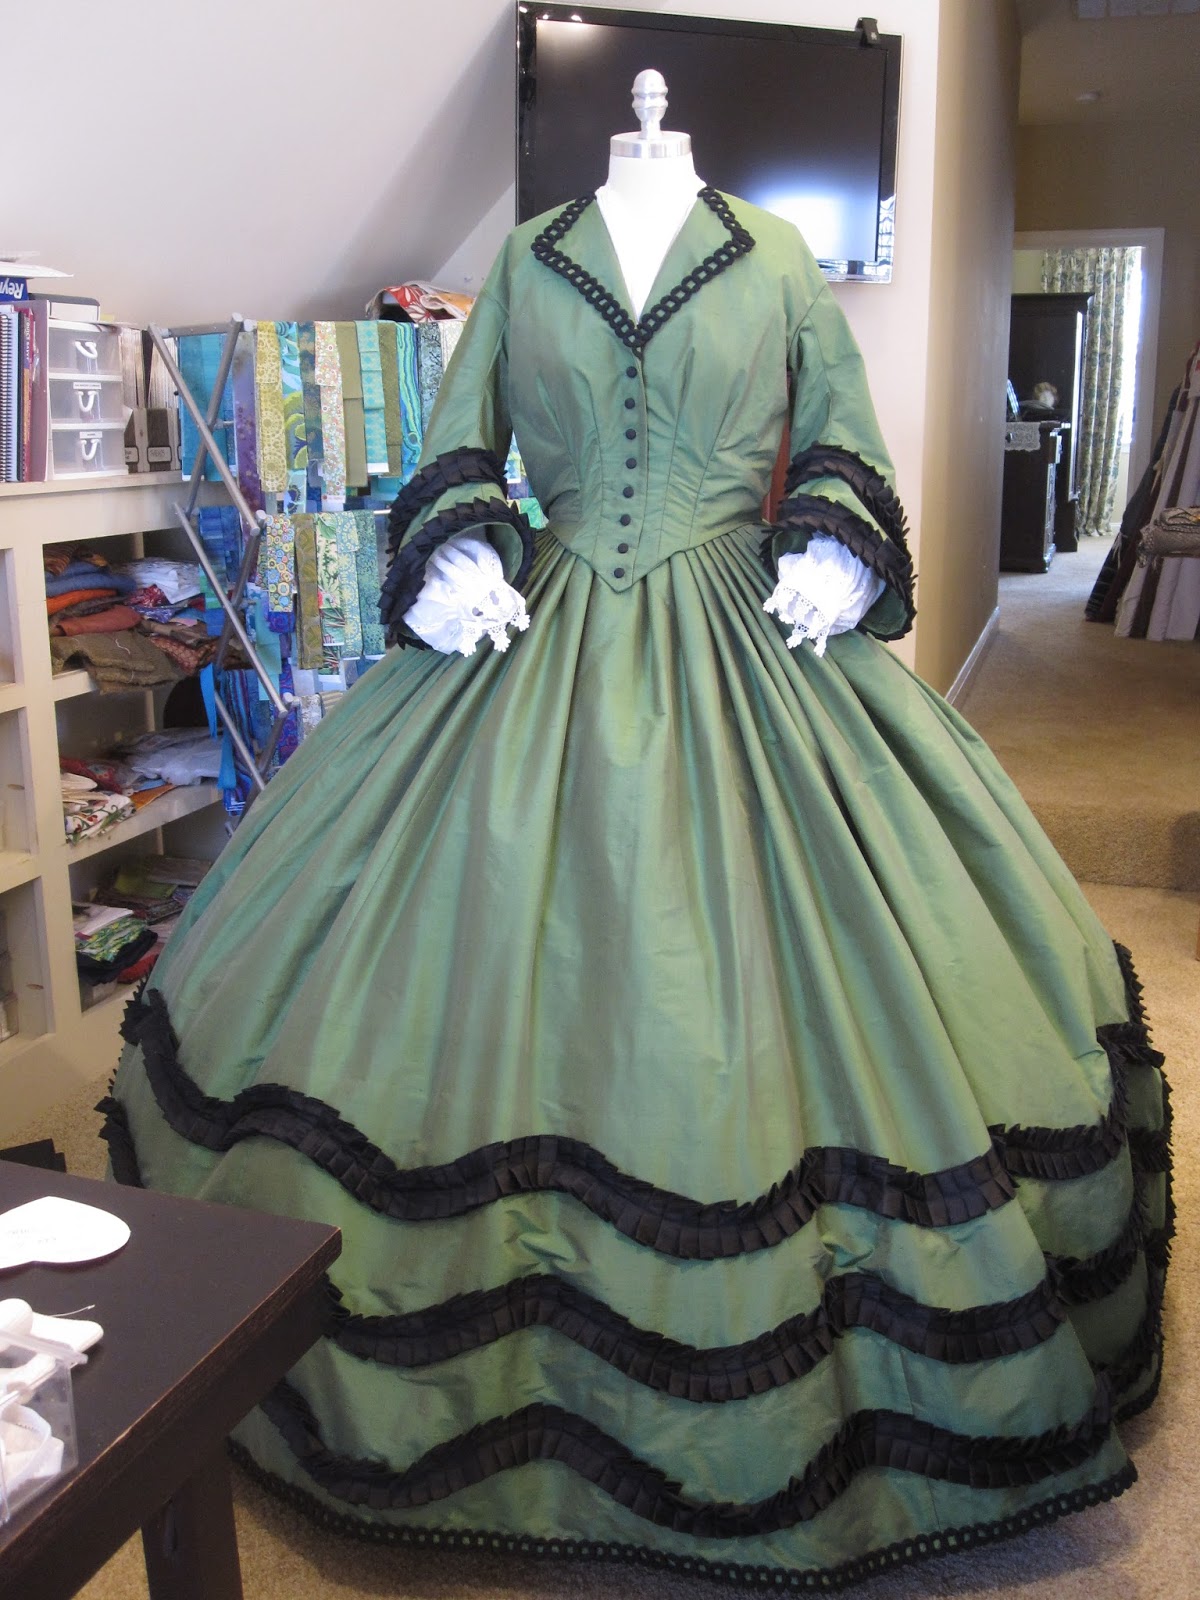
Finished Dress, Front View
The bodice fits me much better than it does my dress form, by the way -- the dress form needs to be padded out to match my size and shape but I just haven't had a chance to do it yet.  I don't have any good pictures of me wearing the dress that really show the skirt like these do.


Finished Dress, Side and Back View
In addition to the pleated ruffle trim, we also hand stitched a heavy trim to the bottom edge of the skirt as well as to the lapels.  I really wanted the lapel trim to wrap around the back of the neckline and extend down the bodice front, like this:
Abandoned Plan for Additional Trim
But I decided against it because it's difficult enough for me to button and unbutton the little dress buttons with my broken thumb and all that stiff boning in the way.  I was worried that I'd spend hours hand stitching the trim and then be unable to button the bodice and have to take all the trim off again.  Also, I was running out of time!

Even Sitting Is a Challenge In This Skirt!
Now that the dress is finished, I'd like to extend a big THANK YOU to my mom for helping me make it happen.  Without her help making sense of the directions, cutting layouts, endless hours of hand basting silk organza and stitching skirt trim while I wrestled with buttonholes, this costume would definitely never have gotten finished in time for my first caroling gig.  I couldn't have done it without her help.  Thanks, Mom!

My Amazingly Talented and Profoundly Patient Mom
I'm linking up with WIPs on Wednesdays at Esther's Blog and Let's Bee Social at Sew Fresh Quilts, Main Crush Monday at Cooking Up Quilts, and Monday Making at Love Laugh Quilt.  And now, I'm off to the mall to get my cracked iPhone screen replaced and clean out the LEGO store.  Wish me luck!