Y'all are not going to believe how I decided to quilt my Retro '80s Building Blocks sampler that I've been working on in fits and snatches since 2016. When I started this project, I was drawn to it partly because it would be so much fun to custom quilt each block individually... But by the time the quilt top was finished SIX years later (who's counting?), I just wanted the quilt to be done.
 |
| 85 x 93 Nanu Nanu! Retro '80s Building Blocks is FINISHED! |
I know some of you are in shock, wondering why I would take a challenging quilt pattern, make lots of changes to make it even more difficult to put together, and then just quilt over six years of blood, sweat and tears with an allover meandering edge-to-edge design. Well, I will explain.
Reason #1: This is a Bed Quilt, Not a Show Quilt
 |
| This Time, It Fits the Bed Perfectly |
Don't you love how the rainbow borders tie in with the Pink Floyd poster above the bed? And it's no coincidence that I have the exact same shades of blue, yellow, green, white and red in my quilt to match the wallpaper in the adjoining bathroom, either. I matched my Kona Cotton Solids Color Card fabric swatches to my handprinted Italian wallpaper in the early planning stages of this quilt! Once an interior designer, always an interior designer...
Back to the boring quilting design: Anders wanted his new quilt to have a similar weight and warmth to the comforter he'd grown used to, and he wanted it to be soft and not at all stiff. Custom quilting is gorgeous, but it just doesn't yield the softest, cuddliest quilts.
 |
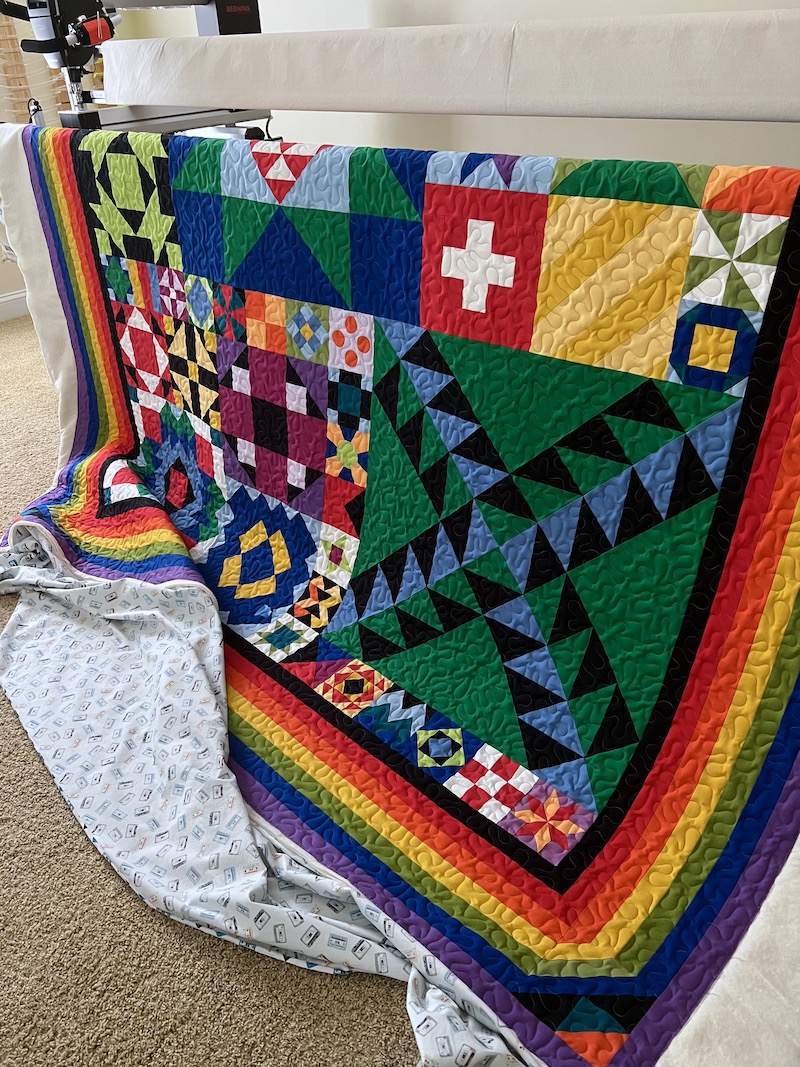
| Fresh Off the Frame, Quilted with (GASP!) Amoebas Gone Wild E2E |
To get the warmth, the weight, and the snuggly blanket feel Anders wanted, I decided to layer Hobbs Tuscany 80/20 Cotton/Wool batting on top of Quilters Dream Cotton Select loft batting (this post contains affiliate links). The meandering design with no backstitching gave me an even amount of quilting across the quilt's surface and preserved the loft of the double batting without compressing it.
 |
| Double Batting (80/20 Cotton/Wool over Cotton Select Loft) for Weight + Warmth |
Reason #2: The Design Actually Complements the Quilt Top
 |
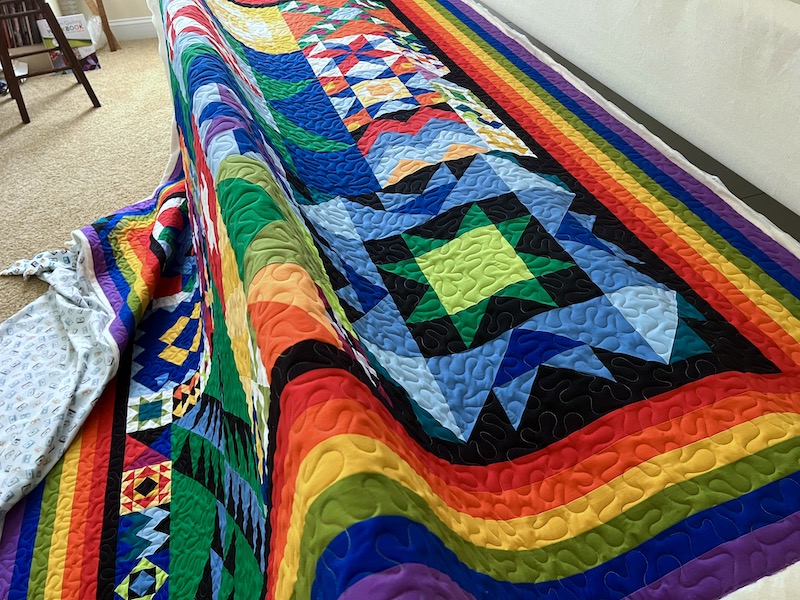
| Yes, I Meandered All Over Those Y-Seams! |
Reason #3: Git 'Er Done Already!
Should we talk about the thread? I chose a variegated King Tut 40 wt cotton thread called Cleopatra. I definitely wanted a matte cotton thread because my goal was a vintage '80s vibe and quilting with shiny machine embroidery threads is a newer trend. I didn't want to use gray thread because there isn't any gray in the quilt. I considered white, but that would have been so high-contrast against the black and darker blues and greens. I could have gone with thread matched to the lime green, yellow, pastel blue or orange colors in the quilt, but then I realized that ALL of those colors, in all the right shades, were in the Cleopatra variegated thread.
 |
| Thread is King Tut Variegated 40 wt Cotton in color Cleopatra |
The Cleopatra variegated thread also reminded me of those multicolored pencils that we used to have back in the early 1980s when I was in elementary school. I'm remembering the ones that had "rainbow lead" so you could get this variegated thread effect in your doodling by twisting the pencil in your fingers as you were drawing. Nostalgia won out over the other thread options!
Look at me, meandering all over my precious Y-seams and precisely pieced triangle points. Like a heathen! 😂.
 |
| This Felt Like Sacrilege! |
But seriously, all kidding aside: this quilting design was right for this quilt because it created a finished quilt with the functional attributes I wanted for its intended purpose as a bed quilt for a finicky teenager, and because it got my quilt finished FINALLY so it could be used and enjoyed. I relished the challenges of piecing this quilt top and I felt a definite sense of accomplishment with many of the blocks, but I never planned to spend six years on this project. I'm over it now and ready to move on to something else. I still haven't finished custom quilting my Jingle applique quilt yet (back on my schedule for the week before Thanksgiving) so if this quilt had "needed" custom, it wouldn't have gotten finished until sometime in 2023!
 |
| Right Across Mork's Suspender Borders, Too |
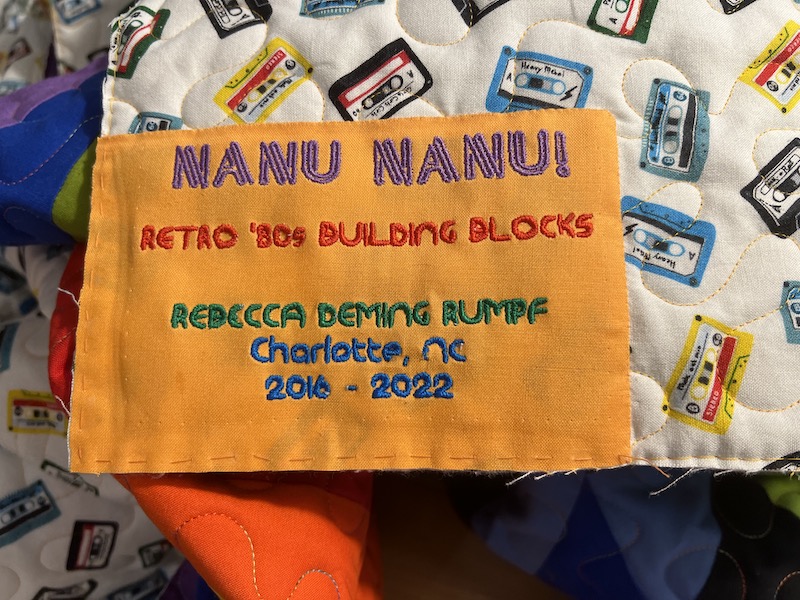
Of course, I wasn't in such a rush that I would skip the quilt label:
 |
| Machine Embroidered Quilt Label |
So, to recap the tortuous journey of making this quilt: I began with the intention of making the quilt pictured below, the Moda Modern Building Blocks quilt (unfortunately, the pattern doesn't seem to be available anymore):
 |
| Inspiration Quilt, 84 x 96 Without Borders |
I never actually had a copy of the Moda pattern. I started out with the idea of drafting the quilt myself in EQ8 (or was it EQ7 back then?) software so I could alter it from a Queen size to the twin size I needed for my son's bed. The block layout and proportions in the center of my quilt are identical to those in the Moda quilt. However, in order to fit all of the blocks in the original quilt onto a narrower Twin quilt, I reduced the scale of all of my blocks to be multiples of 5" instead of multiples of 6" as in the original quilt, and I added borders only to the top and bottom of the quilt to get the length back after shrinking the blocks. That GREATLY COMPLICATED construction, by the way, requiring foundation paper piecing and template piecing for nearly every block because I no longer had "ruler friendly measurements" for my block units. If you compare the Moda pattern photo to my quilt, you'll see that 30 of the 48 blocks in my quilt are the same as the ones in the Moda quilt, but 18 of mine are different. I had fun playing around with the design in my software program and swapped in other traditional and vintage block designs, but I think it still looks very much like the Moda Modern Building Blocks quilt overall -- definitely not an "original design" of my own, despite my snazzy Mork Suspender borders!
 |
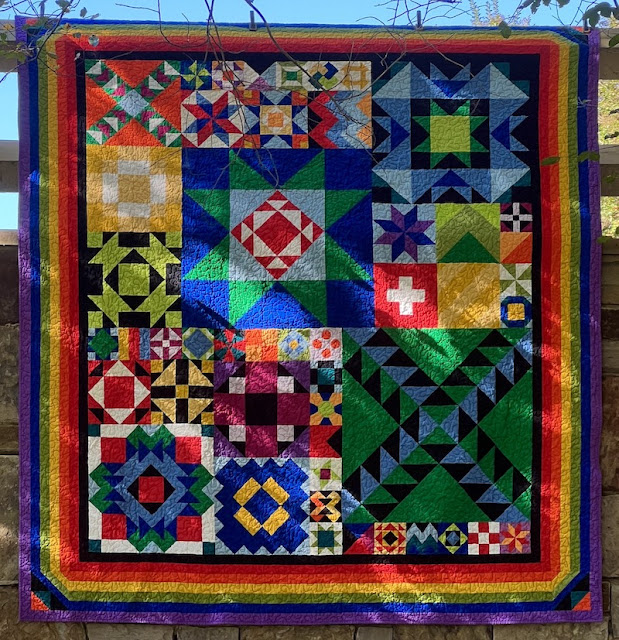
| My Version, 91.5 x 101.5 With Mork Borders (before quilting) |
Even though I preshrunk my Kona Solid fabrics and my backing fabric in hot water before cutting into them, I still got some shrinkage from quilting and laundering the finished quilt. Its final finished size is 85" x 93", so that was about 7% shrinkage to the width and 8% shrinkage in length.
 |
| Border + Color Palette Inspiration |
My husband Bernie had just gotten back from a work trip when I begged and pleaded for him to help me get a photo of this quilt. There he is, waving at you from the top of the bridge as he clamps my quilt to the railing for me.
 |
| My Husband Bernie, Plighting Me His Troth* |
*I have explained to Bernie that quilt photo shoots are something he agreed to in our marriage vows, the part where he said he would "plight me his troth," and if he didn't know that "troth plighting" meant quilt photos, he should have asked the pastor for clarification before making that solemn vow before God and all of our assembled friends and family members. And don't you dare tell him any different! 😜
I'm linking up today's post with my favorite linky parties, listed on the left sidebar of my blog. And now that my design wall is empty, I'm contemplating what my NEXT project should be!

27 comments:
Congratulations on the finish! Finishes always feel good but the long term quilt finishes feel amazing! I'm glad to read the Christmas quilt is on the quilting schedule, I look forward to viewing that finish in December, happy stitching!
I LOVE the quilt! I have so enjoyed following the trials and tribulations of your work on this project, as well as your sense of humor every challenging step of the way. The finished product is great! I hope your son enjoys and appreciates all of your efforts. Thanks for sharing!
You had me on this one! As you talked about making the sizes smaller, I kept going back up to the first picture because it didn't look like a twin quilt. I would read some more and go back to that picture. I finally got to the end! LOL He grew up! At least you were making something that he wouldn't outgrow. He can take that on to college. You did a beautiful job with it. I really like custom quilting but I have recently been trying to go to some quicker all over designs for the feel. I haven't yet tried adding the second layer of wool. Thanks for sharing.
I think the quilting design absolutely complements the piecing, and it’s great that it doesn’t compress the quilt and make it really stiff. I love all the different blocks in this marvelous sampler quilt, but the borders absolutely make it! Congrats on this wonderful finish!
It was definitely worth the heartache, maths and determination. It is stunning. What a “WOW” quilt which I am sure your son will treasure for ever.
I absolutely LOVE the colors and the sharp geometric look of this quilt. Mork and Mindy night was Thursday night for this newlywed. We splurged with hamburger patties and mac&cheese for dinner. Such great memories. As I write this I am getting ready to head out to Lake Wateree to check out possible properties for our final home. My daughter has fallen in love with Matthews and the surrounding areas and this looks to be a good place to continue out lakefront property search. We spent the ladt two days checking out Lake Murray options. Your quilting and piecing are pure perfection. Thank you for sharing your talents with us in this way. You are truly blessed. Let your husband know that reading the fine print on any contract is a must. Especially in front of G-d and family. d
Yippeee, it's finished!! Love, love, love and the wallpaper is a bonus. But wait, YOUR son has been sleeping under a BBB quilt???? Horrors! I hope it has not inflicted any permanent damage on the poor innocent.
Oh my, Rebecca Grace! It's *glorious*! One of the things I really like about quilting is that beds and walls don't outgrow their quilts (unless the bed totally changes, as in your case this time), so taking a long time isn't terrible. But this one was definitely worth the wait -- it's *wonderful*!
The choices you made with the borders, batting, and quilting design are perfect for the function, look and feel of this quilt. It's amazing and will be enjoyed for many years to come, I am certain.
It is always a treat to read your posts and follow your mental journey. Meandering is perfect for a quilt meant to be functional with flair. This will be treasured by Anders.
I totally understand your "Sacrilege!" comment about meandering over this quilt (because I feel it with some of the quilts I've quilted over the years.) Given the intended use for this quilt, I wholeheartedly support your choice. Also remember that DONE is SEW much better than perfect (and custom quilting on a teen quilt is lunacy!!) Congratulations on completing this epic project, Rebecca.
It's beautiful, Rebecca! It does go quite well with that Pink Floyd poster!! And the quilting is perfect for a quilt that will be used and loved!!
Oh Rebecca, your quilt is wonderful and I'm sure that Anders will love it, more than his previous comforter ;) His new quilt looks warm and soft, and I love all the details you wrote about it.
Et le quilting choisi est parfait pour toutes les raisons expliquées !! Bravo pour ce travail de 6 ans, et maintenant comme tu dis, place à un nouveu projet ;))
Thank you for sharing your beautiful finish and linking up!
What a stunning quilt for Anders! I love that it coordinates with the wallpaper and poster and that his loving mother made it larger for the larger bed. I understand the desire to do custom quilting, but a bed quilt is just that. The shrinkage wasn't too bad with the quilting and batting and prewashing. I love the Cleopatra thread, too. It is another perfect choice among many. Your saga reminds me of how I overcomplicate things. Congratulations on a terrific finish!
What a labor of love! I am proud of you for sticking to your changes in the pattern. The colors are very vibrant and I love the meandering. It does get a bad rap if one uses it on a show quilt, but you know all the reasons you listed justify the meandering. I think quilting each block different might have taken away from the beauty of the colors. The meandering does stay in the background and show of the full enjoyment of the quilt! Excellent job Rebecca! I know how it feels to get things “completed” - now on to the next one! Hugs
What a fantastic quilt, well worth the time & re-working the plans on size and quilting.
The story behind the quilt is just as cool as the quilt itself! I love the look of it on the bed, with the PF poster. If I had oreos, I'd stack 'em in your honor (had to have a nod to M&M in my comment).
love it especially the name! And your bathroom wallpaper! LeeAnna
Congratulations on getting a UFO to completion. Love the border treatment. It is so well done and so Mork's. Sorry to read you had to go through Crazy Town with the block construction though. Very well done! Don't know if we have a "plight me is troth" in a French wedding but I almost die laughing at your definition. (I need to look if I have such a clause in my wedding vows.) ;^)
What a fun quilt! Love the colors.
What a wonderful Ta-Dah moment! Your sweetie is a gem and a wonderful partner in the quilt shoots!
Bwahh ha ha - Bernie!!! you are totally stick with her - quilts and all!!!!
I love it - I think it turned out great!!!
Oh I was chuckling as I read through your post today! Such a great story behind the scenes,6 years worth! Yes, sacrilege to use that panto, but you know, it really works. It allows your piecing to shine, and your colours & fabrics stand out beautifully...and as you say, you just wanted it finished. And gosh, doesn't it look amazing on your son's bed.
I love what you told your husband! It sounds perfectly logical to me. What else could it mean. The quilt is gorgeous.
Congrats on your finish…love the quilt. Agree that sometimes keeping it simple in terms of quilting is best. I love a good meander and it looks great in the variegated thread.
I am giving you a standing ovation along with all the other quilters who read this blog post, Rebecca!!! Nah, custom quilting is not necessary on this quilt--looks fab and useful with an all-over! Custom would've made it too high brow for your son. Love the variegated thread--that was a clever addition! Beautiful, just beautiful!!!
The quilt is gorgeous, as it that wonderful wallpaper.
Post a Comment