Showing posts with label Retro Eighties Building Blocks. Show all posts

Friday, October 7, 2022

The One Where the Longarm Quilter Finishes Her OWN QUILT: Nanu Nanu! Retro '80s Building Blocks is Ta-DONE

Y'all are not going to believe how I decided to quilt my Retro '80s Building Blocks sampler that I've been working on in fits and snatches since 2016.  When I started this project, I was drawn to it partly because it would be so much fun to custom quilt each block individually...  But by the time the quilt top was finished SIX years later (who's counting?), I just wanted the quilt to be done.

85 x 93 Nanu Nanu! Retro '80s Building Blocks is FINISHED!

I know some of you are in shock, wondering why I would take a challenging quilt pattern, make lots of changes to make it even more difficult to put together, and then just quilt over six years of blood, sweat and tears with an allover meandering edge-to-edge design.  Well, I will explain.  

Reason #1: This is a Bed Quilt, Not a Show Quilt

This Time, It Fits the Bed Perfectly

Don't you love how the rainbow borders tie in with the Pink Floyd poster above the bed?  And it's no coincidence that I have the exact same shades of blue, yellow, green, white and red in my quilt to match the wallpaper in the adjoining bathroom, either.  I matched my Kona Cotton Solids Color Card fabric swatches to my handprinted Italian wallpaper in the early planning stages of this quilt!  Once an interior designer, always an interior designer...

From his second birthday until he was 12 years old, my younger son Anders slept underneath his Mommy-made "Froggy Quilt of Many Colors."  I finally took it off the bed because it was beginning to show some serious wear and because I thought the novelty frog print fabrics were too babyish for a middle schooler, and I promised him that I would make him a new quilt.  Because I overcomplicated the plan for the new quilt and got sidetracked with lots of other projects along the way, Anders has been sleeping under a plain old comforter from Bed Bath & Beyond for the past 6 or 7 years, a comforter that was supposed to just be "temporary" until Mom finished the new quilt.  Oh, the SHAME!  I can't tell you how good it makes me feel when I walk past his room and see a handmade quilt on his bed again!  

Friday, September 9, 2022

Olivia's Church Windows, Gail's Autumn Bear Paws, and My '80s Sampler Gets Borders and Backing Fabric

Good happy morning, everyone!  I am so far behind in posting photos of the quilts I've been doing for clients that I am having a hard time deciding which quilts to share with you today.  Seriously!  The second-best part about being a longarm quilter is that I get to see and collaborate on so many gorgeous quilts in every color and style imaginable.  (The very best part about my job is that I get to meet, talk with, and be inspired by the wonderful people who make these quilts).  

So, considering that my phone is busting at the seams with photos I haven't shared yet, I ought to quit writing the blah blah and just show you some quilts already!

Church Windows Baby Quilt for Olivia

The maker of this fresh and modern baby quilt is a high school math teacher, so she's automatically my hero.  Olivia has brought me several baby quilts over the past year, shower gifts that she's made for friends and relatives.  This one is extra-special, though, because it's for Olivia's own first child who is due to arrive any day now.  I'm so excited for her!

Olivia's 39 x 40 Church Windows Baby Quilt


Olivia chose the Church Window quilt pattern from Lo and Behold Stitchery, available on Etsy here (this post contains affiliate links).  After looking at lots of designs together, Olivia chose this Annabelle edge to edge design from Christy Dillon for its ability to soften the geometry of the piecing lines with soft curves, feminine florals, and a modern vibe that will "grow with the baby" versus anything overtly "baby."  Don't you love the way the flowers appear to be vines supported by a patchwork trellis on this quilt?

Annabelle E2E Design Stitched in Barely Pink So Fine Thread

We used Quilter's Dream Bamboo blend batting, one of my favorites for baby quilts due to its lighter weight, softness and breathability.  Previously known as Quilter's Dream Orient, this blend includes not only bamboo but also silk, cotton, and Tencel fibers.  The thread I used is 50 weight So Fine in color Barely Pink.  So Fine is a great choice for quilting designs like this one that involve backtracking/overstitching on previously stitched quilting lines because it doesn't build up and look "thready" in those areas.  

Monday, September 5, 2022

Note To Self: There Are No Magical Border Elves Who Finish Quilts While You Are Sleeping

Oh my gosh, y'all -- I would so much rather be making blocks for a new quilt rather than putting seven borders on this WIP (Work In Progress) project that I've been puttering around with for the past six(!) years!  When I came up with this bright idea of Mork's rainbow suspenders for a quilt border, I was only thinking about how cool it would look and not thinking at all about actually having to go to all of this bother at the tail end of the project when I just want to be DONE with it already!  I procrastinated cutting the border strips after I cut the black inner border a couple months ago -- swiftly remembering how much I hate cutting long lengthwise strips for a big bed quilt.  Well, I finally cut them all and have been piecing them together and attaching them to my Retro '80s Building Blocks sampler.  This is where I left off last night, with only the final purple border strips waiting to be attached:

Only One More Border to Go!

First, I'd joined the Kona Lipstick and Kona Black borders together, pressing the seam allowance towards the black on the top and bottom strips and towards the red on the left and right side strips.  That way, the seams nested and locked together nicely when I mitered the red+black border corners.

Trying to Keep Organized...

Then the next four colors were strip pieced together to apply as a single border: Kona Tangerine, Kona Grellow, Kona Peridot, and Kona Ocean.  

Saturday, June 11, 2022

Nanu Nanu! Borders Are In Progress for My Retro '80s Building Blocks Sampler

Y'all, PROGRESS IS HAPPENING on my Retro '80s Building Blocks quilt!  I foundation paper pieced my 6" border corner blocks yesterday:

6 inch Border Corner Blocks Completed

The fabrics in my corner blocks are Kona Cotton 1019 BLACK Kona Cotton 146 GLACIERKona Cotton 25 OCEANKona Cotton 317 PERIDOTKona Cotton 476 GRELLOW, and Kona Cotton 1370 TANGERINE (By the way, this post contains affiliate links.  If you scroll all the way to the bottom, I've got links to where you can find every single fabric that I used in this quilt).  

Meanwhile, I've finally sewn the interior blocks of this quilt together.  (At which point a little devil on my shoulder whispers "You could be done with this now, if you skipped the borders..."). Begone, Devil!  Without the borders, the quilt would be too small to fit the bed!  ðŸ˜¤

Here it is, draped (sideways) over my longarm frame for measuring:

Quilt Top Sewn Together, Sans Borders

I always take border measurements through the vertical and horizontal centers of the quilt top rather than at the edges, and that bar on my 13' long arm frame comes in handy for measuring.  It's a lot longer than my cutting table.

Monday, May 30, 2022

A Sauntering Squirrel Swooshed By -- In a Kaffe Fassett Tiered Maxi Skirt

Hello and Happy Memorial Day Weekend, Everyone!  My birthday was May 27th, so I took advantage of Memorial Day sales on top of a birthday coupon from my not-quite-local quilt shop, Sew Much Fun, to buy yards and yards of Kaffe Fassett Collective cotton fabric prints that I plan to transform into long, swooshy skirts with my serger:

Birthday Flowers From My Sister, Kaffe Fassett Fabrics for my Skirts

I'm planning to make one skirt with the purple Japanese Crysanthemum-Antique (yes, this post contains affiliate links) alternated with Spot Plum (the two fabrics on the left), and another skirt from the Japanese Crysanthemum-Scarlet alternated with Zig Zag-Cool.   I'm linking to independent Etsy shops who carry these fabrics for your convenience, but I recommend pairing fabric prints in person at your local quilt shop if at all possible.  I spent a LONG time dragging fabric bolts around the shop (and made a big mess -- sorry!) before I was satisfied with my selections. 

Inspiration:  La DoubleJ Tiered Maxi Skirt, $590 from Nieman Marcus

The Tutorials

This new "squirrel project" first invaded my consciousness when I saw Sharon Madsen's How to Sew a Multi-Tiered Maxi Skirt tutorial on Bernina's We All Sew blog last week.

Sharon Madsen's Skirt for Bernina's We All Sew Tutorial

I love wearing easy, comfortable styles like this for summer, and I am seeing tiered maxi skirts cropping up in all of the high end retail shops this year.  This is definitely an on-trend look for Summer 2022, and it would be a great beginner sewing project if any of you have daughters, granddaughters or other girls in your life who are interested in learning to sew.  

Tuesday, May 10, 2022

Progress On the Retro '80s Building Blocks Quilt is Happening! Nanu Nanu!

Hello and Happy Tuesday!  It's been awhile since I've set any goals for my personal sewing projects, but I'm right on schedule with quilting commitments for clients and I'm SO close with my Retro '80s Building Blocks sampler...  See, I managed to assemble the "A" section of the quilt top last week, the part that I've outlined with a red rectangle: 

First Section Assembled, No Casualties Suffered By My Points

Woo hoo!  And then I assembled section "B" this morning.  This one was a lot faster since it was only three big blocks and no fiddling around with the little ones, but still very satisfying to have another chunk of the quilt top put together:

Second Section Assembled, Still No Catastrophes

This is slow going because I'm working out which way to press the seam allowances between the blocks as I go along and, total honesty -- I was procrastinating putting the blocks together once I'd finished them in case there was going to be a lot of seam ripping and swearing involved like there was when I was joining all the blocks together for my Sermon Scribbles quilt awhile ago.  I am a Side Presser and not an Open Seam presser.  When my seams are pressed in opposite directions and they nest and lock together at the seam intersections, that's when it's the easiest to get those seams to line up perfectly.  But without sashing between blocks and with so many different block styles in the quilt -- and without any pattern instructions telling me which way to press the seams to match up like that -- sometimes it works out and it's easy, and other times I have to match two seams that are pressed in the same direction and use that little hump-jumping tool to keep my presser foot level as it passes over the giant mountain of seam allowances!

Saturday, April 16, 2022

Janet's Kintsugi Quilt: Not Your Grandma's E2E Quilting

Good morning and Happy Passover/Happy Easter to all who are celebrating this weekend!  The quilt I'm sharing today was made by my client Janet in a Kintsugi workshop taught by Pepper Cory.  (You can read more about kintsugi, the ancient Japanese art of repairing broken pottery with gold, and how Pepper translates this idea into quilting, on Pepper Cory's blog here).  

Detail of Janet's Kintsugi Quilt with Geoglyph E2E

If you don't have time for the in-depth read, here are the basics: When you take this class with Pepper, you bring in an assortments of similar orphan blocks, incomplete and no longer loved projects you don't feel like finishing, and other odd bits and pieces ("shards") you might have lying around your studio.  Pepper guides students to create a layout with an abstract, modern art feel and teaches how to "glue" those pieces together with yardage of a complementary background fabric that acts as the golden lacquer to hold everything together and create a finished work that is more beautiful than all of its bits and pieces were on their own.  Janet chose a Moda Grunge fabric (this post contains affiliate links) for her background that sets off her bright, scrappy blocks and string strips.

Detail of Janet's Kintsugi Quilt with Geoglyph E2E

Janet's Kintsugi quilt is quite large, 88" x 88", with ample negative background space.  We chose a modern digital panto design by Jess Zeigler called Geoglyph that mimics extensive ruler work quilting, and when I set the design up in my computer I flipped, mirror-imaged, and staggered the rows of the design so that there is no traditional design repeat on the entire quilt.  

Monday, March 28, 2022

Y-Seams Make Me Feel Like a Boss: My Retro '80s Sampler Blocks Are Finished!

Good Monday morning, everyone!  I am delighted to share that, FIVE and a half years after starting my version of the 2014 Moda Modern Building Blocks sampler quilt, I have finally finished making all 48 blocks!  

Woo Hoo!  All 48 Sampler Blocks Are Finished (Finally)!

No, the blocks aren't sewn together yet.  Expect that to take me some time, because after all of the time I've invested into making these blocks there is no way I'm willing to sacrifice any pointy points along the seam lines where the blocks join together.  This quilt top will be assembled slowly, with lots and lots of pins and probably also with lots of help from my BFF, the seam ripper.  Which is fine, because I can use that time to think about how the heck I'm going to quilt this when the top is finally done.

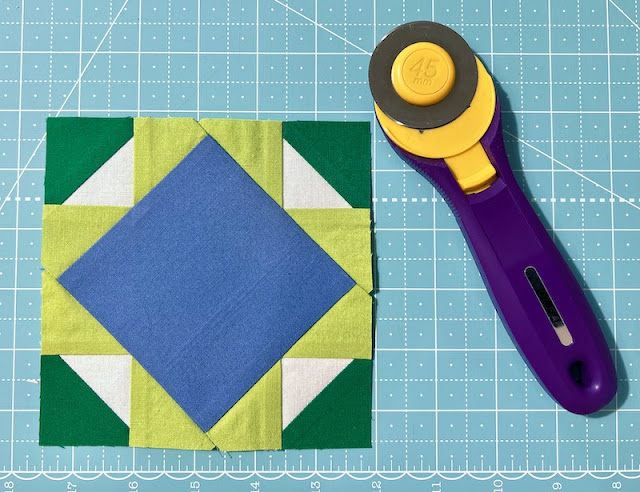
5 Inch Finished Block, Not In Original Moda Pattern

The black, orange and yellow block shown above was not in the original Moda pattern.  It's a traditional block design that I swapped in from my EQ8 quilt design software (Disclaimer: this post contains affiliate links), either from the main EQ8 block library or from the BlockBase Plus add-on containing all of the blocks from Barbara Brackman's Encyclopedia of Pieced Quilt Patterns.  I don't remember the name of this block, but it supports the early 1980s graphic design vibe I am aiming for with this quilt, especially with the opportunity to use two shades of orange and yellow for a three dimensional effect.  There are two Y-seams in that block, on either side of center where the black QST (quarter square triangles) on the outside edges of the block are sewn to pairs of 45 degree diamonds.  The Kona Solid colors used in the block above are Tangerine, Goldfish, Grellow, Sunflower, and Black (links take you to where those Kona colors can be found from Etsy sellers).

Wednesday, March 23, 2022

Holly's (Not So) Little Ruby Layer Cake Quilt + Retro 80s Sampler Progress

Good morning and happy Tuesday, my lovelies! It's a rainy spring day here in Charlotte, North Carolina, and the grass looks so vividly green against the overcast skies.  My favorite kind of weather -- cool but not cold, new life springing up all around me, yet it's not such a beautiful day that you have to feel guilty for squirreling away in the studio instead of being outdoors.  It's drizzling out there, but it's dry in the sewing room where all the good fabric is waiting for me!

Holly's (Not So) Little Ruby Layer Cake Quilt

Speaking of all the good fabric...  Today I'm sharing my client Holly's enormous 100" x 100" quilt made from layer cakes (packages of precut 10" squares of coordinating print fabrics) of the Little Ruby fabric collection by Bonnie and Camille for Moda Fabrics.  Doesn't this fabric collection channel the spirit of Spring?  I did find several Etsy sellers who have Little Ruby precuts available here (affiliate link) in case you can't find them at your local quilt shop.  

Little Ruby Layer Cakes + Winter Flower E2E Quilting Design

I don't know the name of the pattern Holly used to make her quilt, but every time I see a quilt like this I think "Why don't I ever make quilts like this?!"  When you have great fabric prints, a simple patchwork pattern shows them off so beautifully.  I love how the large print squares are separated by frames of white.  My cerebral wheels are spinning, y'all -- I have a couple of fabulous large scale print fabrics stashed away, waiting for me to figure out how to show them off in a quilt.

This King quilt is for Holly's guest bedroom.  Won't this be a wonderful treat for her overnight visitors?  We used Hobbs Tuscany 80/20 Cotton/Wool batting for this quilt (affiliate link), a batting that I've only recently started stocking.  I like it -- it's an 80/20 blend so it's similar to the Hobbs and Quilters Dream 80/20 Cotton/Poly battings I carry, but the wool seems to give it just a bit more loft resilience than the cotton/poly blend.  Like the other wool battings I carry, the Hobbs cotton/wool blend batting is resin bonded to prevent the wool fibers from bearding through the finished quilt the way that cheaper wool battings do.  The cotton/wool blend has a lower loft -- and a lower price point -- than 100% wool batting, so it's not going to replace 100% wool in my inventory, but it's not going to replace my go-to 80/20 cotton poly batting, either.  Some people have wool allergies, and wool battings are less forgiving than cotton or polyester if someone throws a quilt in a hot dryer after laundering.  But I love having so many different choices so we can get exactly the look, feel, and laundering options we want for every quilt!

100 x 100 Little Ruby Layer Cake Quilt with Winter Flower E2E Quilting Design

Sunday, March 13, 2022

A Sampler Block, a Custom Ironing Table, and a Custom QOV for Harold

Lest you think I've not been making any progress at all on my own projects, I have this block to show for myself:

Another 5 inch Block Completed for my Retro '80s Sampler

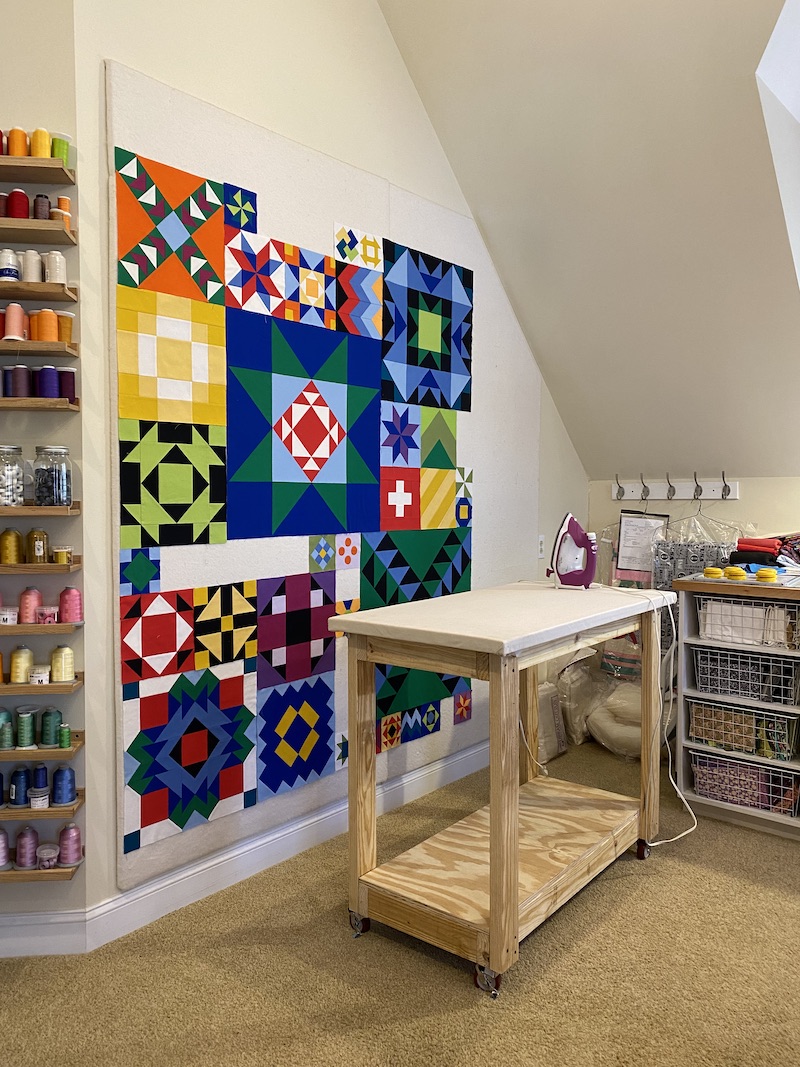
I've actually finished several more 5" blocks for my Retro '80s Building Blocks sampler quilt besides this one -- I only have six left, plus borders and corner blocks.  The photo below was taken a few weeks ago and doesn't show any of the new blocks.  What it does show is my new, fancy-schmancy custom ironing table, built by my "Handy Husband":

Rebecca's Fancy-Schmancy Custom Ironing Table

24 x 48 Custom Ironing Table

I have been searching in vain for an ideal quilter's ironing board, and I finally talked my husband into building one to my specifications.  

Sunday, January 30, 2022

Four More Blocks for My Retro '80s Building Blocks Quilt + Layout Options for FrankenWhiggish Rose Blocks

Happy Week End, everyone, and happy Month End as well!  One of the goals I'd set for myself at the start of January was to make some more blocks for my Retro '80s Building Blocks sampler quilt, and I finally did that yesterday.  Four more happy little 5" blocks are completed, only one of which was in the original Moda Modern Building Blocks design.  The other three blocks were among the many that I swapped out when I was redrafting the quilt in EQ8 Quilt Design Software (affiliate link) to suit my purposes.

Four More 5 Inch Blocks for Retro '80s Building Blocks

Gotta admit, I am still not 100% thrilled with the center of the little Lemoyne Star but it took me a LONG time to piece that one with all of its little Y-Seams, and I decided it's Good Enough.  Or at least, it's the best I could do that day.

Here they are, my completed blocks back up on the design wall, with the new ones added into the mix:

Back on the Design Wall: 38 Blocks Finished, 15 Remaining to be Made

For those of you who haven't seen any of my earlier posts about this quilt, here's a quick recap.  I started out with the idea that I wanted to make the Moda Modern Building Blocks quilt that was a popular BOM (Block of the Month) about eight years ago.  But I wanted mine to finish a different size to fit a particular bed, and I did not have the kit or the pattern anyway, so I set about redrafting the quilt in EQ8 from pictures of...  But instead of sizing my blocks as ruler-friendly multiples of 6", my blocks were multiples of 5" in order to get the finished quilt size I wanted with the borders I added.  The whole idea behind the "building blocks" sampler was for it to be a skill builder, so I eliminated all of the unecessary seams that Moda had added to simplify the piecing, adding back Y-seam construction because that's a skill I wanted to focus on.  I also swapped out 40% of the blocks in the original quilt for different ones in order to get that retro 1980s vibe I wanted and/or to include blocks that were more interesting (to me) or more challenging.  And I added rainbow borders that were inspired by the suspenders Robin Williams' character wore on the television show Mork & Mindy.  

Saturday, January 1, 2022

New Year, New Ambitions, and New Applique Projects for Rebecca!

HAPPY NEW YEAR!  Have you made big plans or resolutions for 2022?  Will you be Eating Less Junk Food, Drinking More Water, Spending Less Money, Achieving Self-Actualization and Becoming One With the Universe?  Or are you mustering your willpower behind resolutions like No New Projects Until the Old Ones are Finished, or Only Using Fabric that you Already Own?  If those are your goals for 2022, I'll be cheering you along from the sidelines but I won't be joining you in your Year of Austerity.  Two years into the Plague, I've had enough of deprivation and restrictions and my New Year's Resolutions are all about MORE instead of less.  More creative challenges, more learning new skills and honing existing ones, and more shopping to support small businesses: local quilt shops, mom-and-pop online sellers, and all of the talented designers whose fabric lines, quilt patterns, and digital quilting designs send so much beauty and inspiration out into a bleak world!

Rebecca's New Applique Projects for 2022:

With that in mind, I've resolved to start THREE of Sarah Fielke's challenging year-long BOM (Block of the Month) projects involving extensive handwork, lots of variety, and excuses to buy more fabric (and cut into plenty of the scraps and yardage already in my stash).  Mwahahaha!


A few weeks ago, I asked y'all to weigh in and help me decide which of these three Sarah Fielke BOM reruns I should join in 2022, and I was hoping your collective feedback would help me to pick one.  Well, that didn't happen!  There was no clear preference for one project, and I am drawn to different aspects of each one.  What I like about all three projects, and what I like about designer Sarah Fielke's style in general, is their playfulness and whimsy -- like beautiful children's book illustrations that captivate a child's imagination.  The techniques are challenging and involve a lot of hand stitching, but the style is just plain cheerful and fun.  I need some FUN in 2022!  If any of you want to join me (and thousands of other quilters around the world) with one of these projects, you still have time to sign up on Sarah's web site here.  The first patterns won't be released until January 31st, so you still have time to pick your project and get your fabrics together!

I'm planning to use lots of scraps and fat quarter yardage from my stash for these three quilts, so the easiest way to ensure that they don't end up looking all alike is to use very different background fabrics for each one.  To that end, I made a quest to one of my favorite Not-Quite-Local Quilt Shops a few days ago, Sew Much Fun in Lowell, NC.

Supporting Local Businesses by Purchasing Way More Fabric Than I Need

Yes, my plan was to just buy yardage for the background fabrics and alternate block fabrics for Happy Days and Simple Folk, and yardage for the center medallion and borders of Down the Rabbit Hole.  As you see in the photo above, I also bought half yard cuts of a bunch of other fabrics that caught my eye, to be cut up for the appliqué and pieced blocks.  It's a good thing I got to the shop 45 minutes before they closed, because I kept finding more and MORE fabrics while they were cutting the ones I'd already picked out...  I was like a toddler in the grocery checkout, grabbing candy bars and tossing them in the cart while mom isn't looking!

Wednesday, October 13, 2021

Ann's Magic Carpet Quilt + TWO NEW PROJECTS for Rebecca!

First Things First: Ann's Mesmerizing Magic Carpet Quilt

Oh my gosh, you guys -- check out the quiltaliciousness of this fabulous Magic Carpet Quilt that I completed last week for my client Ann!  Ann pieced the top using Paula Nadelstern's Duets and Poured Color fabrics from Benartex.  She followed a FREE Benartex pattern called Magic Carpet that was designed by Stephanie Sheridan specifically to promote the fabric collections, available from Benartex here.  

Modern Eccentric E2E in Variegated 40 wt YLI Cotton Thread

I quilted Ann's Magic Carpet quilt using Ann Shackelford's Modern Eccentrics E2E quilting design and I just love how it turned out -- great texture with a wonderful illusion of motion.  I feel like I really could step onto this "magic carpet" and go sailing off into the night sky.


Ann made this quilt as a wedding gift.  I think the pattern does a great job of showcasing the distinctive Paula Nadelstern fabric prints.

Sunday, September 19, 2021

A Couple More Blocks for My Retro 'Eighties Building Blocks Sampler

Good morning, my lovelies!  I have been "SEW" busy lately that I'm starting to accumulate a backlog of things I wanted to share here on my blog.  Today I'll show you the last two 10" blocks I made for my Retro 'Eighties Building Blocks sampler (adapted from the 2014 Moda Modern Building Blocks QAL).  Here's what the design wall is looking like these days:

All of the 10 inch Blocks Are Completed!

This project would be a finished quilt top by now if I was able to work on it consistently, but I've been more focused on customers' quilts lately.  I've also been responsible for more church music over the past few weeks, now that Church Council has decided we have to wear masks while we're singing and a lot of our singers are staying away because of health concerns etc.  So, those are my excuses for only having TWO new blocks to share since the last time I posted about this project!

Block 18

Both of these blocks finish at 10" and use Kona Solids in Lipstick, Snow and Black.

Friday, August 13, 2021

Olga Quilt Finish for a Brand-New Quilter + More Y-Seams for My Retro '80s Building Blocks Sampler

Part One: Yolanda's Very First Quilt!

Good morning and thank goodness it's Friday, everyone!  I haven't been blogging as frequently as usual because I've been busy, busy, busy.  My oldest son Lars just got home from working all summer as a camp counselor and he leaves to head back to college this Saturday.  My younger son Anders' 18th birthday is TODAY and he heads off to begin his adventures as a college freshman next Thursday.  I've been doing lots of laundry, birthday planning and college shopping for the boys to ensure they have everything they need for school.  

Of course, quilting has been happening, too -- I'm behind on a few quilts that I wanted to share with you, and today I want to show you this Olga quilt (a beginner quilting pattern from Tuesday Bassen, inspired by vintage Scandinavian textiles and available for purchase here) that I quilted for my client Yolanda.  The most amazing thing about this quilt is that it was made by a TOTAL beginner -- not only is this the first quilt that Yolanda has ever attempted, it's her very first project on her very first sewing machine.  She did an amazing job -- I would never in a million years have known that she was brand-new to sewing if she hadn't told me that when she dropped off her quilt top!

60 x 60 Olga Quilt with A Bit of Fun E2E

Yolanda requested a "simple meandering quilt design" for this throw quilt destined for sofa snuggling, and I suggested A Bit of Fun E2E, which combines a basic meander with loops for a playful counterpoint to the rigid geometry of the piecing lines.  

Wednesday, July 28, 2021

Happiness is an Eight-Pointed Star, and Y-Seams Are My Super Powers

If Prince Charming was a LeMoyne Star quilt block, then Wendy Welsh of Wendy's Quilts and More would be my Patchwork Fairy Godmother.  I am just ridiculously happy about how perfect this 10" eight-pointed star block turned out on my very first try, nice and flat and zero puckers in those Y-seams, and all this was accomplished without any seam ripping or swearing, thanks to Wendy's fabulous Hand Piecing 103 - 8 Pointed Stars video.

10 inch LeMoyne Star, Block 15 for my Retro '80s Sampler Quilt

In the original Moda Modern Building Blocks quilt, this Eight Pointed Star block (also known as LeMoyne Star, Lemon Star, and Puritan Star) was simplified to be more beginner-friendly by bisecting the 45 degree diamonds into half square triangles, eliminating the set-in seams as shown below:  

I prefer the cleaner look of the traditional block with the Y-seams for my own quilts, and I relish a good piecing challenge.  This is supposed to be a skill building project, after all!

I finished the partially-pieced block I shared in my last post (also with unnecessary simplification seams removed in favor of Y-seams) and that one came out pretty good, but I'm regretting using white thread because I can see little white thread dots at the center of the block.  I might redo that center bit with red or blue thread.

Block 12 Completed, 10 inches

Block 12 from the Moda Modern Quilt Blocks Sampler was first published as Mosaic #13 in the Ladies' Art Catalog #341, according to Barbara Brackman's Encyclopedia of Pieced Quilt Patterns, 3rd Ed.

Tuesday, July 27, 2021

Yes, I DO Remember How to Make a Quilt Block…. Back to My Retro ‘80s Building Blocks Sampler!

My mom came over to sew with me after church on Sunday, and I decided to get back to my languishing Retro ‘80s Building Blocks sampler (also known as Nanu! Nanu!).  I got one simple 5” block cut out and sewn together and another more complicated 10” block cut out and partially pieced before my mom called it quits and I decided to spend the rest of the afternoon playing with my spoiled rotten Rottweiler.

Block 12 in Progress, 10 inch Version With Y-Seams


My Retro '80s Building Blocks sampler is adapted from the Moda Modern Building Blocks Sampler that was released in 2014.  I changed the block sizes from multiples of 6" to multiples of 5" to get the size I wanted, which complicated cutting considerably since I no longer have "ruler-friendly" fractions for most blocks, substituted out a bunch of blocks, and have redrafted any blocks that Moda simplified because I'd rather sew Y-seams than have unnecessary seams bisecting all of my diamond patches.  The whole point of this sampler was to be a skill builder, after all.

Moda's Version of Block 12, 12 inches, with Easier Bisected Diamonds

Tuesday, January 19, 2021

Two More Retro Sampler Blocks Completed, and Fabric Crises Averted

 Hello and happy Tuesday!  This post needs to be a "quickie" because I have a dentist appointment to get ready for.  I like making these Tuesday To-Do lists, even if I don't always cross everything off before the next Tuesday rolls around.

Last week, I managed to eke out two more 5" sampler blocks for my '80s Retro Building Blocks sampler quilt:

5 Inch Puss In the Corner Block


Neither of these blocks is in the original Moda Modern Building Blocks quilt, by the way.  I always try to mention that in case anyone out there is working on that quilt, so as not to confuse anyone. Like most of the blocks in my quilt, these were both foundation paper pieced due to the non-ruler-friendly patch sizes that happen when you take a 6" block and force it down to 5".

5 Inch Card Trick Block


Meanwhile, my order of Kona Solids from Missouri Star Quilt Company DID arrive this past week, including the Ocean blue that I was needing so desperately, and I washed, dried and folded all of it.  I HATE prewashing fabric, but the only thing I hate more than prewashing fabric yardage is frantically trying to remove dye bleed from a finished quilt.  

Tuesday, January 12, 2021

Four More Blocks This Week for my Retro '80s Building Blocks Quilt

 Progress, y'all!!!  I've made four more blocks for my Retro Building Blocks sampler quilt this week.  New blocks are circled and numbered below.

16 Blocks Finished, 32 Yet To Be Made

I'm almost out of my Kona Ocean fabric until my order from Missouri Star shows up, so the most recent 5" blocks were selected because they could make use of the itty-bitty scraps I have on hand.  I'm at least partially using foundation paper piecing techniques for most of these blocks, but a few of the blocks I chose to mix require good old fashioned template cutting and fussy-fiddly piecing.  The orange and blue one numbered 4 in the photo above was one such block.