
Lest you think I've not been making any progress at all on my own projects, I have this block to show for myself:
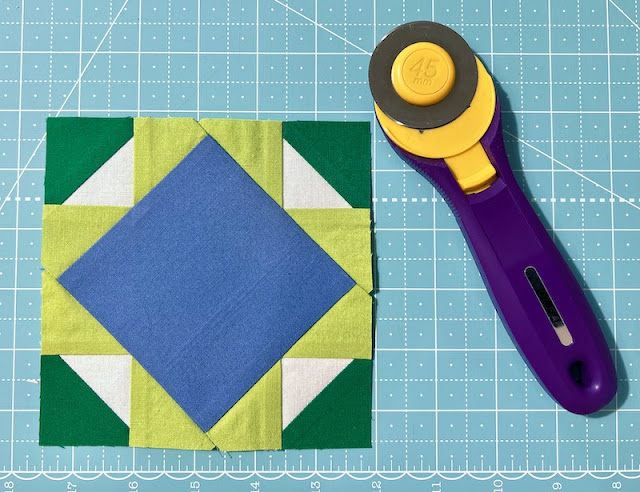 |
| Another 5 inch Block Completed for my Retro '80s Sampler |
I've actually finished several more 5" blocks for my Retro '80s Building Blocks sampler quilt besides this one -- I only have six left, plus borders and corner blocks. The photo below was taken a few weeks ago and doesn't show any of the new blocks. What it does show is my new, fancy-schmancy custom ironing table, built by my "Handy Husband":
Rebecca's Fancy-Schmancy Custom Ironing Table
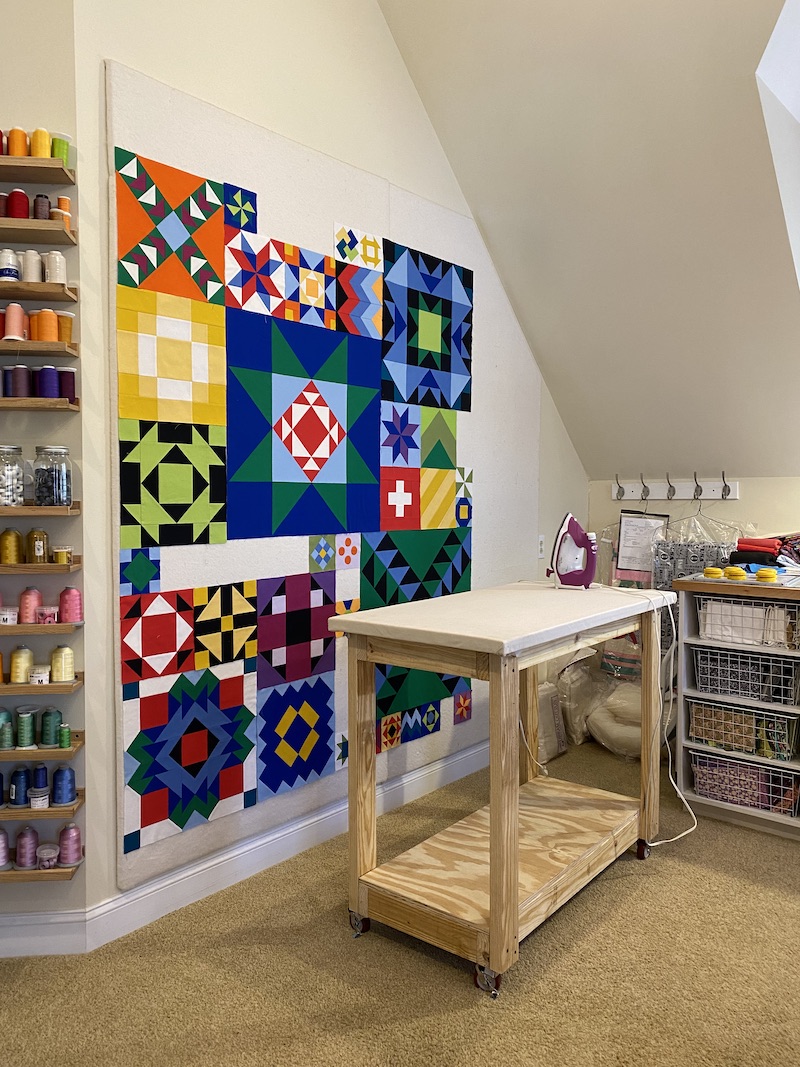 |
| 24 x 48 Custom Ironing Table |
I have been searching in vain for an ideal quilter's ironing board, and I finally talked my husband into building one to my specifications. Y'all, I am RIDICULOUSLY excited about my ironing table!
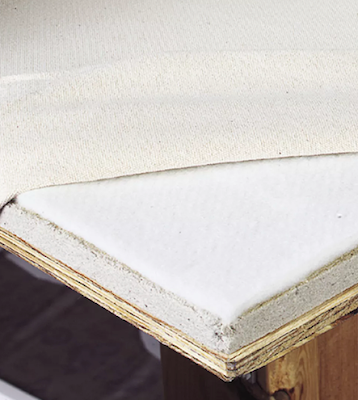 |
| Plywood, Pinnable Foam, Padding and Canvas Cover |
It's basically a miniature version of the worktables used in custom drapery workroom, and I got the materials and instructions from the Rowley Drapery Supply company. It's built of plywood topped with pinnable foam, then a layer of worktable padding (like a really thick quilt batting, not sure what the fiber content is but it can withstand moisture and high heat from a steam iron) and covered with heavy duty canvas wrapped tight over the surface and stapled to the underside of the table. When the canvas gets too worn or duty, I'll just rip it off and replace it with a new piece. The table is sturdy so it doesn't tip over, it has locking casters so I can move it around the studio easily, and the 24" x 48" rectangular surface is perfect for pressing full widths of quilting cotton. No more silly pointy-ended ironing boards in my studio!
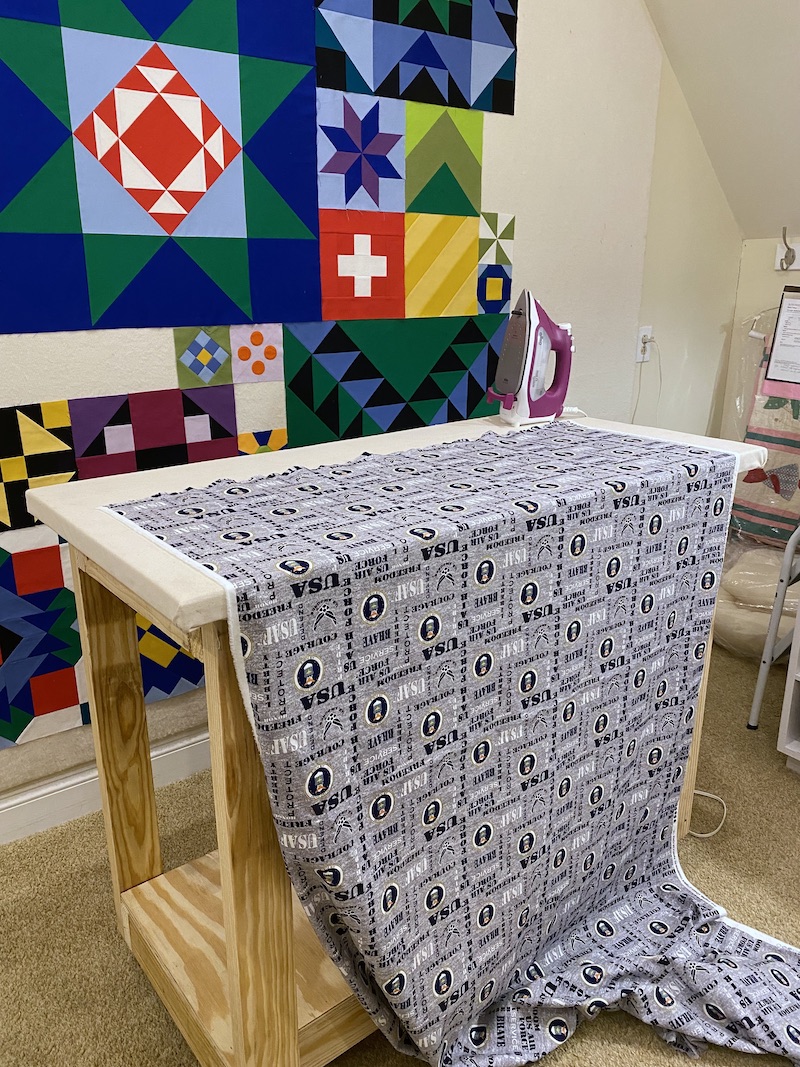 |
| Full 45 inch Width of Fabric Fits My 24 x 48 Ironing Table |
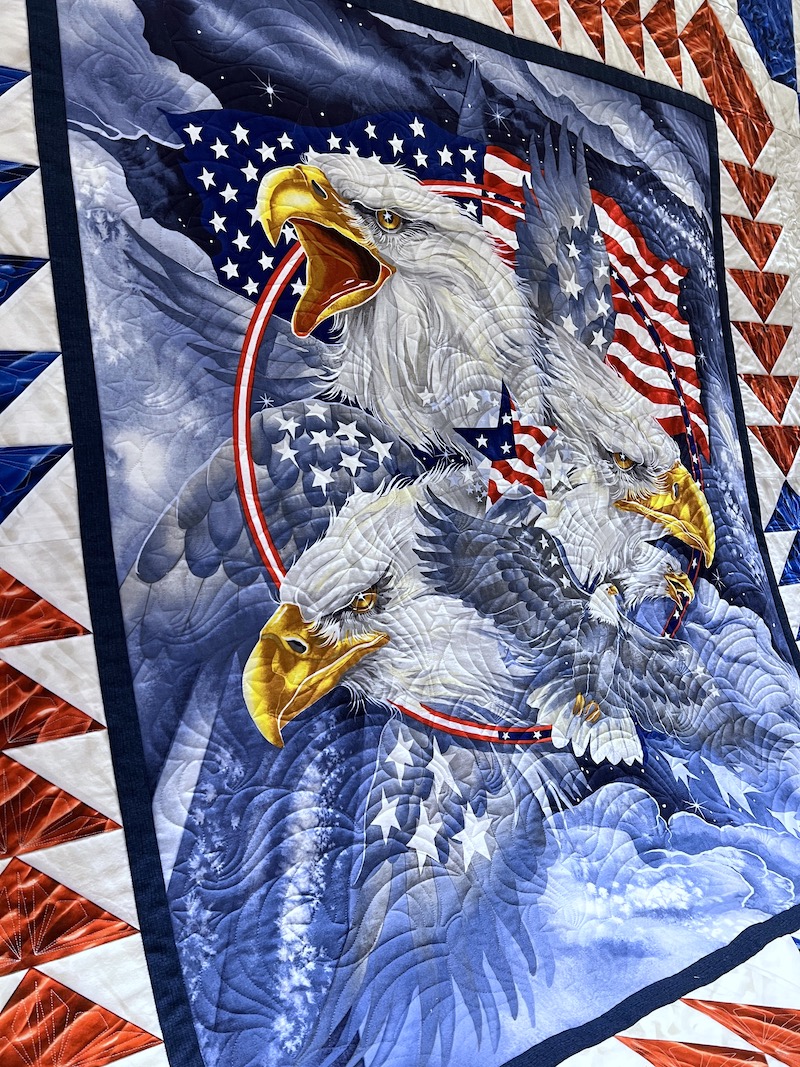
A Custom Quilt of Valor for Harold
The United States Air Force fabric I was pressing in the photo above was the backing for this very special Quilt of Valor made by my client Dianne for her husband Harold. Dianne and Harold came together to drop of the quilt top and to pick up the quilt when it was finished, and I enjoyed getting to know both of them and learn about Harold's adventures in the service of our country. When he retired from the Air Force, Harold had flown over fifteen thousand hours.
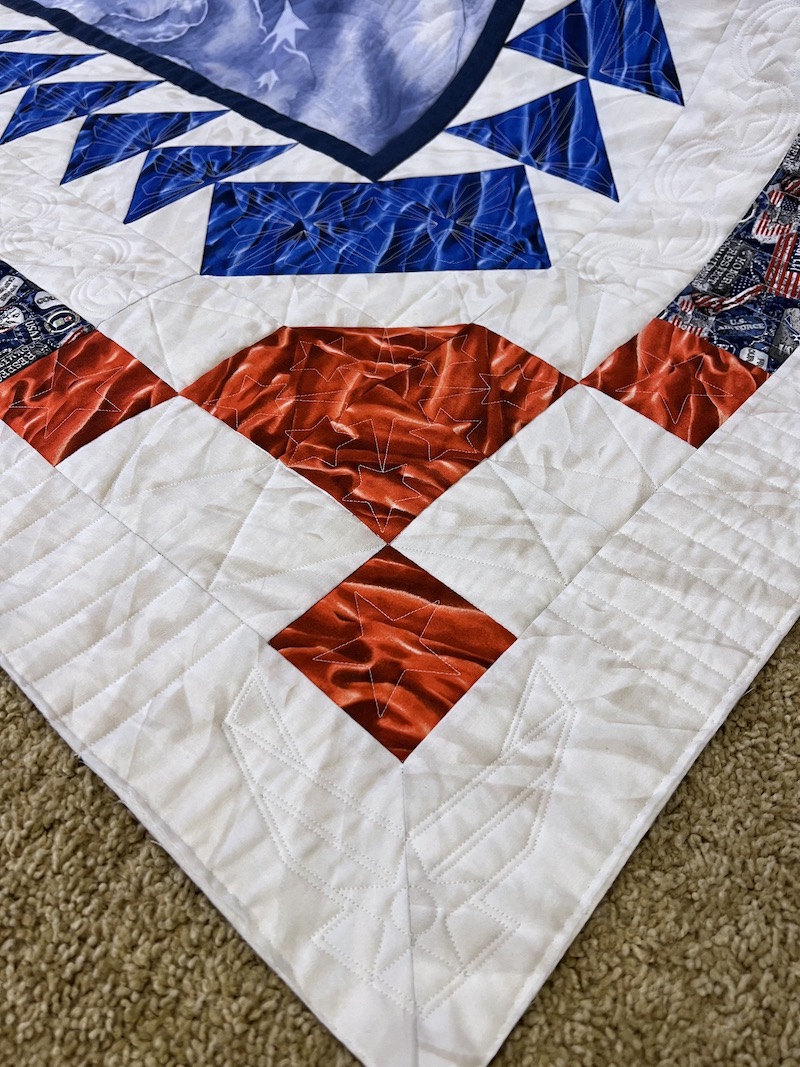
Dianne found this majestic eagle panel for Harold's quilt and framed it with flying geese borders that reminded me of fighter jets. I quilted the panel with Anne Bright's Scroll Stars B2B (Border to Border) design in Aurifil invisible nylon monofilament thread (affiliate link), to add texture and movement to the panel design without detracting from the image with thready "scribbles."
 |
| Scroll Stars B2B Design Stitched in Aurifil Invisible Thread |
I know not every quilter is a fan of invisible thread, but there is no other thread that would have disappeared so completely into both the white of the eagles' feathers as well as the inky navy background areas. I love how the Scroll Stars quilting design brings this panel to life -- isn't it cool how that star landed right above the eagle's eye in the photo below?
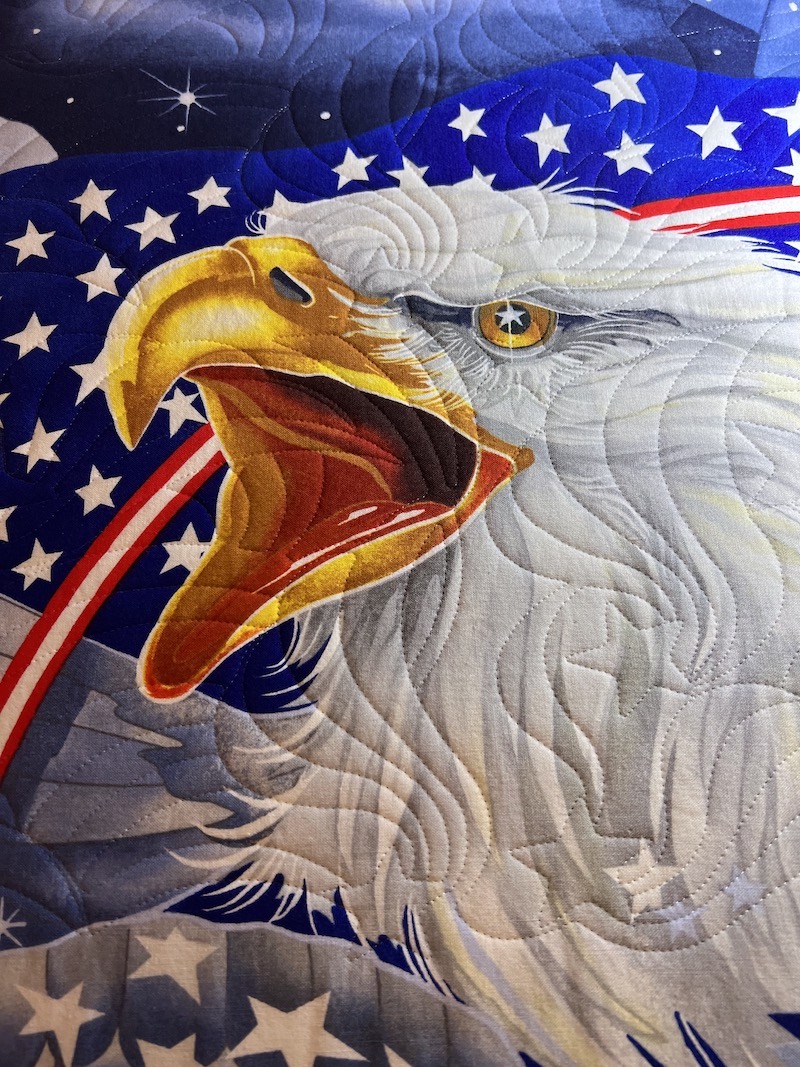 |
| Aurifil Invisible Thread Enhances the Panel With Subtle Texture |
For the flying geese border, I found a Karlee Porter design for the triangles that played up the idea that they are fighter jets flying in formation around the central panel.
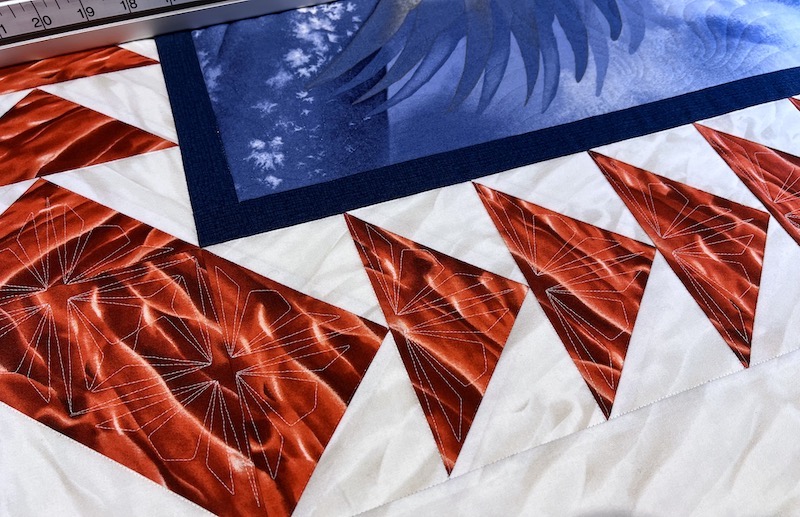 |
| Karlee Porter's Triangle 7 for Flying Geese |

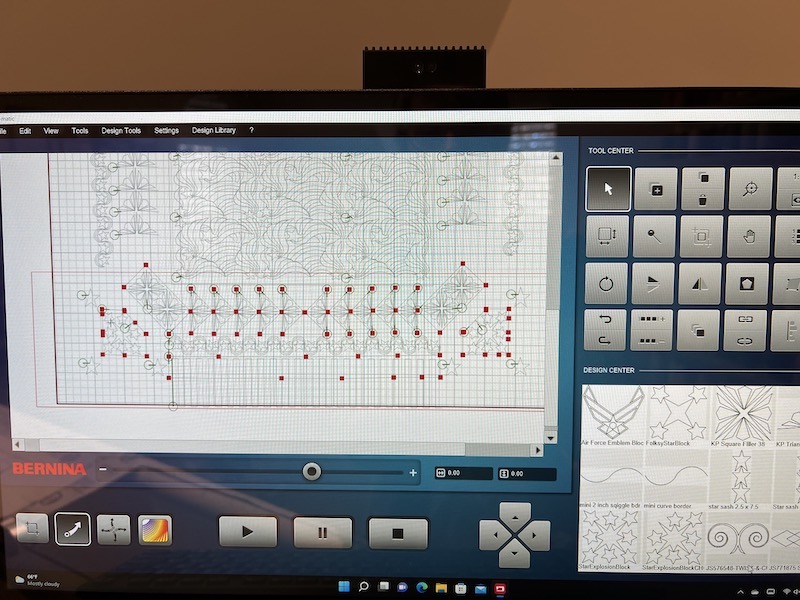 |
| Custom Quilting with Bernina Q-Matic, My Blind Quilting Assistant |
I used a separate digitizing software program called Art & Stitch to combine two of Karlee Porter's square block design for the corner rectangles:
 |
| Star Explosion Block (Modified) and Air Force Emblem, Both from Quiltable |
I also used Art & Stitch to edit the Star Explosion block (designed by Jen Eskridge for Quiltable) to fit the irregular pentagon patches. The Air Force Emblem was also sourced from Quiltable, and just needed to be resized and carefully positioned to fill the outer corners without encroaching into the binding seam.
Computer assisted custom quilting probably doesn't save much time over completely hand guided custom quilting. The biggest advantages of using the computer are that you don't have to make any markings on the fabric of the quilt (that may or may not come off afterwards) and that the computer can stitch the designs so precisely and repeat them identically throughout the quilt. There is still a tremendous amount of time involved in planning a custom quilt, sourcing and altering designs to fit, as well as actually stitching it all out.
Here's what this quilt looked like before quilting:
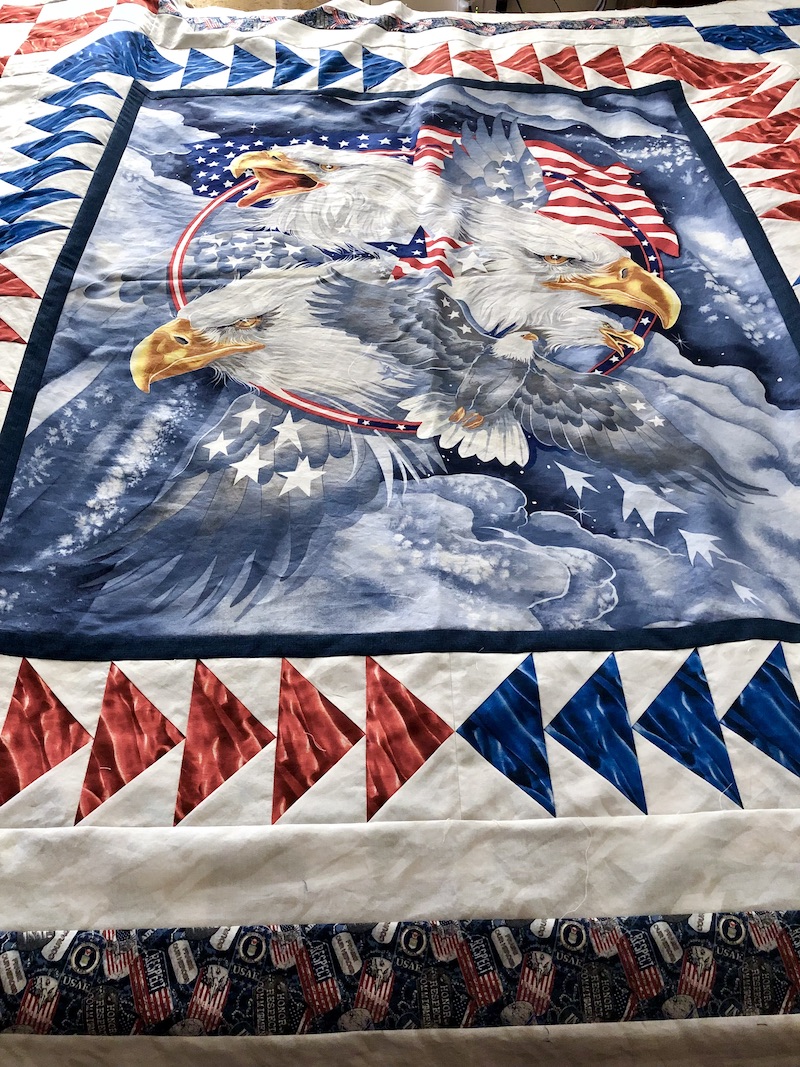 |
| Harold's QOV Before Quilting |
...And here's what it looked like when it was ready to go home:
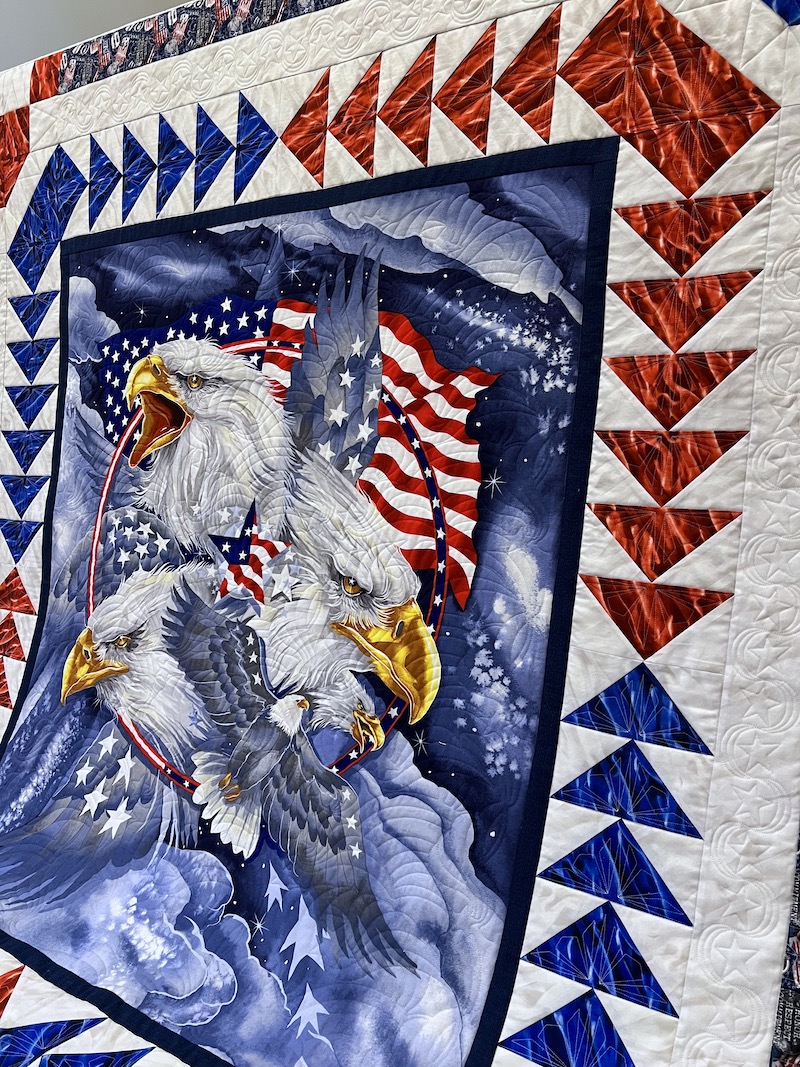 |
| Harold's 67 x 72 Quilt of Valor |
Thank you for choosing me to be a part of this very special quilt for you, Dianne and Harold, and thank you Harold for your service to our country!
This Week's Sewing Goals
So, what's next for me this week? I think I might actually finish the last blocks for my sampler quilt!
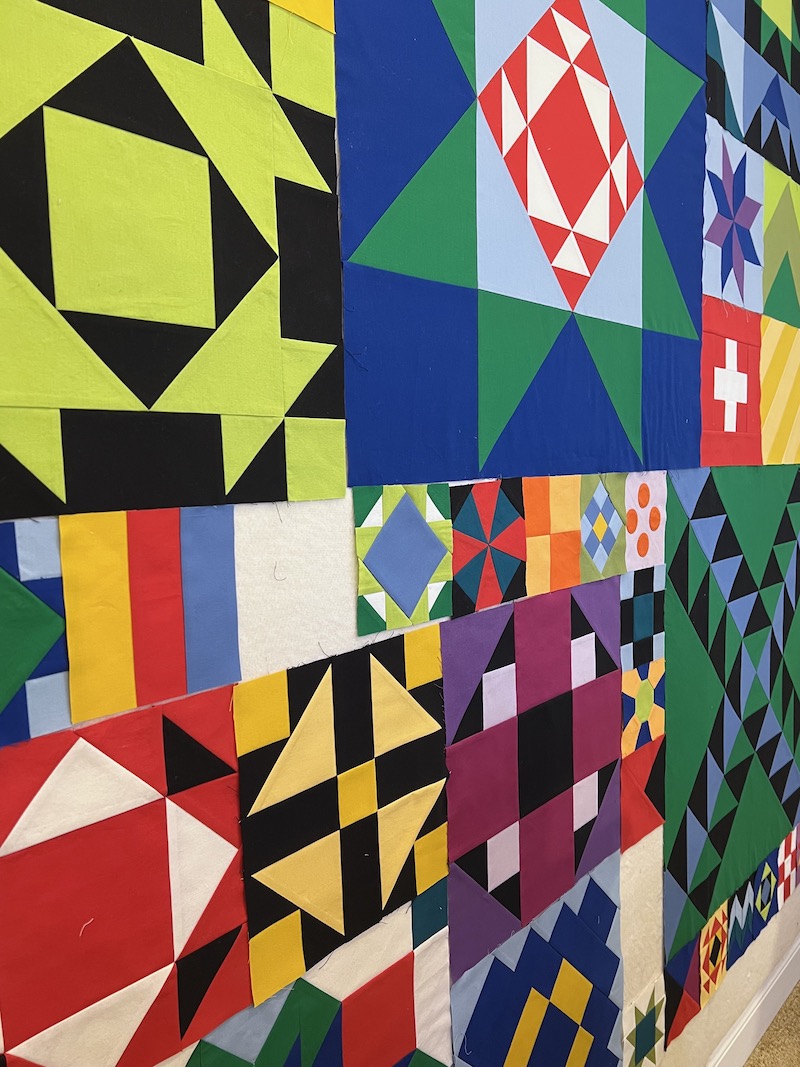 |
| Can You Spot the Newest Blocks? |
I've got a sewing play date planned with a friend on Tuesday and I'm hoping to get the last few blocks cut, prepped, and packed up with my Featherweight this afternoon. I'd like to move forward with the tulips for my FrankenWhiggish Rose appliqué blocks as well, but right now my cutting table is piled high with all the different Kona Solid fabrics I'm using in the sampler quilt.
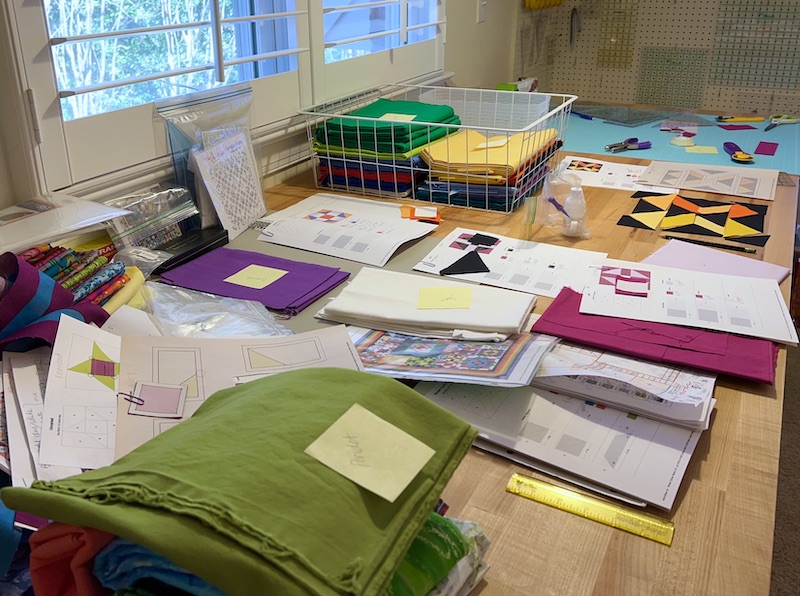 |
| Prepping the Final Blocks for FPP and Template Piecing |
Harold's quilt was the last custom quilt in my queue and I still have one last vintage restoration waiting for my attention that I'm hoping to wrap up by the end of the month. Going forward, I'll only be offering edge-to-edge quilting services for clients. That should help me predict turnaround time more accurately while also carving out a little more time for finishing up projects of my own.
Have a wonderful week, and happy quilting!
16 comments:
that is great to have the custom ironing board - I wish I had room for one like that. The quilt wall is looking wonderful - you must be almost done with it!
Oh yes, you can be very excited about your ironing table, I want the same!! Looks like there is a lot of room under to add baskets and boxes, a lot of storage possibilities! The new block is lovely, and your design wall looks fabulous. Et merci pour la leçon de quilting informatisé, c'est très intéressant de voir comment cela fonctionne.
Thank you for sharing, and linking up ;)
That custom quilting is GORGEOUS! WOW! You are going to love that ironing board every time you use it! Kudos to your hubby for being able to make what you "needed."
Wonderful new ironing station! You are lucky that your husband would make such a sturdy table for you! There is a local company in NH that makes them and I think I am getting one soon. You did a fabulous job on the custom quilting. I love doing it….but you are right it takes time. I need to use my designer software more, a resolution for me once I get through April.
Handy husbands are the best. The ironing table looks great, and the size is perfect! Enjoy! Nice work on the QOV quilt too - gorgeous quilting!
Three cheers for Handy Husband's pressing table creation, Rebecca, and a hearty round of applause for the spectacular quilting job you did on that QOV!!!
Your hubby did a fantastic job with your new ironing table. The QOV quilt is absolutely gorgeous - so much thought and time went into the quilting - fantastic job!! I am loving your sampler quilt. Looking forward to seeing the finish!
Wow! What a fabulous way to quilt that QOV quilt! I *love* the borders -- they really do give the impression of fighter jets. As for the ironing table, color me wildly jealous. ;) I simply don't have the space for something like that, but that little detail doesn't stop me drooling over yours! LOL!
I love your ironing station, your cheerful (and well organized) sewing room and your custom quilt for Harold. Those flying Geese do remind me of fighter jets. Perfect quilt and quilting!
I love your custom ironing table. I have an original "Big Board" brand ironing table. I started out with in over my ironing board like they show in their advertising. When I remodeled my sewing room, I invested in the rolling drawer supports specifically made for a Big Board by Tracey's Tables. I love my board! And now it's tall enough. My old ironing board was not adjustable. I know you will enjoy your board as much as I enjoy mine!
First of all, your quilting on this QOV is absolutely beautiful! You brought that panel to life. The flying geese are perfect as a border and your quilting kicked it up over the top. Well done! Secondly, I love your ironing station. How wonderful to be able to iron fabric opened up all the way. Thirdly, your new blocks for your quilt are so much fun. I'm looking forward to seeing this one together and it won't be long!
That custom ironing table is fantastic! My husband made a similar table for me that is my cutting table, and it doubles as my ironing table. I hope to have the space to have both in my sewing room at some point!
The QOV is absolutely stunning, and your thoughtful quilting just makes it a work of art. As little as I have quilted on the longarm in the few months I've had it, I marvel at the skill and planning it would take to do it by computer - I get it!
Thank you for linking your post to To Do Tuesday!
Love the quilting design on the QOV
I never thought I'd be suffering from ironing board envy! :-D What a great addition to your sewing room!
Thank you for the link to the ironing table supplies and directions. I have a batting and canvas covered plywood sheet sitting on my regular ironing board. It works, as long as I don't press too hard around the edges. And wheels and storage under would be lovely!
The QOV quilt is wonderful. I seem to go blank on what borders to use with the panels that I have.
Hi Rebecca, after reading your process, I'm not at all sad to be FMQ on my sewing machine! I actually got to FMQ small stuff and it was so much fun. Now I have to psyche myself up to do some really stitching on my son's Version 2.0! Your quilting is absolutely fabulous, and your ironing board is amazing. :-) Good luck on your projects - they seem to be coming along well. Have a great week.
Post a Comment