Showing posts with label Otto. Show all posts

Monday, January 6, 2020

Monday Updates: Spirit Song Quilt, Frankenwhiggish Applique, a New Fabric Shop, and a Puppy Portrait

Hello and happy Monday!  The "little one" (my 6' tall 16-year-old son) is back to high school today, but I still have my 19-year-old son home for a few more days before he heads back to college.  Now that it's Epiphany and Christmas has officially ended, Bernie is taking down our Christmas trees today.  I've been sewing 4" Birds in the Air blocks together over the weekend for my Spirit Song quilt (whose color palette was inspired by the contemporary choir dress code colors for which I never have anything to wear).

First 16 inch Block Sewn Together for Spirit Song Quilt
I'll need twelve of those 16" blocks in a 3 x 4 layout for this throw-sized quilt.  This is a total procrastination project, by the way.  I have no intended use or recipient in mind for this quilt. But, since it's Design Wall Monday, here are all of the blocks (before I started sewing them together) laid out on my design wall:

192 Four Inch Blocks on the Wall, Final Layout
Colors are weird in that photo because I took it late at night and then tried to correct shadows and yellow cast from incandescent lighting, etc.  But that's the photo that I printed out to use as a placement guide as I'm assembling the blocks into a quilt top.  

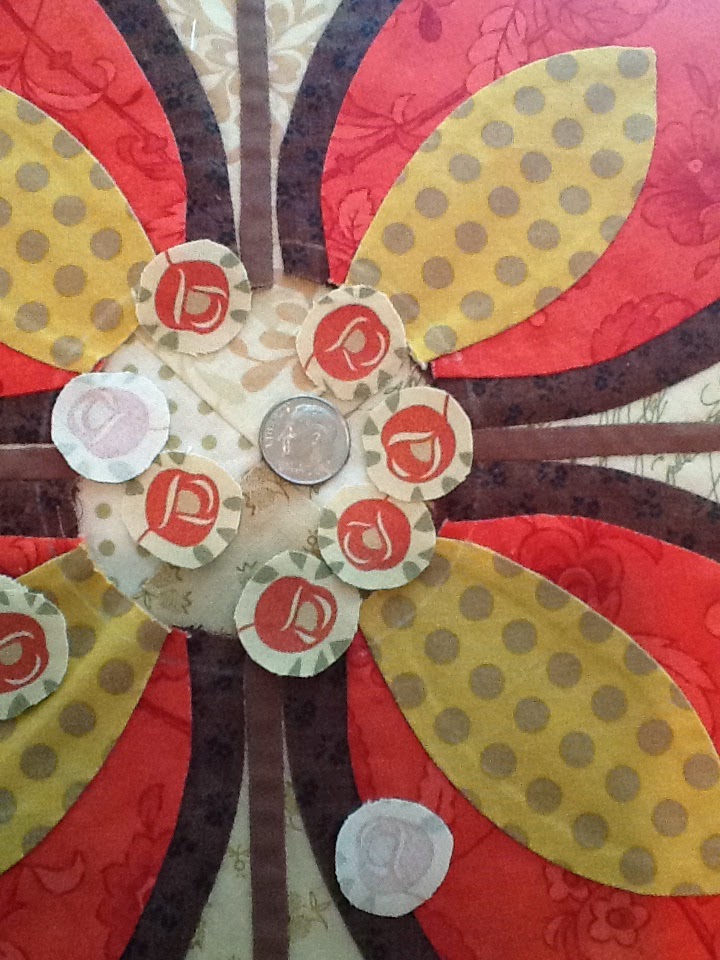
I'll be working on my never-ending Frankenwhiggish Rose needle turned applique project this afternoon with my SouthSide Stitchers Bee amigas.  I feel like I've been making little green leaves FOREVER...

Hand Stitching for Today's Sewcializing Bee
Colors in that photo are weird, too.  Here's the first completed block:

Block One of Nine for Frankenwhiggish Rose Quilt
Colors are more accurate in this photo.  I completed the first block in its entirety to see how I liked it, and then started making eight more identical blocks assembly-line style: all of the stems, all of the large petals, all of the circle centers, and now I've been bogged down with putting sixteen leaves on each block for aeons...  I am so looking forward to finishing the leaves and moving on to the reverse appliquéd tulips, stuffed berries, and broderie perse rosebuds at the center of each block!

One of my quilting friends and I checked out a new local shop yesterday afternoon, and I came home with some goodies:

Shopping Treasures from a New Local Shop, Stash Charlotte
The store is called Stash (located in the Plaza Midwood area, for those of you who are fellow Charlotteans), and they used to sell only yarn and knitting supplies until they were bought by new owners who decided to add fabrics and Janome sewing machines.  I found out about them at the Charlotte Quilters' Guild, because Stash is one of our sponsors for our upcoming March quilt show (they've donated a Janome sewing machine as a raffle prize) and I've been meaning to check them out ever since.  It turns out that they are the ONLY non-chain quilt shop near Charlotte that is open on a Sunday afternoon, a crucial piece of information that I will be storing away for sure...

Stash is a very small shop and they have a lot more yarn than fabric...  BUT...  the fabric that they do carry is an interesting mix with an aesthetic that I like, and the manufacturer names on the bolts were kind of off-the-beaten-track, not the same lines that are carried by other quilt shops in our area.  I noticed a few Japanese fabric companies that I've only seen in online shops before, and OH MY GOODNESS, y'all -- they carry LIBERTY OF LONDON!!!  I have eyed those fabrics online, but with a skeptical eye due to the higher price point.  Now, having seen the fabrics in person, I'm officially a groupie.  

Liberty's Strawberry Thief Print on Tana Lawn
The crisp clarity of Liberty's highly detailed prints reminds me of the magnificent (and stratospherically expensive) screen prints from Scalamandre.  And the cotton lawn fabric that Liberty prints on has the softest hand and drapes like silk charmeuse.  I know that Liberty is a favorite with quilters and crafters, but I'm thinking of using it for a light-as-a-feather blouse, skirt, or dress -- maybe in Spirit Song colors so I'll finally have something to wear to church!  :-). Wouldn't this fabric be luscious for a blouse like this one from the Danish pattern designer Personal Pattern?  

Blouse 4253 from Personal Pattern, available here

You might have noticed some yarn in that photo of my shopping treasures, too, even though I have never even considered learning to knit.  I picked two of the thinnest, most interesting variegated wool yarns because I couldn't stop petting and squeezing them like I was that crazy lady in the "Don't Squeeze the Charmin" commercial!  I'm planning to experiment with them in my bobbin with decorative machine stitches, and if that doesn't work, I'll play with them in my serger loopers, and if THAT doesn't work, well, I might have to sign up for a knitting class at Stash!

I have one final picture to share with you before I wrap up this post.  I have to show you what one of our pastors surprised me with after church yesterday.  He had seen my Facebook post about losing our dog Otto to cancer just before Christmas, and he painted this for us from one of my photos:

Painted by Drew Goodson, Associate Pastor at Christ Lutheran Church in Charlotte, NC
I was so overwhelmed.  I had no idea that Pastor Drew was gifted with artistic talent in addition to his gifts for ministry.  I so appreciate the outpouring of love and compassion from my blog readers as well.  Thank you all so very much.

Well, once again I've lost track of time while writing a "quick blog post" and I'm on the verge of being late for my sewing bee!  

Linking up today's post with:
·       Slow Sunday Stitching at http://kathysquilts.blogspot.com/  
·       Oh Scrap! at Quilting Is More Fun Than Housework http://quiltingismorefunthanhousework.blogspot.com
·       Design Wall Monday at Small Quilts and Doll Quilts  
·       Monday Making at Love Laugh Quilt
·       Moving it Forward at Em's Scrap Bag
·       BOMs Away Katie Mae Quilts  

Thursday, January 2, 2020

One Less Bell to Answer, One Less Egg to Fry, One Less Dog to Pick Up After... Saying Goodbye to Otto

I've been putting this post off for awhile now, but I might as well get it over with.  This post has nothing to do with sewing or quilting and everything to do with why I haven't been sewing or quilting lately.  

The canine love of our lives was a joyful, ball-chasing, howling-and-singing companion full of energy.  He followed along behind Bernie every time he mowed the lawn, as if the two of them were patrolling the yard together.  He slept at the foot of my bed, and I swear his gentle snore was the best sleep machine noise ever.  Whenever I started singing anything, especially anything in a minor key or anything with "Alleluia" in it, he'd sit up, wag his tail, and howl along with me like a canine Andrea Bocelli belting out his favorite aria.   


Our Sweet Otto, Jan. 5 2011 - Dec. 20 2019
At nearly 9 years old, Otto was the absolute picture of health at the beginning of December, except for a troubling limp that was getting worse instead of getting better, despite restricting his activity and giving him anti-inflammatory meds.  We took him to the vet on the Tuesday before Christmas for X-rays and were totally blindsided by a diagnosis of advanced osteosarcoma, an aggressive and very painful bone cancer with close to 100% mortality because it tends to metastasize before it's even diagnosed.  Our choices were to either amputate his affected leg and put him through chemotherapy, which would eliminate the tumor pain but only give him another 4-5 months, or manage his pain with medication for as long as possible, likely 1-3 months.  


Otto and Lulu Snuggling With My Son, Lars (Otto in Foreground)
Even with that awful news, we expected to have a few months to pamper and love on him.  I was researching his bone cancer online, ordering him special orthopedic beds from Orvis so he'd be more comfortable and getting recommendations for veterinary oncologists.  But I didn't even get a chance to take him to a specialist -- his initial diagnosis was on Tuesday, and by Thursday afternoon he was absolutely leveled with pain that was beyond control, with vomiting and bloody diarrhea and so extremely ill that there was nothing we could do for him but let him go on Friday.  My sweet, loving dog who wanted nothing more than to be glued to our sides, constantly supervising us and snuggling with us, was at the point that he was hiding beneath the deck steps at 3 AM in 20 degree weather, unable to pick up his head.  He wouldn't come in the house, he wouldn't/couldn't come when called.  And when we brought him back to the vet on Friday he was so severely dehydrated, low blood pressure, rapid heart rate, gums were pale and did not pink up when pressed, still having bright red bloody diarrhea, suffering so badly...  All of this happened only three days after receiving the bone cancer diagnosis, with a dog who had been full of playful puppy energy and joy up until that point.


Happy Boy Just a Few Months Ago, Visiting Lars at College

To say that it has been a sad couple of weeks for our family is such an understatement.  Even Otto's sister Lulu, our other Rottie, is grieving.  At first she seemed agitated after we took Otto away and didn't bring him home, and she would run to the door whenever someone came home like she was hoping they'd brought Otto with them.  Now she seems more depressed and anxious, even though we've been trying to give her lots of positive attention and distractions.  She won't play, she doesn't want to go outside except to go potty, and she's been licking at her forelegs a lot.  I got her some tasty chew bones for redirection and that's helping, but she's definitely affected as much as we are -- she and Otto were together since birth, she's never been an only dog before, and her personality is totally different now.

Lulu Snuggling with Lars's Feet on Christmas Morning
I just wanted to share some of my favorite Otto pictures and memories as a final goodbye to the best little choir dog and quilting supervisor ever:

My Sweet Baboo, Otto, Supervising Pineapple Log Cabin Quilt Construction
I loved it when Otto would hang out in my sewing room with me.  Such a cutie pie.

More Hanging Out With Mommy in the Studio
In the Studio With Me For the Last Time, The Day Before We Lost Him
Otto had three favorite humans on this planet: Me, my husband Bernie, and our oldest son Lars.  My younger son Anders and my mother were also in his "inner circle" of humans from whom love and kisses were tolerated.

Another Puppy Pic, Back When Bernie Could Still Scoop Him Up in His Arms

Snuggling With My Husband Bernie, In My Office.  Lulu on Left, Otto on Right
As ferociously as he could bark at would-be intruders and door-to-door salesmen, Otto was incredibly gentle and loving with family members.  He was such a snuggler!

Lars and Otto Had Such a Special Bond.
More Snuggling With Lars
On his last morning, once Bernie got Otto out from under the deck steps, he was able to get him into the garage where it was a little bit warmer, but he wouldn't come in the house and he was unwilling or unable to pick up his head, even when I started the car right next to him.    


When Otto Wouldn't Come In the House, Lars Came Out to the Garage
It's so strange not having Otto in my house anymore.  No howling when I sing.  No snoring in my bedroom.  No supervision in the quilting studio.  No furry friend appears in my kitchen, looking up at me with hopeful longing the instant I take out butter, chicken, or peanuts.  No one scratches the side of my desk chair impatiently to tell me "Enough computer -- time to throw my tennis ball!"  The worst is when I glance down at his favorite places where he used to lay and no one is there.


I Smell Butter.  Or Chicken.  Or Peanut Butter.
Raising this dog has been a wonderful experience that I would do again in a heartbeat, despite all of the challenges and inconveniences that come with owning a strong, powerful dog who is distrustful of strangers.  I wrote about my dogs the day we brought them home as 9-week-old puppies, I have shared their antics and adventures here over the years, and it seemed only fitting to give Otto a eulogy here on my blog.  

Selfie With Puppies On the Car Ride Home From the Breeder.  Otto on Left, Lulu on Right
Nine years was not nearly enough.  

No More Puppy Kisses For Me
Goodbye, my sweet Baboo!  We will never forget you.  

Friday, October 3, 2014

Meanwhile, Applique... and Dog Arias

Leaves Finished on Whig Rose Applique Block
I finished the last of the leaves on my Whig Rose block a few days ago.  This is my first needle turned applique project (the applique shapes for the Jingle BOM project had preturned edges, starched and pressed over heat resistant mylar templates).  As you may remember from this post, I was having trouble getting that curved edge of the leaves nice and smooth at first.  As usual, I'm learning new skills by reading a book -- in this case, I'm following the instructions in The Best Ever Applique Sampler by Becky Goldsmith and Linda Jenkins, a.k.a. Piece O'Cake Designs.  I contacted Becky Goldsmith via her web site and blog, and she was unbelievably generous and kind in helping me troubleshoot my Lumpy Leaf Dilemma.  You can read her wonderful suggestions on her blog here: http://pieceocakeblog.com/tag/curves/.  What helped me most was Becky's advice to work slowly and only worry about turning enough fabric for one stitch at a time on these tight outer curves.  I see a lot of improvement from that first leaf to the last leaf that I appliqued.

I'm still getting the hang of the whole vinyl overlay and pinning process.  With preturned edges, it was easy to use a lightbox with the pattern BENEATH my block to precisely position applique shapes and glue or pin them in place for stitching.  With needle turn applique, Piece O'Cake recommends tracing the pattern onto a clear vinyl overlay that you lay over your block and then carefully slide your shapes into position between the block fabric and the overlay, lining up the chalk lines on your applique shapes with the traced lines on your overlay, while using registration marks on the block fabric and overlay to keep everything straight and positioned properly.  I'm finding it difficult to do this as accurately as I would like it to be.  I get that, in nature, no two leaves are identical, but this is not a naturalistic applique design that I'm working on and for my purposes the goal is identical, perfectly symmetrical leaves and flowers. 

Evidence of Shape Shifting During Pinning
See how that one leaf shifted when I pinned it down and ended up touching the leaf below it?  If these leaves had preturned edges, that would have been much more obvious before I began stitching, but with the fabric allowance sticking out all the way around it was too late by the time I realized it.  My stitches are really tiny, which is good because you can't see them, but not so good if I have to pull them out with a seam ripper.  I'm not willing to risk accidentally cutting into the background fabric, so that leaf stays where it is.  What's next for this block?  The fussy-cut rosebuds that go around the center of the main flower!

Up Next: Rosebuds!
Another famous applique teacher and author has also gone out of her way to help me out.  Jeanne Sullivan, whose classes sell out faster than rock concerts, reached out to me in response to my post on the Applique Addicts Yahoo group.  I already had Jeanne's book, Simply Successful Applique, and she was kind enough to suggest that her prepared freezer paper template method would work well for these tiny shapes.  The difficulty I'm anticipating is in preserving the not-quite-round shape of the rosebuds without having them look lumpy and misshapen, like I tried to make them round and I just did a terrible job.  I also don't want the rosebuds to "shrink" when I turn them, but I can't let any of the off-white turning allowance show, either, because it would really stand out against the chocolate brown fabric to which these shapes will be applied.

This afternoon, Lars has a math tutor coming (don't ask) while Anders will be at church for his Youth Orchestra rehearsal.  I'm planning to set up my supplies on the kitchen counter so I can experiment with rosebuds while I eavesdrop on the tutoring session.

Anyone who has read through this entire boring post deserves a treat, so here you go: I made a recording yesterday of my three-year-old male Rottweiler puppy singing his favorite song, Mozart's Laudate Dominum aria.  Enjoy:


I'm linking up with Can I Get a Whoop Whoop Friday at Confessions of a Fabric Addict, because I think those leaves are definitely whoop-worthy.  Like I tell my son with regards to math (which we're not talking about here, because this is a happy place), being smart doesn't mean you automatically know how to do everything the first time you try it.  Your brain gets smarter every time you struggle with something that is NOT easy, and you keep working on it and ask for help if you need it and refuse to give up until you've learned how to do it.  Everything is difficult before it becomes easy!

Have a wonderful weekend!

Monday, April 15, 2013

A Puppy Portrait Plea and a Lederhosen Update

Proposed Formal Portrait of Otto

Now, how funny is that?  Bernie took some really great photos of our Rottweiler puppies the other day, and I just couldn't help myself...  I found some photos of oil portraits from my trip to the Louvre and used my design software to stick my puppies' heads in place of the people.


Proposed Formal Portrait of Lulu

This one is Lulu, my Puppy Princess Extraordinaire.  I think the hands would need to be replaced with paws, and the background might need to be lightened up a little so she doesn't blend into it and disappear.

My mother does some oil painting, and she painted a fantastic portrait of my sister's dog once from a photo.  If she loves me as much as she loves Janice, don't you think she should whip up these paintings of my sweet doggies as well?  After all, they are her grandpuppies.

I think it would be hysterical to hang large oil paintings of my dogs like this, in matching ornate frames, in my living room.  Did you hear that, Mother?  I would hang them in a PLACE OF HONOR IN MY HOME, where everyone would see them and marvel at your mastery.  Please please please please please...

And now, back to the lederhosen, which are almost actually finished.  I just need to sew on seven buttons and three buttonholes.  If I have time, I'll add that little knife pocket to the right side seam and maybe some decorations to make them extra-snazzy.  But even at this point, they are wearable with safety pins.  I think that all the top stitching with jeans thread helps to make them look more like leather, don't you?
Lederhosen Costume In Progress

These need to be finished TODAY, in time for rehearsal at 3:30 PM.  And they had just better fit the boy, because I can't really make any adjustments at this point and there isn't enough time to start over.  I used a strip of drapery buckram, trimmed to 2" wide, to stiffen the waistband, and I found some jute ribbon at Michael's to simulate the leather lacings at the sides.  I have some red and green felt that I'm thinking of using to recreate the effect of the oak leaf pocket design on Bernie's authentic lederhosen, as well:

Bernie's Real Lederhosen

We need to use the real lederhosen straps with our costume, and they are a hunter green embossed leather with red leather trim, like the decorative pockets, so I think that adding those red and green leaf pockets would help to make our brown lederhosen coordinate with the straps better.

Of course, nothing is getting done AT ALL as long as I sit at the computer, clickety-clacking away...


Tuesday, January 29, 2013

In Which Otto, My Rottweiler, Teaches Machine-Embroidered Applique on the Bernina 750QE


Otto Supervises Embroidery on the Bernina 750QE

So my Rottweiler has been doing a bit of embroidery with my new Bernina 750QE...  :-)  Otto was fascinated by the noises and movement of the embroidery module.  It was very cute.
 
I came up with an Inaugural Project to help me get to know the new sewbaby.  It's going to be a mini quilt, smaller than a place mat, with our last name appliqued in large capital letters. It's the I'm Too Cool for School Carpool Tag to replace the boring, laminated name tags that were distributed to us by the school.  After I do the machine-embroidered applique I'll add some borders, layer it with batting and backing so I can test out the BSR function with some free-motion quilting (maybe can incorporate one of the 2012 Free-Motion Quilting Challenges that I still need to complete).  Finally, I'll test out the dual feed feature when I attach the binding.  By the time it's finished, I should be pretty comfortable with my new sewing machine.

Applique 4 Alphabet from Embroidery Arts
I selected the Applique 4 monogram font from Embroidery Arts, and I combined the letters in my Artista Designer Embroidery Software, sizing the letters to completely fill the Mega Hoop (which I have owned for at least 7 years and have never taken out of the box!) and using the vertical alignment tool to fine-tune the spacing. 

Disclaimer: I am not what you'd call a frequent machine embroiderer.  In the past, my embroidery module has only come out every 6 months or so, for quilting "in the hoop" or a monogrammed baby blanket gift.  The actual embroidery process is very easy -- all you have to do is thread the machine, press the start button, and then clip the thread and rethread with the next color when prompted by your machine.  The tricky part of machine embroidery is getting your fabric into the hoop properly so that it is taught, but not stretched, correctly stabilized to support the density of your chosen embroidery design, and positioned in your hoop so that your design can stitch out exactly where you want it to go. 

See that pesky puckering?
I hooped my solid black, quilting weight cotton fabric with one layer of lightweight tearaway stabilizer, and noticed puckering around the very first letter as the design began to sew out.  Grr!  The puckering didn't look too severe, and I figured I could probably steam it out with the iron later, so I kept going.  I floated an additional layer of the tearaway stabilizer under the hoop for the last 3 letters of our name, and that almost completely eliminated the issue.  Yay!

Completed design.  Additional stabilizer was used with the "MPF" to eliminate puckering.  Not bad, right?
...Except, NOT yay.  It turns out that inadequate stabilizing was only part of the problem.  I must have stretched the snot out of my fabric when I hooped it, because once the embroidery was complete and I removed the hoop, the fabric relaxed and even MORE puckering appeared!  I was able to steam most of it away around the letters that had the additional layer of stabilizer, but the first two letters look pretty bad. 

Stretched In the Hoop -- See all those awful wrinkly puckers now that the hoop is removed?!
Could I "quilt this out?"  Maybe -- but the point of this whole project was supposed to be a learning exercise, so I'm decided to start over.  I'm not wild about how severe the lettering looks against the black background, anyway.  Puckers aside, I'm just not loving the combination of fabrics, thread color and font style.  I chose those fabrics based on the need for the name to be visible and legible from a distance, viewed through the windshield of my car -- but I think it ended up looking like a neon sign at night.  I didn't realize how heavy that satin-stitched edge was going to be.  The letters looked really cute in that fabric when I cut them out:

Pre-Cut Applique Letters, Prior to Stitching
So the next day, I tried again.  This time, I hooped my fabric along with TWO layers of OESD Clean and Tear tearaway stabilizer, and tried to be more careful about stretching.  I chose a red Eiffel Tower print for the background and a black and white stripe for the lettering.  This particular alphabet was inspired by the Art Nouveau artistic style that was very influential in Paris around the time when the Eiffel Tower was conceived and constructed for the 1889 and 1900 World Fairs, so it felt appropriate to pair them together. 

Second Attempt with 2 layers of OESD Clean & Tear
Still not perfect, but much better, don't you think?  I was really careful to keep my towers straight.  Also, I should mention that I printed out full-size templates of each applique letter from my embroidery software, then traced them (upside down!) to Wonder Under fusible web.  I cut each letter out as a rough square, fused that piece to a scrap of striped fabric -- carefully aligning the stripes -- and THEN carefully cut out each letter with a small, sharp scissors prior to starting the machine embroidered applique.  I took some photos of this process with the original applique fabric:

Lettering Traced BACKWARDS onto Fusible Web, then Fused to WS of Applique Fabric
That way, after the machine has sewn the placement line, I carefully remove the hoop from my machine, place it on my ironing board, positioned my pre-cut letter inside the stitched outline, and fuse it in place with my mini iron.  Once the letter has been fused in place precisely where it belongs, I reattach the hoop and the machine is ready to do the tackdown, underlay, and satin stitches with no additional fabric trimming required. 

The directions for machine embroidered applique designs usually call for putting an oversized scrap of fabric down over that placement line and trimming the excess fabric away in between the tackdown stitch and the satin stitch, but I think it would be a nightmare to try to cut these letters after they were already stitched down in the hoop.

See, I still have a bit of a wave at the edge of this piece, but it's much better than the first attempt and I think I can work with it.  I really, REALLY love the way the fabrics and font style work together.

Mega Hoop has TWO screws, not just one!
I should mention at this point that, when I was packing away my Mega Hoop, I noticed that it has TWO adjustment screws -- the one at the top left that I had been loosening and tightening to hoop my fabric (near the R), and ANOTHER adjustment screw at the lower right corner that I hadn't even noticed.  Did I mention that I've never used this hoop before?  Now I'm thinking that, if I had loosened BOTH screws the way I was supposed to, it would have been much easier to get the fabric into the hoop smooth and taut WITHOUT stretching it.  Note to self: the Mega Hoop has TWO SCREWS!

So, to sum things up: today I learned (again!) that I probably need more stabilizer for embroidery than I think I do, especially when I'm working with light weight fabrics and heavy satin-stitched designs.  I also learned that I need to loosen the outer hoop more (with BOTH screws) before I cram the inner hoop, fabric, and stabilizer into it so the fabric isn't stretched and distorted in the hooping process.  In fact, since I'm planning to quilt this piece anyway, I probably should have layered a thin cotton quilt batting between the fabric and stabilizers prior to hooping it -- the batting would have provided even more support for my embroidery design.

Next time I show you my Too Cool For School Carpool Tag, I'll probably be adding borders of some sort.  I haven't decided what I want them to look like yet.


Tuesday, April 17, 2012

Otto the Wonder Dog Warbles Like Whitney

Okay, so my dog doesn't actually sound at all like Whitney Houston, and neither do I.  Deep down, I know my dog is only joining in because he thinks I'm howling like a wolf, but I prefer to think that we understand one another on a deep, musical level that transcends the differences of our species.  Lulu, meanwhile, thinks we're both nuts.

And now, without further ado, I bring you Otto the Wonder Pup:

(you do have to suffer through listening to me sing the verse, however, because Otto doesn't really get into it until the refrain):


Today, I ignored the laundry, cleaned nothing and did not set foot in the sewing room.  Instead, I figured out how to make a video of my dog singing with me, which I then posted on YouTube.  I am feeling very tech-savvy.  Now all I need is a nice, hot latte and my day will be perfect!

Thursday, February 9, 2012

The Cone of Shame


My poor, sweet puppy has been crying piteously for days now, whimpering and snivelling about the injustice of The Cone of Shame. He finally went in for neutering last Friday (we waited until he was 13 months old for a number of health reasons). We tried just keeping a close eye on him for the first couple of days, but every time we turned our backs he went into turbo-crotch-licking-overdrive, so the e-collar we initially just put on at bed time is now tied around his big meatball of a head all day long. Today is the 6th day post-op and his discharge instructions say that he has to be prevented from licking for a minimum of 7 days after the surgery. So he staggers around the house, knocking down picture frames and crashing into door jambs, and makes sad puppy dog faces full of mournful reproach.

Just a couple more days, Otto, until we ditch that cone and get your Indestructible Dog Ball out in the yard for you again! Hang in there, buddy!