Showing posts with label Vintage Textiles. Show all posts

Sunday, January 16, 2022

The Velveteen Rabbit, Quilters' Edition: A Quilt Becomes Real, and Then Becomes Whole Again

Good morning, Quilty Peeps!  Instead of the "snowstorm" promised by the weatherman, I'm looking out my window at a sloppy mix of ice and sleet.  But at least the sky looks like winter even if the ground looks like a mess!  

On Becoming Real, from The Velveteen Rabbit

One of my favorite books when I was a child was The Velveteen Rabbit by Margery Williams, first published in 1922.  This year marks its 100th anniversary!  Reading the Skin Horse's description of how toys become Real, I realized that Becoming Real is exactly what happens to a treasured family quilt that has been loved and tattered until it's falling to pieces.  A quilt whose binding is worn through and falling off, with threadbare spots where the batting is coming out and split seams and holes and tears and stains "can't be ugly, except to people who don't understand."  Real is what happens to a quilt when someone loves it for a long, long time.  It's the Real quilts, the ones that have been truly loved, that their owners can't bear to part with no matter how shabby they have become.

Although I'm no longer accepting vintage quilts for repair, I still have a couple more waiting in my queue, like this one that I finished last night for a gentleman in Minnesota:  

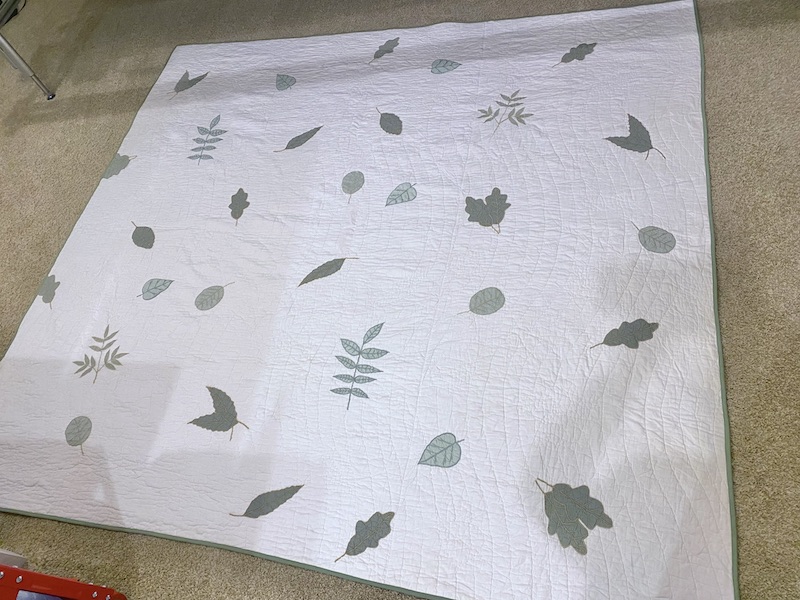
91 x 87 Vintage Quilt, After Repair/Restoration

Wednesday, March 31, 2021

Everything Old is New Again: EQ8 Design Inspiration From a Vintage Quilt

 Good morning!  Happy Passover to my Jewish friends, Happy Holy Week to my Christian friends, and Happy Spring to one and all!  In my house, my younger son has a half day of remote learning today and then he is off for a week of Spring break.  My older son is coming home from college tomorrow afternoon, and we are all going to attend a real, live, in-person worship service together for Easter Sunday, followed by Easter dinner with my mom.  I'm so excited; it's like seeing the light at the end of a very long, dark tunnel!  We had to sign up in advance to attend church services due to reduced capacity for social distancing, and we'll get our temperatures checked at the door and wear masks the whole time, but STILL.  ðŸ˜Š

My main focus project, Anders' high school graduation kaleidoscope quilt, is still on track, but I'm sure everyone's tired of looking at it right now and it isn't looking much different than the last time I showed it anyway.  I'm just working my way through row by row, sewing corner triangles onto blocks that you've already seen.  So I thought I'd show you something else today -- a client's vintage Economy quilt that is in my queue, awaiting repair.

62 x 80 Vintage Economy Quilt, Awaiting Repair


Don't you love how fresh and MODERN this antique/vintage quilt appears?  Other than its exceptional condition overall for a quilt that's probably 80-90 years old, what strikes me about this particular quilt is how it's a two color, pink and white quilt, but there's a subtle ombre effect from the use of at least three different shades of pink fabric, and the way the quilt maker distributed those three shades of pink in the block layout.  Secondly, what a cool quilting design!  It's similar to Baptist Fan, except that the design reverses direction in the center of the quilt to create a very modern-looking wave effect across the quilt top.  Also. the curved lines of quilting meet up with the rows above and below rather than touching the "fan" to the left as in a traditional Baptist Fan quilting design.  

Saturday, January 16, 2021

Textile Archaeology: Exploring a Vintage Quilt Through Dissection and Repair

 Yesterday morning, while drinking my latte, I read through a string of National Geographic articles about recently discovered hominid remains in the Rising Star cave system of South Africa.  On my giant desktop monitor, I clicked through slide shows of exploration scientists cramming themselves and their equipment into narrow channels of rock as they gingerly worked to free fragile, ancient fossils that would shed new light on our understanding of early human history.

Client's Vintage Summer Quilt, Prior to Repair

And then, I headed up to my studio, and began a delicate excavation of my own, the beginning of a vintage quilt repair that I'm undertaking on behalf of a client.  Although I've never thought about it this way before, I'm sure that a big part of what attracts me to these fraught and often tedious vintage quilt projects is the opportunity they afford for a bit of textile archaeology.  And yes -- that's actually a thing!  

"As fiber folk, we all know the feeling. You look at a handmade textile and you see not just a pretty object, but the hours at the loom or knitting needles, the fiber drafting at the wheel, the alchemy at the dye pot, even the shepherds with their flocks. You can see all the steps and decisions that went into creating that object, all the places where one path or another was chosen. Archaeologists are constantly trying to trace back those paths, to see those moments when a decision had to be made and why. The whys are how we learn about culture in the distant past."


         -- Christina Pappas, Textile Archaeologist 


Saturday, May 4, 2019

Vintage Quilt Resurrection Completed; Back to Lars's Mission Impossible Graduation Quilt (With Only Three Weeks to Go), and PROM 2019

I have a FINISH, you guys!  This is the vintage 1960s era family quilt that I rescued for a friend.  
Vintage Quilt Repaired and Quilted, Ready to Go Home

It was like an episode of This Old House where they start out planning to just update the kitchen of a 19th century home but then they find all kinds of problems hidden inside the walls...  There were definitely moments when I wasn't sure I could get this quilt back together again and had to walk away from it for a few days before I felt comfortable about how I was going to proceed.

I'm very sad that this next photo is out of focus, because it was the best picture that shows my greatest accomplishment with this project -- this quilt is now SQUARE, as in STRAIGHT sides and 90 DEGREE ANGLES at every corner!  


The Victory of Straight Sides and Square Corners
Squaring up the quilt top before quilting it was challenging, to say the least.  There are all different fiber contents from cottons to poly blends in the quilt top, with different weave densities, so some of the fabric patches had shrunk at drastically different rates from their neighboring patches over the years.  You know how quilters talk about quilt tops that have "C-cup blocks" here and there?  Well, this top had C-cups, D-cups, and a big maternity bump through the center.  I used the vertical channel locks to keep the sides of the quilt straight as I was advancing it, scooting the raw edges of the fabric in a LOT in the center of the quilt top despite how scary all that fullness looked, and I was seriously amazed that I was able to "quilt it out" with my loopy meander swirl.  So, even though I didn't fully understand why vertical and horizontal channel locks were a big deal when I was shopping for my longarm machine two years ago, I get it now and I am REALLY glad that I have electronic channel locks on my APQS Millennium machine!

The actual quilting went pretty fast.  I initially was going to partially float the quilt top since "they" say that gives you "more control" with a quilt top that isn't perfectly flat and square.  I pinned it to my quilt top roller but, try as I might, I was not able to get the top rolled up without the center of the quilt top stretching out wider than the top and bottom edges.  So I unrolled, unpinned, floated, and prayed...  

In this next photo, I've drawn around each of the patches that I added in yellow so you can see how extensive the repairs were:


Everything Outlined in Yellow is a Patch that I Added
As you can see, almost all of the patches had to be pieced together from multiple fabrics ahead of time to adequately cover the holes in the quilt top without being obvious later additions.  Because the original quilter had used most of her fabrics multiple times in the quilt top, I made sure to repeat my new fabrics and spread them around the quilt top as much as possible for a balanced look.  Several of my fabrics, such as the Kaffe Fassett and Tula Pink scraps, were bleached before using them to mellow their vivid hues and mimic half a century of fading.  I am really, really pleased with how well those patches blend in and disappear, especially after quilting and laundering.


Without the Yellow Outlines, Can You Spot My Repairs?
Here's a shot of what this quilt top looked like on my design wall after I'd separated it from its shredded backing fabric, polyester batting that was coming out through the holes, and the acrylic yarn ties that held it together at 4" intervals:


Quilt Top Separated from Original Batting and Backing, Prior to Repairs
And here's a shot of what the quilt looked like originally, in one of the good sections, with those original yarn ties:


Original Acrylic Yarn Ties in a Good Section of the Quilt
So, why did I quilt this instead of replicating the original yarn ties?  Several reasons.  Number one, I don't know how to tie a quilt with yarn in a way that would create tiny pom poms like this, and I'm not really interested in learning.  Actually, that's reason number two, because if I thought it was the best solution for the quilt I would have grumbled and complained but I would have figured out how to do it anyway.  The real reason this quilt is now quilted instead of tied is the fragility of the vintage fabrics in the quilt top.  I patched the worst places, but it was a balancing act -- if I replaced every piece of fabric that was seriously compromised by age and UV exposure, I'd have had to replace 80% of the quilt top and it would look like a completely different quilt when I was finished.  Yarn ties put a lot of stress on the quilt top fabric at each knot, and the proof of that is the many places in the quilt top where the yarn tie had ripped right through the quilt top fabric.  Quilting the layers together marries the fragile quilt top fabrics to the strength of the new batting and backing fabric better so it's impossible to grab hold of just the top layer accidentally all by itself.  The loops that I incorporated into my meander quilting were functional in that they helped to draw up excess fullness in the quilt top, but they were also a little nod to the original polka dot effect of the orange yarn ties.  I also saved all of the orange yarn knots when I cut them off, with the idea that they COULD be reattached by machine if the quilt's owner really missed them, like with a button sew-on tacking stitch or something.  I chose the orange binding fabric to maintain continuity with the original color scheme, and even though the new backing fabric is lavender instead of solid orange (the quilt's owner requested a different color backing), it has little orange dots that reminded me of the orange yarn ties:


Yarn Ties Saved in a Baggie; Label Embroidery Thread and Backing Fabric Chosen to Coordinate
I used the Liberty lettering font in my Bernina v8 embroidery software to digitize the label, with expanded font spacing to ensure the dates would be legible.  It's stitched in 100% cotton embroidery thread because the sheen of a polyester or rayon embroidery thread seeming like a jarring anachronism to me.  So, after appliquéing the label to one of the quilt corners, the only thing left to tackle was the binding.


Hand Stitched Binding Takes FOREVER

...And I ALWAYS underestimate how long "just need to add binding" actually takes me.  With this quilt, which was approximately 63" x 70" when I put it on the frame, I think it took me around eight hours to hand stitch the binding to the back side of the quilt, and that doesn't include the time it took to make the binding, machine stitch it to the front of the quilt, and join the ends of the binding together.  This quilt had hand stitched binding originally and it deserved to get hand stitched binding again, but I REALLY need to learn how to do a completely machine stitched binding for the many projects that deserve to be finished but fall short of being heirlooms, you know what I mean?  

If you have a favorite machine stitched binding technique, please share a link to a tutorial, video, or book in the comments so I can try it next time!


Removing the Original Hand Stitched Binding, Backing and Batting Prior to Repairs
This quilt will be returned to its owner at church on Sunday morning (we both sing in the choir).  I really, REALLY hope she likes it.  It is a scary thing to take a scissor and a rotary cutter to someone else's family treasure, and there's definitely no putting it back the way it was!

My One Monthly Goal for April was to finish my son Lars's Mission Impossible graduation quilt top and to get this vintage quilt top quilted, both of which I managed to accomplish by the end of April.  I am finally getting the hang of this Setting Reasonable Goals thing!


My OMG for May is to Complete Lars's Graduation Quilt by the May 26th Deadline


My EQ8 Rendering of Lars's Mission Impossible Graduation Quilt
So now my OMG (One Monthly Goal) for May is to get Lars's Mission Impossible quilt 100% completed no later than the May 26th deadline.  Our church is doing a big graduation blessing sendoff service for all of the high school graduates on June 9th where they process into the church in their caps and gowns during a slideshow on the big screens of their baby pictures and graduation pictures, and then each graduate's parents wrap him or her in a quilt and lay hands on them for a blessing, and all of the moms and grandmoms are weeping and the men are pretending they have something stuck in their eye...  But the pastors and staff members pile all of these quilts in the middle of their conference table and pray over them and bless them ahead of time at their staff meeting, and this is why I have a hard deadline of May 26th to get the quilt finished and dropped off at the church office.


My Most Recent Photo of the Actual Quilt Top, Still In Sections
I finished assembling the quilt top at 3 AM and all of my helpers were asleep, so I didn't get a photo of the finished top before I folded it up and hung it in the Quilt Purgatory Closet.  But the top is done, ready to quilt.

Having been recently reminded that hand stitching the binding on a quilt this size is likely to take me the better part of a week, I really only have two weeks to get this quilt loaded, quilted, and off the frame...  

Meanwhile, the intended recipient of this quilt is off enjoying his prom tonight:


My Lars-of-Ours With His Lovely Prom Date, Corinne

My Lars-of-Our With His Parents, Who Are Trying to Figure Out How 18 Years Went By So Fast
I'm linking up with:  

FRIDAY

·      Whoop Whoop Fridays at www.confessionsofafabricaddict.blogspot.com
·      Finished Or Not Friday at http://busyhandsquilts.blogspot.com/
·      TGIFF Thank Goodness It’s Finished Friday, rotates, schedule found here: http://tgiffriday.blogspot.ca/p/hosting-tgiff.html  
-->
·      One Monthly Goal at Elm Street Quilts: http://www.elmstreetquilts.com/

MONDAY

·      Design Wall Monday at Small Quilts and Doll Quilts http://smallquiltsanddollquilts.blogspot.com 
·      Main Crush Monday at Cooking Up Quilts http://www.cookingupquilts.com/
·      Monday Making at Love Laugh Quilt http://lovelaughquilt.blogspot.com/
·      Moving it Forward at Em’s Scrap Bag: http://emsscrapbag.blogspot.com.au/
·      BOMs Away at Katie Mae Quilts: https://www.katiemaequilts.com/blog/ 

TUESDAY

·      Colour and Inspiration Tuesday at http://www.cleverchameleon.com.au
·       To-Do Tuesday at Stitch ALL the Things: http://stitchallthethings.com

Tuesday, April 9, 2019

Vintage Quilt Repair + Mission Impossible: To-Do On Tuesday

Good morning!  I am astonished to report that, not only did I reach last Tuesday's weekly goal of completing half (24) of the blocks for Lars's Mission Impossible graduation quilt, but my mom and I got ALL 48 blocks done last week.  Woo-hoo!  They are all laid out on my design wall now, waiting to be sewn together.  


Mission Impossible: All Forty-Eight 12 inch Blocks Complete!

I just have a few decisions to mull first, such as:

  1. Am I going to sew these blocks into rows next, or will I sew sets of four 12" blocks together into 24" blocks first, 12 "X" blocks and 4 "O" blocks?  If I make them into 24" blocks first I think I stand a better chance of sewing them together in the right direction, avoiding the dreaded seam ripper...
  2. I need to work out a pressing plan for the seam allowances
  3. I need to figure out how to remove that extra purple fabric from the corners of these blocks where it's all in the seam allowance

But while I'm pondering those things, I took a little detour and went back to that vintage quilt repair that I'm undertaking for a friend.  I had my 'Nina 750QE all set up for invisible machine appliqué piecing from the inside curves on those flying geese blocks, and that's the same technique I wanted to use to patch the vintage quilt.  All I needed to do was switch from the Smoke monofilament to Clear monofilament.


Vintage Quilt Top with Backing, Batting, and Yarn Ties Removed

Here's what I know about this quilt.  It was made by the grandmother of my friend (who is about to become a grandmother herself in a few months), and my friend's husband remembers seeing it in her parents' house before they were married.  Those are the only facts I know so far, but I've asked their daughter to try to find out more so I can make a label from the quilt when I've finished repairing/resurrecting it.


Exploratory Surgery: Removing the Shredded Orange Binding, Backing, and Polyester Batting
As I began taking the quilt apart, I realized that the fabrics of the quilt top were faded and weakened from UV exposure -- my friend had been using it as a picnic blanket under the Carolina sun for many years.  See how much more vibrant that paisley print is where it was covered by the binding fabric?


See How Vibrant That Pink Used to Be, Under the Binding?

I wish I'd taken pictures of this quilt front and back when I first got my hands on it at the beginning of February.  The bright orange backing fabric was shredding, hanging off the back of the quilt like ribbons, and exposing large sections of batting.  The front of the quilt had several large holes where fabric was shredding and disintegrating across multiple fabric patches.  


One of the Worst Holes, Located Near the Center of the Quilt Top
The original quilter had tied the quilt with yarn at 4" intervals rather than quilting the layers together, so I went into this with the idea that I would remove the binding and snip the yarn ties to separate the quilt layers, patch those large holes, and then layer the top with new batting and backing and machine quilt it on the longarm.  I did not even consider tying it with yarn again because the fabrics are so weak and the yarn ties were putting too much stress on the fabrics.  In several places, the knot of yarn had ripped right through the quilt top.  I think that quilting stitches will do a better job of marrying the top to the new batting and backing so they function as one, allowing the fragile quilt top to benefit from the strength and stability of the other quilt layers.


Original Yarn Ties in a Good Section of the Quilt, Spaced 4 inches Apart
One more surprise challenge was the construction of the quilt top itself.  There was a base or foundation layer comprised of several different white fabrics that appear to cut from cast-off garments and linens.  Like the quilt top, the base layer fabrics are different weights, different weaves, some cotton and some synthetic blends, and the quilter did not bother to remove seams and hems from these pieces before sewing them into the quilt.  Upon initial inspection of this quilt, I'd planned to leave the base layer intact, but once I got the quilt apart I discovered that the foundation was not salvageable.  It was badly shredding, those bulky seams and hems hidden beneath the quilt top could cause problems for machine quilting, but the kiss of death was the realization that the assorted fabrics in the base layer had shrunk at different rates from one another and at different rates from the fabrics in the quilt top.  It was all pleated and puckered where it wasn't shredding, making it impossible for the quilt top to lay as flat as it could without the backing.  Oh, and the WEIGHT of the base layer was making it difficult for me to handle the quilt top for repair without ripping it.  


Pieced Foundations Semi-Attached to Quilt Top
The construction method was kind of haphazard, with the quilt top fabrics pieced together in a random fashion similar to the improvisational piecing of today's modern quilters, and then those sections of pieced fabrics were sewn to the foundation fabrics only intermittently, with gaps of up to 14" between stitching lines that held the quilt top to the foundation.  However, some -- but not all -- of those seams were holding the quilt top patches together as well as attaching the to the foundation.  So, over a period of several days, I carefully snipped away the foundation fabric between stitching lines, using my duck billed appliqué scissors to avoid accidentally snipping into the quilt top.  There are also quite a lot of hand stitched repairs to the quilt top made by my friend that go through the foundation fabric as well, and I felt that those stitches were part of the quilt's history that needed to remain so I cut around those stitches as well.


Carefully Snipping Away the Foundation Fabric Along the Seam Lines
And of course, historian and vintage textile lover that I am, the whole time I'm working on this I'm trying to pin down an approximate date for when the quilt was made.  The number one rule of dating a quilt is that a quilt cannot be older than the youngest fabric in the quilt, and this one had polyester batting and polyester-blend fabrics.  I know that polyester fabrics were introduced to the market after World War II, but I have not been able to find out when polyester quilt batting was first sold.  If anyone knows, please let me know in the comments!

As for the colors and print patterns in the quilt top, those are telling me 1960s or 1970s, especially when I consider how much wilder and brighter all of the colors would have been before the fabrics faded.  I'm also factoring in what I know about the history of quiltmaking in the United States in the 20th century.  Quilting fell out of vogue post WWII with the growth of consumerism, readily available and affordable commercially made bedding, and people associating patchwork quilting with the hard times and "making do" of the Depression and war years.  Some of the older quilters continued making traditional quilts for pleasure, but this particular quilt doesn't mesh with styles that were popular with quilters in the 1950s and it's free-form construction and lack of uniform seam allowances suggest to me that this was made by someone who was new to quilting, someone who had not been taught by previous generations, someone who was figuring it out as she went along.  I feel like this quilt belongs somewhere in the Quilt Revival of the late 1960s-1970s...  EXCEPT...  My friend said her grandmother made this quilt, not her mother, and that detail makes me lean towards an earlier date (1960s) versus a later date (circa Bicentennial quilt revival in the mid 1970s).  Also, while the construction of the top suggests a beginner quiltmaker, the yarn ties were precisely spaced in a 4" grid with knots that held the test of time, and the double-fold binding was neatly and skillfully finished by hand.  I did ask the great-granddaughter to try to find out which grandma made this quilt, where/when she lived etc., and I'll be interested to learn how accurate my quilt sleuthing has been.

Y'all, if you are still out there making quilts without labeling them, you are going to drive people like me NUTS in the future!!  


Seriously, though -- this quilt is an example of the best destiny a quilter could ever wish for his or her quilts.  It has been handed down from generation to generation, literally loved to pieces, and the quilter's granddaughter still can't bear to throw it out because this quilt is a connection to a grandmother's love long after the grandmother is gone.  But, without a label, the next generation is not going to know who made this quilt or why it's special.  PUT A LABEL ON YOUR QUILTS, people!  It doesn't need to be fancy!  Just "Made by Sally Johnson Smith, Anytown, U.S.A., 2019."  Scrawl it in the corner with a Pigma Micron fine tipped permanent in pen and be done with it!  Your great-great-grandbabies will thank you for it.  :-)

So, back to my repair process.  Having a rough idea of when the quilt was made has guided me in selecting prints from my stash.  This is all about sentimental value, so I'm trying to make myself as invisible as possible in the repairs -- I want it to still look like grandma's quilt when I'm done with it, not Rebecca's version of grandma's quilt, you know what I mean?  I want my repairs to blend in.  I've bleached most of my patch fabrics because the ones in my stash that have the right 60's-'70s vibe have colors that are way too vibrant to blend with the faded original fabrics:

Scraps from my Pineapple Quilt Backing, Before and After Bleaching
Scraps of Tula Pink from my Disco Kitties Quilt, Before and After Bleaching
For those really big holes in the quilt top, I randomly pieced some odd-shaped scraps together first and then appliquéd them over the damaged section of the quilt top.  It was challenging for me to abandon straight lines and right angles in order to create a patch that didn't look like an obvious later addition.

Damaged Section Before Repair
I am just smoothing the quilt top over my ironing board, getting it as flat and smooth as possible, and then laying my patchwork patch over the damaged section, trying to match the edge of my patch to a seam line wherever possible.  I am turning the seam allowance under by hand, without measuring, deliberately making it a little wonky, and then flattening it with the steam iron.  When I'm satisfied with the patch and its position on the quilt top, I secure it with a bead of Roxanne's Glue Baste-It just along the edges and hit it with the iron again to dry the glue.  

My New Patchwork Section Positioned and Glue Basted In Place On the Ironing Board

And then I machine stitch the patch in place the very same way I was doing the invisible machine applique stitch to secure the inner curve on my geese blocks.  

Appliquéing my Patch to the Quilt Top with Clear Monofilament Thread
Now, I know what y'all are thinking -- your eagle eyes have spotted Tula Pink and Kaffe Fassett prints and you are judging me for putting such hallmark 2018 fabrics into a circa 1965-1979 quilt top.  Well, I feel like Kaffe's and Tula's prints have a heavy 60s-70s influence that works with the other prints, and they bring back some of the life and zing that the original fabrics have lost to fading.  They would also help a future quilt historian to easily date when the repairs were done, in the even that my new label falls off (or if I'm not able to get enough information to make a label).  But I selected the musical notation fabric and the disco kitty specifically with the quilt's current owner in mind, because she is an amazing (like EARTH-SHATTERINGLY amazing) singer and cat-lover who was recently deprived of a kitten under dubious circumstances.  So the kitty stays!

This Was the Other Really Bad Hole in the Center of the Quilt Top
Appliquéing My New Patchwork Section Over the Damaged Area
For the repair shown above, I bleached the coral floral print fabric and the Kaffe Fassett print on the right, but did not bleach the little schoolhouse print or the jelly roll strip of lavender Kona Solid.  

Back Side After Stitching Repair, Prior to Trimming

 After stitching, I flip the top over and carefully snip away the damaged portion of the quilt top beneath my repair.

After Trimming Away Damaged Section Beneath Repair

My invisible machine appliqué stitch is similar to a blind hem, but it's actually a tweaked Vari-Overlock stitch with a very narrow swing bite and tiny, short straight stitches between the zigzag.  Although I'm using clear monofilament thread in the needle, I've wound a medium beige 60 weight Mettler cotton embroidery thread in my bobbin, so you can see what my stitch looks like on the back of the quilt top - it's that jaggedy brownish zigzag.

See How Nicely That Repaired Section Blends Into the Quilt Top?

I Think the Kitty Cat Looks Pretty Good, Too
Yes, the kitty cat draws attention because he's a cutie, but I don't think my REPAIR is obvious in that section of the quilt so I'm pleased with it.  I

So now that I've taken care of the sections of the quilt top with the most severe damage, I'm sewing open seams closed where I find them and patching smaller holes.  There are a number of places where the quilt top fabrics have torn right along the seam lines and smaller holes sprinkled throughout the quilt.  It has to be a balancing act -- there are so many fabrics in this top that are worn to the point that you can see through them, but if I replaced ALL of them it would change the quilt top to the point that it would no longer be recognizable as the same quilt.  Remember that I'm already changing the backing and binding fabric and I'll be quilting it instead of tying it with yarn again -- those are big enough changes.  So I'm just going to focus on the most severely damaged areas, fixing the worst hole and then the next-worse hole and so on until it gets the the point where the top can be successfully quilted.

And so, my To-Do On Tuesday Goals for this week are:


  1. Complete repairs on Vintage Quilt Top
  2. Assemble Mission Impossible Blocks into Finished Quilt Top
  3. Load Vintage Quilt Top for Longarm Quilting
  4. Watch Judi Madsen's iQuilt Classes in Preparation for Paducah Quilt Week Classes
I'm linking today's post up with:

TUESDAY

·      Colour and Inspiration Tuesday at http://www.cleverchameleon.com.au
·       To-Do Tuesday at Stitch ALL the Things: http://stitchallthethings.com

WEDNESDAY

·      Midweek Makers at www.quiltfabrication.com/
·      WOW WIP on Wednesday at www.estheraliu.blogspot.com

THURSDAY

Needle and Thread Thursday at http://www.myquiltinfatuation.blogspot.com/