|
| Because a Needle and Thread Feel Good, and Sticky Glue All Over a Hot Iron Feels Bad |
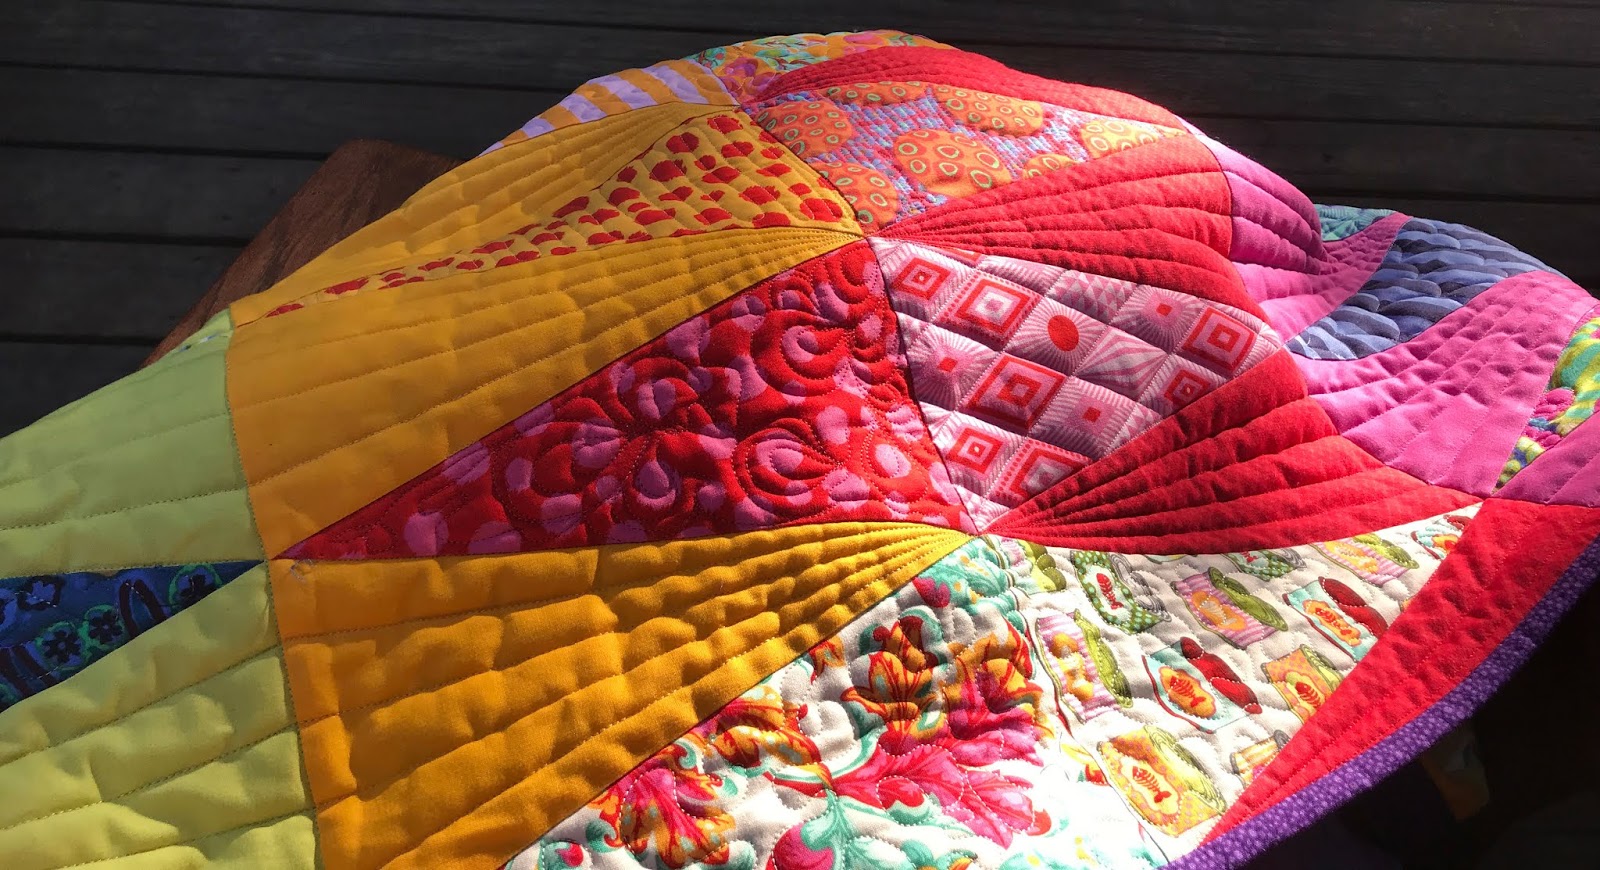
Well, folks -- I had lofty intentions of binding this quilt entirely by machine yesterday using one or more of the glue basted binding tutorials that are floating around out there. As you can see, I abandoned that adventure, carried my not-quite-finished quilt out to the deck, and started stitching the binding down to the back by hand with my trusty size 11 Bohin applique needle and Aurifil Mako 50/2 cotton thread. *AHHHH!!*
 |
| Look How It Glows In the Late Afternoon Sun! |
Can you hear the birdies chirping in the background? I love how the colors glow in the late afternoon sunlight like a fiery sunset. And I love letting my mind just empty while my fingers make tiny stitches on autopilot with no stress whatsoever. Yes, it might take me 10 hours to sew the binding down all the way around this quilt, but I'd rather spend 10 hours relaxing than two hours of anxiety, burned fingers, and sticky glue all over the ironing board, which was what I experienced when I attempted to follow the "easy" methods of machine binding with Elmer's School Glue.
 |
| Green Spool Aurifil, 40 weight 2-ply, Stronger than Orange Spool 50 weight 2-ply |
Updated 6/4/2018: Note to Self -- Don't use the 50/2 weight Aurifil for hand stitching binding next time! It's too fine and it kept breaking. The 40/2 weight Aurifil on the GREEN spools is a much better choice, or else a 50/3 cotton thread like Gutterman or Mettler would be a good choice.
Well, in all fairness, what I was really trying to do was my own mash-up of a couple of different machine binding tutorials. I started with Hayley Grzych's Master Machine Binding tutorial from Bernina's We All Sew education blog.
My thinking was that I own the Bernina machine with the features and accessories used in this tutorial so I might as well take advantage of them, right? So, as per this Bernina tutorial, I cut my binding strips 2 1/2" wide (rather than 2 1/8" or 2 1/4" as I've done in the past). This was a mistake, as I'll explain in a moment.
 |
| Walking Foot #50, Needle +5 (All the Way to the Farthest Right Position) |
Hayley's Bernina binding tutorial has you cut your strips 2 1/2" wide for a 3/8" finished binding, because that's the easiest binding width to eyeball with the Bernina walking foot. As shown above, when the needle on a 9 mm Bernina machine like my 750QE is moved to the farthest right position (+5), the distance between the needle and the outside right edge of the walking foot will be 3/8". With most batting, the 2 1/2" strip width, when folded in half and stitched to the front of a quilt, will be just the right width to wrap around the edge of the quilt and cover the stitching line sufficiently to be secured when you go back and stitch in the ditch by machine.
 |
| Stitching Binding to Front of Quilt With Walking Foot and Seam Guide |
I popped the seam guide that came with Patchwork Foot #97D onto my machine before stitching the binding to the front of my quilt for added "straight seam insurance." Even with the glare of bright lights against shiny metal and middle-aged eyesight, the seam guide creates a barrier at the edge of the walking foot so that I'm sure of an even, exact 3/8" seam all the way around the quilt.
 |
| Sewing Binding to Front of Quilt |
Hmmm, this binding strip is noticeably wider than what I'm used to! I'm thinking that this must be because I need a little bit more binding on the backing side to ensure that the folded binding edge is secured to the back of the quilt when I stitch in the ditch on the right side, so I keep sewing it to my quilt, all the way around, carefully mitering the corners and joining the two loose ends with my little binding tool. It looks great, smooth and pucker free all the way around thanks to my walking foot feeding all of those layers through the machine so evenly.
 |
| Pressing the Binding Away From the Quilt Top |
Then I take the quilt over to my ironing board to press the binding away from the quilt top. Oh, how lovely...
 |
| Nice, Straight Binding! Looking Good! |
...Until I get to a seam intersection that was 1/4" away from the outer edge of the quilt top, and see that my perfect 3/8" binding seam has chopped off EVERY SINGLE POINT. DUH!!!!!
 |
| Buh-Bye, Triangle Points! |
 |
| Exactly 1/8" Chopped Off Every Point |
 |
| Every Precise Little Point Along the Top and Bottom Edges Is GONE. |
If my quilt had a plain outer border, I could make my binding whatever width my heart desired from a scant 1/4" to an inch or more with no problems. But when there is patchwork at the outer edge of the quilt with 1/4" seam allowances, the binding can ONLY be 1/4" wide without chopping off triangle points. Oh, I could have left an eighth of an inch excess batting and backing beyond the quilt top edge to accommodate my wider binding, but I think it would be harder to keep that binding seam allowance straight and consistent all the way around the quilt if I was looking at fluffy, see-through batting next to my seam guide instead of the well-defined raw edge of the quilt top.
I decided NOT to remove my binding, trim 1/8" off the width, and resew it. It is what it is.
Now, Hayley's binding tutorial on the Bernina blog tells me to just wrap the folded binding edge around to the back of the quilt, make sure it covers the previous stitching line, and just pin it in place before stitching in the ditch from the front side of the quilt. But when you put stick pins through thick, puffy quilt layers, you get a little wobble where each pin compressed the layers. I didn't want to risk those wobbles. So I decided to switch to one of the glue basted machine sewn binding tutorials at this point, the most famous being Sharon Schambers' painstaking technique for show quilts. Sharon is an Elmer's School Glue junkie who even glues her binding to the FRONT of her quilt before doing any stitching at all, and then she glues the folded edge of her binding to the BACK of her quilt even if she is going to be finishing her binding by hand, heat setting the glue with a hot iron as she goes along. And her finished bindings look AMAZING.
Well, I have never even pinned my binding to my quilts before I start sewing it on, and I have never had any problem with shifting or puckering. I suspect that's because I'm always using my Bernina's Dual Feed and/or using a walking foot to ensure that my unpinned layers of fabrics and batting are all feeding through my machine without shifting. Maybe the extra step of gluing would make a difference if I didn't have the options of using a walking foot or Dual Feed, and I'll certainly keep it in mind if I ever need to sew binding on with one of my vintage Featherweight machines, but for now, my motto is "If It Ain't Broke, We Ain't Gonna Try to Fix It."
But my friend Susan over at Quilt Fabrication has a great tutorial showing how, after sewing her binding to the front of her quilted placemats by machine the way I did on this quilt, she used Elmer's School Glue (heat set by ironing) to secure the folded edge of her binding on the back of her placemats before stitching in the ditch from the right side. She said it was easy to do and her placemats came out great, so I decided to give it a try.
 |
| Machine Binding Sample |
In the photos at left, you can see how I repurposed one of my tension testing scraps for practicing how I was going to glue baste the folded edge of my binding to the back of my quilt and then finish it by stitching in the ditch. Since I have so many different colors along the outer edge of my quilt top, I threaded up my Bernina with invisible monofilament thread in the needle, leaving purple Aurifil Mako 50/2 cotton thread in the bobbin. On the front of the quilt top, the needle stitches will land just INSIDE the edge of the binding, so the needle thread must match or camouflage with whatever fabric(s) are along the outer edges of the quilt itself. Monofilament is perfect for disappearing on all of those different colors and prints. But on the backing side of the quilt, the stitches are going right on top of the binding itself. That's why the bobbin thread should be an exact match to the binding fabric.
I lowered my needle tension to 2.25 for the monofilament thread, and decided that I liked a stitch length of 2.25 as well. As per the Bernina binding tutorial, I used Edge Stitch Foot #10D with Dual Feed engaged to stitch in the ditch from the front of the quilt, keeping my eye on the needle as I was stitching rather than watching the blade of the guide on the presser foot. (I had a 75/11 Quilting needle in the machine and could have switched to a smaller size 60/8 needle with the monofilament to leave smaller holes in the fabric, but I didn't bother because I know the holes will close up when I launder the quilt anyway. Also, occasionally I am lazy).
I don't know; I think the sample looks pretty good, don't you? I could live with that, for a completely machine sewn quilt binding. So I grabbed my partially-bound quilt, headed over to the ironing board, and started trying to glue my binding down to the back side of my quilt. And then my stress level -- and my blood pressure -- shot through the roof as I struggled with my obnoxiously puffy wool batting that refused to stay flattened long enough for me to glue the binding down and dry the glue with my iron.
 |
| Quilt Wars Episode 5: The Puffy Batting Strikes Back |
See what I mean? One of the things quilters love about wool batting is its puffiness, its resilient loft that doesn't go flat and limp between quilting stitches like an all-cotton batting. But the downside is that the wool batting won't even flatten temporarily so I can get the binding glued down. I've got glue all over my fingers, glue all over my iron, and I've been struggling with it for about 30 minutes with only about 10" of glued binding to show for myself, binding which is not even glued perfectly straight anyway.
Then I remembered the 1/4" wide washaway fusible "Wonder Tape" that I use for securing knit garment hems in place prior to coverstitching them on my serger. There are several brands of this stuff -- Dritz and Collins are the most commonly available. They are like a very thin, double-sided sticky tape that fuses in place with ironing and completely washes out of the finished project when it's laundered. Lightbulb moment! I started putting it along the edge of my binding, although now that I'm thinking about it, it would be even better to apply the tape directly to the back of the quilt, right along the stitching line.
 |
| Washaway Fusible Tape for Mess-Free Glue Basting! |
This alleviated my frustration with the sticky mess of the Elmer's School Glue. However, the puffy batting edge was still giving me grief and the process was going SO slowly that I began to question how much time I was really saving with this "quick and easy machine binding" that I was trying to do. Also -- and this was really the deciding factor -- the whole reason I was in my sewing room at all on Saturday afternoon is that I was taking a break from working on music for Sunday morning that was not going well at all and I was getting more and more freaked out as the hours ticked by and it wasn't getting better... I decided some "fabric therapy" would help me to clear my mind of all the "ANXIE-TEA." As it turns out, struggling with uncooperative puffy batting and repeatedly burning myself with a hot iron while I try to learn a new method of quilt binding was NOT the relaxing break that I needed!

Obviously, I survived my latest opportunity to make a fool of myself in church yesterday, because I'm still here to tell you about it. And my quilt is still not done, because hand stitched binding takes forever. I don't care; I'm recuperating today.
 |
| Monday Lisa and I Both Had Rough Weekends |
I've not totally written off machine binding; I just wasn't up to it this weekend, for this quilt. I think I need to experiment on smaller projects that are not already earmarked as special gifts, and remember that struggling to learn something new in the sewing room -- while valuable for growing skills -- is NOT relaxing and therapeutic in the way that hand stitching, chain piecing, and other previously mastered skills can be. Taking a break from ONE challenging, stressful activity that isn't going well only to switch to ANOTHER challenging, stressful activity that isn't going well is a recipe for disaster!
Here are my takeaways from this aborted machine binding attempt:
- Unless my quilt has a plain outer border, the binding width must be dictated by the 1/4" seam allowances along the outside edge of the quilt top. That means binding strips are cut at either 2 1/8" for thinner cotton batting or 2 1/4" for a thicker, fluffier batting, and the binding gets sewn to the quilt with a 1/4" seam allowance!
- Regardless of whether I'm going to finish the binding by hand or by machine, I need a 50 weight cotton thread that is an exact match to my binding fabric. I had to make a separate trip back to my Bernina shop for the purple Aurifil thread because I didn't remember that when I was shopping for the binding fabric, and my stash of 50 weight cotton thread is primarily neutral blender colors that I use for piecing.
- I should at least try using Wonder Clips (rather than glue or pins) to hold the binding in place for machine stitching. The Wonder Clips have the advantage of less distortion where the 1 cm wide clamp compresses the fabric compared to pinning, and they also won't stab me or catch on the quilt, snagging the fabric as I'm wrestling with the big, bulky quilt under the sewing machine, and using the clips to secure the binding edge would be faster than any glue or fusible method.
- If, after trying the Wonder Clips, I'm still not happy with how the binding comes out, then using a fusible washaway Wonder Tape along the stitching line is probably the way to go over glue. Not saying there's anything wrong with glue for those who use it successfully, but I was getting glue all over myself like I was a kindergartener struggling with arts and crafts -- I'm pretty sure I even had glue in my HAIR. So, Wonder Tape is my friend.
- As for the Dilemma of the Puffy Batting Edges: I think that, if I was using a cotton batting or even an 80/20 cotton/poly blend, the batting at the edge of the quilt would have been easily smashed down into submission just with the iron. Alternatively, I could have run a line of basting stitches right inside of the trimmed edge of the quilt to compress and secure the quilt layers before attempting to bind it. Or I could have compressed and secured the edges of the quilt with my serger before binding it, the way I do with my Minky backed quilts before I apply prepackaged satin binding. But again, the more additional steps involved with machine binding, the less attractive it is as an alternative to hand stitched binding. Now I'm going to be basting, serging, pressing, gluing and fusing before I can even start stitching the binding down?
- One more thing I want to remember: Since I did glue down a good 12-14" of binding before I threw in the towel, I was able to discover that I do NOT like trying to push my needle through the stiff, glued fabric layers when I'm hand stitching binding! Susan Schamber says she feels that Elmer's School Glue is basically like a starch product that helps to "stabilize" fabric for stitching, but I found the glue VERY difficult to stitch through. Maybe I used more glue than she uses, and I'm sure it wouldn't pose a problem for the sewing machine, but for hand stitching binding, I have no problem wrapping the binding around the edge of the quilt as I go along, so the time I wasted spent gluing and fusing the binding edge in place was really a total waste. Having the binding edge already sewn down all the way around the quilt would also make it difficult to hide the knots and thread tails when I'm hand stitching and need a new length of thread.
But for now, the binding of this quilt and any others will have to wait. My kids get home from school soon and, before they burst through the door with their whooping and hollering, I need to review jazz music for tonight's VOX rehearsal.
Have a great week, everyone!