Showing posts with label hand embroidery. Show all posts

Thursday, October 9, 2025

October OMG is Finished: Deco Custom Quilting (Substantially) Finished, Off the Frame

I've finished my OMG (One Monthly Goal) for October, three and a half weeks early!  I am as shocked as YOU are!  My entire 102" x 102" Deco bed quilt (pattern by Lo & Behold Stitchery, available on Etsy here) is now completely stitched in the ditch and all of the digital designs have been quilted as well.  (This post contains affiliate links).  I took one last photo in the Garish Yellow Quilt Studio as I was taking my quilt off the frame:


My 102 x 102 Deco Bed Quilt is Off the Frame!


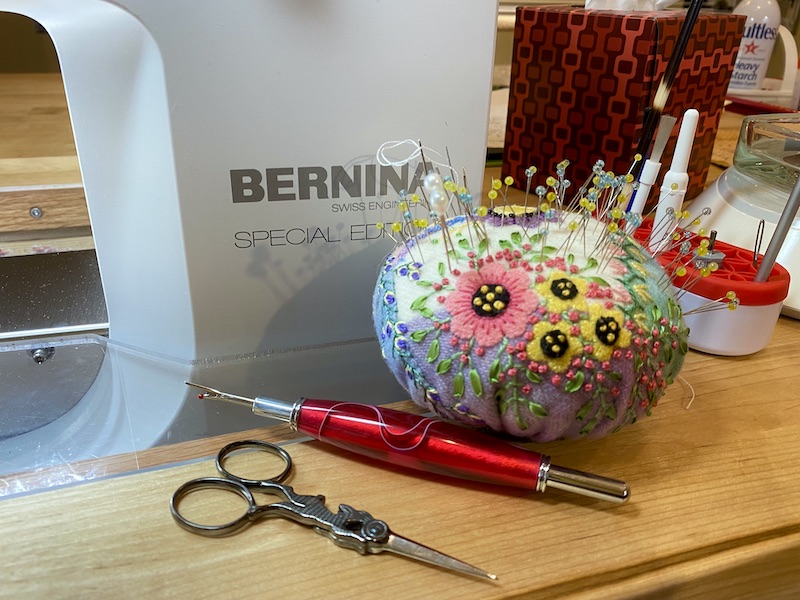
Now that Deco is off the frame, I can start packing up all of my long arm quilting tools and supplies and Bernie and I can disassemble the frame and pack everything up for our upcoming move back to North Carolina.  However, although I completed what I set out to do on this quilt for this month, the quilt is not yet 100% quilted.  According to the batting manufacturer, I have more than enough quilting to hold the quilt together, but it's uneven quilting in that the digital quilting areas are quilted more densely, with lines of stitching much closer together, than the pieced blocks that are only stitched along seam lines between contrasting fabric patches.  It has always been my intention to complete this quilt with additional quilting in the pieced blocks.  However, it's "quilted enough" for me to feel comfortable taking it off the frame, folding it up, and packing it in a box for our move.


All SID (Stitch In the Ditch) + Digital Quilting Completed


My original plan was to reload this quilt on my long arm machine at the other end of the move to quilt the pieced blocks with decorative ruler work and free motion quilting, but then I got to thinking about how I've always wanted to play around with combining machine quilting and hand quilting on the same project, in different thread weights.  

Tuesday, November 23, 2021

Rebecca's Ultimate Etsy Gift Guide for Quilters and Crafters

 Hello, friends, and happy Nearly Thanksgiving to those of you in the United States!  Today's post is something I've never done before -- a shopping guide chock full of gift-worthy goodies that I personally would love to find under my tree on Christmas morning.  If you have quilters, sewists, or embroiderers on your shopping list this year, I have some suggestions that are sure to be received with delight.  (If YOU are the quilter/sewist/embroiderer reading this post, you may find a few items for your OWN wish list).  What's more, every item on my list is in stock and coming from a small craft business owner via Etsy -- and none of them contains those pesky microchips that are delaying just about everything else you might want to buy for the holidays this year.

A Few of My Favorite Tools

Each of the items on this list is something I personally own and love, or something I currently have on my own wish list.  Feel free to share this post with others, post on social media or wherever.  Disclaimer: this post does contain affiliate links, which means I may receive a small commission (at no additional cost to you) if you make a purchase after clicking my link.  I do appreciate your support of my wicked thread addiction!  ðŸ˜‰

 Beautiful Tools: Where Form Meets Function

The items in this section are a pleasure to own and use because they combine the finest craftsmanship with beautiful design.  Bonus: They make great Instagram props to "style" your work-in-progress photos.

1. Hand Embroidered Felted Wool Pin Cushion from Etsy maker Martha of Quilt Shenanigans.  Who is this good for?  Anyone who does any kind of sewing at all can use a pin cushion, and these must take Martha hours to individually hand stitch and embellish with tiny beads.  Her hand stitching is exquisite, the felted wool is soft and luxurious to the touch, and the pin cushion is well-packed to hold its shape and is stable on a flat surface.  Even the slenderest pins slide in and out with ease, and she has lots of beautiful designs in stock to choose from.   

My New Favorite Pin Cushion, made by Martha of Quilt Shenanigans on Etsy 

2. Handmade, Hand Paired Embroidery Scissors from Maison Sajou.  These are manufactured by a 200-year old company in France, but available in several Etsy shops.  I got mine from Penelope Textiles' Etsy shop.  A few things to know: There are lots and lots of cheap imitations out there for a fraction of the price, but while the mass-produced knockoffs might look just as cute as photo props, there is no comparison to the way they actually cut.  It's like the difference between a Wustof steak knife versus the plastic knife that comes with your takeout order.  The lesser version SORT of cuts, but not cleanly or easily and it's not a joy to use!  Authentic Maison Sajou scissors are individually handmade by French craftsmen, with hand paired blades that are kept together throughout the entire production process to ensure that they match up perfectly. They are sharp, accurate, and cut smoothly and cleanly all the way to the tip (which is absolutely crucial for snipping the inside corner seam allowances in needle turned applique).  Who is this good for?  Anyone who enjoys any kind of hand stitching like cross stitch, embroidery, needle turned applique, or hand quilting would love to receive a pair of Sajou scissors!  In addition to the Hare design that I own, there is also a cute Eiffel tower version, gorgeous Art Nouveau Peacock scissors, and other historic reissue designs to choose from.  Of course, if you just want a cute pair of scissors for a photo prop, those cheaper knockoffs will suit you just fine!

Hand Paired Hare Embroidery Scissors from Maison Sajou, via Penelope Textiles on Etsy

Monday, October 12, 2020

Tuesday's To-Do List: Still Slogging Along With Butterflies and Clam Shells

 Might as well just get to the meat and potatoes this week!  Last week's goals turned out to be overly ambitious:

✅ finish quilting Modern Baby Clam Shells, AND 

get it labeled and   

❌ bound, AND  

❌ get my Letter Home baby quilt top and ready to load on my frame.  

After quilting the pantograph design over most of my Modern Baby Clam Shells quilt and stitching in the ditch around my butterfly appliqués  a quilter who was more goal oriented and focused than I am would have finished up the quilting with some monofilament or color matched thread to machine quilt along the butterfly veins.  I decided to haul out all of my yummy hand stitching threads instead.  I ended up quilting my butterfly veins with Perle Cotton #5, which would probably have looked better with a longer stitch length, but I like it anyway:

Perle Cotton no. 5 for Hand Quilted Butterfly Veins

I like the idea of combining machine quilting with hand stitched details, and think I might explore more of that in future.  


Best of all, since my butterflies are turned edge appliqué with the backing trimmed away behind them and no fusible web or anything like that to add stiffness, they are super soft and smooshable and were very easy to needle for the hand quilting.


The purple butterflies got green stitching.  It's subtle, but I love the vintage hand stitched vibe it gives my butterflies.

All Quilting Completed, Ready to Trim

You know, I was really tempted to custom quilt this one, if I hadn't been up against a time crunch to get it finished.  But I have to say, the less densely quilted pantograph design makes this baby quilt SO soft and cuddly!  Custom quilting might have made for a stiffer quilt, and if I'd gotten too carried away with it, the baby's mom might have felt like the quilt was "too fancy" for everyday use and stuck it in a closet.  ðŸ˜±ðŸ˜±ðŸ˜±. Heaven forbid!  So all's well that ends well!

Attaching the Machine Embroidered Label

My bee group that used to meet in person Pre-Plague has been meeting on Zoom instead on Monday afternoons, and I used that time today to get this quilt trimmed and to attach the machine embroidered label I'd digitized and stitched out on Sunday.  I tried something new this time, using Aurifil 50/2 Cotton threads in the needle and also in the bobbin to embroider my quilt label.  I am really happy with how it came out!  That extra thickness to the thread (compared to regular embroidery thread and bobbin thread) gave the stitching more prominence, yet I had zero issues with puckering or thread breaks.  And although I love the sheen of trilobal polyester or rayon embroidery threads for other projects, I liked the matte lustre of the 100% cotton thread for this quilt.  I used one layer of water soluble topping, one layer of tearaway stabilizer in the hoop, with a second layer of tearaway stabilizer floated beneath the hoop.  I used my built-in basting stitch around the perimeter of the design as well, both to reduce the tendency of the embroidery to draw up and pucker, but also because the basting stitches form a nice, straight rectangle around the label design that I can use to trim the excess fabric and turn the two edges of the label that won't be caught in the binding.

My local chapter of the Modern Quilt Guild will be doing its first in-person stitch-together next Saturday, in the parking lot of the church where we usually meet, with masks and social distancing in place.  I'm planning to get the binding machine stitched to my clam shell quilt tomorrow and then set it aside to be finished with hand stitching at my guild's outdoor gathering. I sure hope the weather cooperates!

And then I can turn my attention back to the baby brother's quilt, based on the AQS Letter Home QAL.  So, that's what I'll be up to for the rest of this week!

Rebecca's To-Do List for This Week:

  1. Attach binding to clam shell quilt by machine
  2. Finish piecing Letter Home blocks
  3. Assemble Letter Home quilt top
  4. Piece Letter Home backing
  5. Load Letter Home on the long arm frame

I'm tempted to put more on that list, but there's so much SHAME when I have to put red X's next to everything at the end of the week!  ðŸ˜‰. Best to quit while I'm ahead!  I'm linking up today's post with the following linky parties:

MONDAY

·       Design Wall Monday at Small Quilts and Doll Quilts  

·       Monday Making at Love Laugh Quilt

TUESDAY

·       To-Do Tuesday at Home Sewn By Us

WEDNESDAY

·       Midweek Makers at Quilt Fabrication

·       Wednesday Wait Loss at The Inquiring Quilter

Tuesday, January 22, 2019

Quilt Block Surgery: How To Change The Center Patch WITHOUT Taking the Block Apart. Also, I Just Remembered I Love Embroidery.

You guys -- I am so excited about my Jingle BOM quilt right now that I'm GIDDY!  Thanks to all of you who reached out and shared your opinions about the crooked tree block and my idea about embroidering dates on the front of this quilt.  I especially liked the idea of putting my initials on the front of the quilt somewhere -- MONOGRAM!!  As for the tree -- ironically, it was Frog Quilter who said that I should leave the tree the way it is (rather than frog stitching it) because it "shows character and makes the quilt uniquely yours."  When I thought about it that way, I realized the tree HAD to come out, because leaving the crooked tree would NOT reflect my character -- MY character is all about analyzing the details and wanting to make a good thing even better.  Also, removing the center patch of that block without disassembling the border OR taking the block apart is a challenge -- and I love a good challenge!


French Hare Embroidery Scissors for Quilt Block Surgery!
So the first thing I did was make sure I had this block-within-the-border pressed and starched so it was very crisp and stable.  Then I carefully used my seam ripper to cut every 3rd or fourth stitch holding that green tree fabric to the adjacent gold fabric patches, working from the back side.  The corners of the green patch were secured by subsequent seams that I didn't want to take out, so I used my new French hare embroidery scissors to clip the green patch's corners right up close to those seam lines, and then carefully pulled the green patch out of the seam without disturbing the stitching.  A few green threads remained caught in the seam, and those pulled out easily with a tweezers.

At this point I was able to audition replacement fabric possibilities through the window/gaping wound in the center of my block.  I decided the original Christmas tree fabric was too cutesy and I didn't like it with the other fabrics in the block anymore, so I replaced it with a red metallic instead.  I used the old patch as a template to cut out the replacement patch.


I Was NOT Supposed to Cut Those Corners Off!
Yes, I forgot that I'd cut the green patch away from the block right at the seam line on all four corners when I was cutting the new patch -- after I took this photo I cut a new red patch and left the corners on this time.


Positioning and Glue Basting Replacement Patch, WITH Corners
I wanted to use my Roxanne's Glue Baste-It for this step, but I found my fabric glue stick before I could locate the Roxanne's liquid glue so that's what I used.  The liquid glue in tiny droplets would have worked better and given me more control of where I was putting glue rather than gooping up all over the place -- but if the glue stick is all you have on hand, you can certainly make do with it.


Anyway, I applied the glue to the seam allowances of the gold fabric and then, with the new red patch right side up on my worktable, I positioned the block -- also right side up -- over the new patch, trying to keep the wavy gold lines in the new patch fabric as straight as possible.  Then I pressed down with my fingertips so the glue would adhere the block to the new patch along the seam allowances, and carefully turned the block to the back side.  Next I used my fingernails to push those corners all the way into place beneath the overlapping seam allowances.

I wasn't trusting the goopy glue stick to hold this patch 100% securely throughout hand stitching all by itself, so I added pins along all four sides of the patch, going through the seam allowances, as well.  These are the 5/8" Essential Applique Pins from Piece O'Cake that I'm using, by the way.  They are just a smidge longer than the more common 1/2" sequin/applique pins, they are super sharp to glide through fabric without resistance, and that extra eighth of an inch makes it easier for me to manipulate them than the smaller pins.


Replacement Patch Glue Basted and Pinned, Ready for Reverse Applique

Now all I had to do was reverse applique the new patch in place!  I used YLI 100 weight silk thread in a cornsilk shade that disappeared into the gold feathery fabric, with my favorite size 12 Bohin applique needle.


Glue Basting Plus Pins Keeps New Patch From Shifting During Stitching
The trickiest bit was when I got to the corners, getting them nice and sharp again.  I had to sort of finesse the fabrics into place at the corners with some additional stitches there.


Back Side of Block, Surgery Completed!
Here's the back side of my block following surgery, with the new patch hand stitched into place and the excess fabric trimmed away at the corners.  Isn't that cute?


Surgery Was A Success!  The Patient Survived!!
I like this block SO MUCH BETTER than the original. Remember that this Jingle quilt was a BOM (designed by Erin Russek of One Piece at a Time, complete patterns available here) so I didn't have a vision of what the entire quilt was going to look like as I was making each block.  Then I decided to alternate red and green fabrics for my setting triangles rather than using all red as directed by the pattern.  Seeing it up on my wall now, I just felt like I wanted a red in the center of this block.  Here's what my block looked like pre-surgery:


Crooked Tree Block, Prior to Surgery
See?  Now, if you happen to like this block better with the crooked tree in the center, feel free to keep that comment to yourself...  ;-)  Just kidding!  Maybe I'll stick that little tree patch on the back of the quilt and incorporate it into the label somehow.  We'll see.  

The surgically altered block is in the right side border, so once I'd replaced the leaning tree I went ahead and attached that border to the center medallion.  It fit perfectly, and the stripe came out exactly as I'd hoped it would...  So I turned my attention to the other last-minute details I had in mind.  Embroidery!

OH MY GOODNESS, you guys -- I FORGOT how much I like embroidery!  And the only hand embroidery I've ever done was the chain stitched stems on the applique blocks for this very quilt.  I gave a lot of thought to the style of the lettering and numerical fonts that would add something aesthetically to this quilt, and I decided I wanted an Art Deco vibe.  I found a font on my computer that I liked for my dates -- after changing the zero to a capital O for a little more oomph -- and printed it out in several sizes until I ended up with a printout that fit my block nicely.

I marked chalk positioning lines on the front of my block from corner to corner, and marked corresponding centering lines in dark pencil on the paper printout of my dates.  Then I pulled out my seldom used but OH SO VALUABLE WHEN I NEED IT light box, slid the paper template under my quilt block, matched up the diagonal centering lines, and carefully traced the dates onto my quilt block with an ultra fine point, archival ink, permanent gold pen.  Now there was no going back!

Dates Marked in Permanent Archival Ink!
At this point in my Jingle project, no more shopping is allowed -- and no stores were open anyway when I was doing all of this last night.  So I chose embroidery threads that I had on hand.  For embroidering the dates, I chose a shiny YLI Pearl Crown Rayon in Gold, color #772, that I found in a bin of heavier threads that I've played with for bobbin work on my Bernina machines.  I wanted the dates to be subtle but legible, and I wanted the numbers to be really delicate as though they had been engraved, so I just did a simple backstitch.  It was so cool to see the embroidery bring these simple numbers to life one stitch at a time!

Embroidery Magic!
How can something SO EASY look SO BEAUTIFUL?!!  I love my dates and I think the block looks like they were meant to be there all along.  Seriously, I'm so glad I did this!

Happy, Happy, Joy, Joy!
I know I'm a dork, but you guys have to remember that this is my very first ever applique quilt, my very first ever diagonal block border, my very first time doing a mitered stripe border, my very first ever hand embroidery...  This has been six years in the making with lots of setbacks and challenges along the way, and I am just amazed that after all the blood, sweat and tears, it looks like this is going to be a finished quilt after all.  It might even be a finished quilt that I can be proud of!  And to think, there were moments along the way where I thought it was just an awful mess and I nearly tossed it!

Last One, I Promise
I've done some machine embroidered personalization on the front of quilts for children before -- special quotes, monograms, the baby's name or birth date.  I couldn't bring myself to machine embroider on hand appliqued blocks that had hand embroidered stems and hand embroidered bird eyes.  I'm really liking the look of the hand stitched dates, and there is a strong chance that you will be seeing more of this from me on future projects.

The other fantastic idea that several of you suggested was embroidering my initials on the front of the quilt.  I loved that idea, and decided to do it as a monogram.  I did an Internet search for Art Deco 3-letter monogram styles and cobbled a few things together on the computer and then adjusted the size until I was able to print a template that fit inside my block properly.  I used the same chalk positioning lines and light box technique as before and traced the monogram design onto my block using fine point archival ink pens in the thread colors I'd chosen for the embroidery.

Monogram Drawn on Block, Ready to Stitch
Now, doesn't it look like the monogram just belonged in the center of that tulip wreath all along?  I wanted the monogram to be bolder than the dates, so I went back to the chain stitch that I used for the stems.  I attempted to stitch French knots where the gold dots are but they didn't come out very well -- I might snip them off, find a YouTube video to figure out what I did wrong, and do them over again.  They're in the same gold Pearl Crown Rayon that I used to stitch the dates on the other block.  The R and the D (for Rebecca and Deming, my maiden name) are stitched in the same emerald green thread that I used to stitch my stems six years ago -- DMC size 5 Pearl Cotton, color 699.  The larger R in the center is for my last name/married name, and for that I chose a DMC cotton embroidery floss in variegated Garnet red, color 115, and separated out four threads to get a similar thickness to the size 5 pearl cotton.  You can't tell from the pictures, but I like the way the subtle color variations of the variegated red embroidery floss mimic the color variation in my red batik berry fabric.

Monogram In Progress During Late-Night Television
This is how far I got before I went to bed last night:

One Letter to Go...
So obviously my To-Do for Tuesday is that I want to finish this monogram -- not just because I'm excited about it, but because I don't want to leave it in the embroidery hoop too long and risk hoop burn marks that I can't press out.  It was probably a no-no to leave it in the embroidery hoop overnight, but I don't know what I'm doing and I'm making this up as I go along...  I might go back and add a little something extra around the big "R" of this monogram, or maybe I won't.  And then, once I'm satisfied with my embroidery efforts, the three remaining block borders can get sewn on...  And then the final outer borders will go on, which are also border stripes that get mitered at the corners, but they aren't as wide so they should be a snap compared to the inner border miters.  Then, at long, LONG last, my Jingle BOM UFO/WIP/WWIT (What Was I Thinking?) will be a completed quilt top, ready for quilting!

I'm linking up with:


Saturday, November 24, 2018

Of Thanksgiving Travel, Needlework Memories, Embroidery, and Applique

Hand Embroidered Pillows Made By My MIL circa 1959
Hello, my lovelies, and happy belated Thanksgiving to all of you in the States who were celebrating this week!  We've just returned from spending the holiday in Florida with my husband's family.  L-O-N-G drive, but well worth it.


More Needle Turn Leaves...
I shoved my Frankenwhiggish Rose needleturn applique project into my suitcase before we left and managed to get some leaves cut, prepped, and stitched down while visiting with Bernie's family, and couldn't help but notice striking similarities between my mother-in-law's throw pillows on the sofa and the project in my lap:


My MIL's Needlework, circa 1959.  This One Is My Favorite.
How cool is that?  It's the same color palette, very similar style -- could be an alternate block in the same quilt.  My mother-in-law Marlies used to do the most amazing sewing and needlework years ago.  Not anymore, due to age-related memory decline, but I asked her about these pillows and she vividly remembered making them.  

She said that she and her sisters got needlework kits like this one from their father as Christmas gifts and these pillows were given to her on her last Christmas in Germany before she emigrated to the United States to marry my father-in-law.  (They were married in 1960, so I'm guessing this was the Christmas of 1959).  Marlies told me the kit came with the pattern, materials, and yarns, and they would start working on the stitching after Christmas.  She had these pillows partially or completely embroidered before she left Germany, and finished and stuffed them sometime after arriving in Philadelphia to begin her new life as a married woman.  So they're close to 60 years old, and I LOVE THEM!


Detail of Yarn Embroidery
Isn't that gorgeous?  I wish I knew more about the pattern designer and the materials.  I can tell you that I've seen these pillows on their family room sofa for the 20+ years that I've known them, and they've definitely seen regular use over the decades, yet there's no pilling of the embroidery threads.  I wonder if it's wool or something else?  I think most synthetic yarns would have gotten all fuzzy and worn-looking by now.


My MIL Marlies, My Sons Anders and Lars, and My FIL Fred
My sons, Lars and Anders, got to spend some quality time with their grandparents, their Tante Angela, and their cousins, too.  My MIL kept asking "Where are the little ones?" whenever the boys left the room, but at 5'10" and nearly 6' tall, they are not little anymore!  

I did manage to get some other sewing done before heading out of town for Thanksgiving.  I loaded and quilted the outreach cuddle quilt for the Charlotte Quilter's Guild:


Outreach Cuddle Quilt Is Quilted!
Someone else in the guild pieced this top and there were some minor fullness issues, so I floated the quilt top and just did a freehand meander from the front side of the machine rather than a pantograph from the backside, where I wouldn't have been able to keep an eye on the trouble spots.  I mounted the quilt sideways and was able to quilt the whole thing in just two advances, less than two bobbins.  Now it just needs to be trimmed and bound. 


Pretty Sure I Put the Horizontal Spool Holder In the Wrong Place
I used a spool of variegated California Poppy YLI 3-ply 40 weight cotton Machine Quilting thread in the needle, and used the horizontal spool holder accessory for the first time since the spool was stack wound.  I am pretty sure I put that thing in the wrong place on my machine, by the way, because in order to use the upper thread break sensor with my setup the thread needs to travel BACKWARDS to the thread break sensor wheel rather than straight down.  I think that spool holder attached with sticky adhesive foam or something; not sure I can get it off and reposition it??  Anyway, I had the 40 weight cotton thread in my size 4.0 needle and used white Super Bob 2-ply polyester prewounds in the bobbin, and was able to get decent tension without too much trouble.  Still seeing slight directional tension variation indicating needle flex, but since completing this quilt I've read that going up to a 4.5 needle with the cotton thread would have helped with that.


I Love How the White Bottom Line Thread Disappears On the Back Side
Look how well the Bottom Line thread disappears on the backing side of the quilt.  The 60 weight 2-ply thread is so fine and thin that it takes on whatever color it crosses, appearing yellow when it crosses yellow fabric and blue where it crosses over blue.

I'm planning to machine bind this quilt, but that will have to wait a few days because I dropped off my main squeeze machine, the 'Nina 750QE, at my Bernina dealer for her annual Well Baby visit.  While I wait for her to return to the studio, I can continue appliqueing leaves to my Frankenwhiggish Rose blocks, pin the last rows of pineapple log cabin blocks together, and get something else loaded on my longarm frame.  


Let's have a poll -- what should I quilt next?  

Should I whip up another charity quilt top for practice quilting and try to completely eliminate the needle flex tension issues, or should I put a REAL quilt on the frame (and risk "ruining it" if my quilting savvy is not yet up to snuff)?  The only "real" quilt top that is finished and ready to load is my Paint Me A Story bear paw quilt, by the way...  


"Paint Me A Story," 65 x 65.  Do I Dare to Quilt This Yet?
I started this quilt in 2014 and I will be HEARTBROKEN if I wreck it.  But I suspect that I need to quilt real quilts if I'm going to get better at the custom quilting I most want to do...  Charity quilts are best suited to simple allover designs, not fancy ruler work and freehand fills.  Hmmm...  Let me know your thoughts in the comments.  

Enjoy the remainder of your long holiday weekend!  I'm linking up with:


Thursday, June 1, 2017

What Kind of Coat Costs $51,500? A Closer Look at Melania's Stunning Dolce & Gabbana Floral Jacket

Melania's Exquisite Floral Jacket by Dolce & Gabbana
This blog is my happy place where we escape from the harsh realities of politics by submerging in art and design, especially textile art and design. Melania Trump's decadently embellished floral jacket, designed by Stefano Gabbana of Dolce & Gabbana, is an unquestionable triumph of textile design.  Garments like this are why I love couture fashion, even though I can't afford to wear it.

So, people have been asking, what kind of jacket costs $51,500?  Isn't that crazy?  Like, what could it possibly be made of that justifies that price tag?  Isn't it just wrong that ANYTHING made of mere fabric should command that kind of coin?

...Except...

"The Women of Algiers" by Pablo Picasso, Sold at Auction for $179M
Art has always been about so much more than the value of the materials used to create it.  Check out Pablo Picasso's 1954 record-breaking oil painting, "The Women of Algiers," which recently sold at auction for a whopping $179 MILLION dollars ($160M plus commission).  It's a canvas with oil paint on it, right?  I can buy everything I need to make that painting for under $50 at Michael's, right?  And the anonymous buyer who bought the Picasso will want to buy my amateur painting entitled "The Rottweilers of Ballantyne" for a hundred million dollars, too... Uh, WRONG.  

I think that when we express outrage over the high prices of couture fashion we are doing a disservice to all textile artists, whether they are fashion designers, art quilters, costume designers, or weavers.  Fine fabrics and threads cost MORE than oil paints, after all, and at least as much artistry and skill go into transforming bolts of silk and a handful of beads into a masterpiece like Melania's jacket:

Silk Ribbon Embroidery, Beading...  All Done By Hand
Click on that picture to enlarge it.  Isn't that just stunning?  The entire surface of this jacket is encrusted with the most painstaking heirloom embroidery techniques.  The padded satin stitched leaves accented with metallic thread veins.  An exuberant garden of three-dimensional silk ribbon embroidered flowers.  Thousands of shimmering seed beads scattered over the flowers like so many drops of morning dew, each one stitched in place by hand.  This garment is magnificent.

But beyond the cost of the materials and the skill of the embroiderer, it's really the "Picasso element" that makes this piece worth so much more than a simple equation of materials plus labor.  It's the creative genius of Stefano Gabbana, who obviously loves traditional hand embroidery as much as I do -- the artist who reimagined a stuffy old-fashioned needlework tradition from ball gowns of centuries past and transformed it into a garment that is fresh, edgy and modern, utterly original and unique.

As Seen On the Runway at D&G
And what about Melania, the First Lady so many love to hate?  We don't know her that well, but it seems to me that she is most comfortable expressing herself creatively through her fashion choices.  Who can forget the fuschia Gucci Pussy Bow blouse she wore for the debate that took place right after the "grab-'em-by-the-P____" scandal broke?

Melania's Gucci "Pussy Bow" Blouse
Dressing well is an art in and of itself, and it takes more than a big bank account to put together outfits that are flattering and appropriate for high-profile events.  Don't believe me?  Think back to some of Cher's notorious Oscars ensembles.  That's why most celebrities today are professionally styled for red carpet events.

Cher's Notorious 1986 Oscars Ensemble
The First Lady of the United States of America would look ridiculous wearing this gorgeous D&G coat the way it was styled on the runway, but paired with a simple ivory dress, the look is elegant and iconic.  Seriously, I predict that someone is going to come out with a creepy collectible Melania doll wearing a miniature version of this outfit.  If I had only seen this jacket on the runway, in a fashion magazine, or in a shop, I would have admired the embellishments but would have had no idea what to wear with it or whether I could "pull it off."  Although she can certainly afford to hire a professional stylist, Melania chooses to "style herself," telling Elle magazine "I style myself and choose what to wear based on what I feel good in it [sic]."

As Worn By Melania Trump in Sicily
She's not Michelle, Barbara or Hillary, she's not Wonder Woman, and she's not Mother Theresa, but she's definitely a snappy dresser.  I look forward to seeing what she wears next!  And as for the designer of this Coat of Many Colors?  Stefano Gabbana is a self-made billionaire, an entrepreneur and a creative genius whose father was a factory worker and mother was a laundress.  Geography aside, the Dolce & Gabbana label is the epitome of the American Dream.  I'm happy for his success, and glad that his beautiful designs are getting the exposure and recognition they deserve.

Happy Thursday, everyone!