Showing posts with label Quilting. Show all posts

Thursday, February 15, 2024

New Fabric, New Project (Maybe): Scrappy Celebration Quilt in Tilda Prints and Solids

Good morning and Happy Thursday from sunny Naples, Florida!  ðŸŒž. I’m in limbo right now, moved out of our old house in Charlotte, North Carolina, but we don’t close on our new house here in Naples, Florida until next Tuesday the 20th.  My entire fabric stash, all of my rotary cutting tools and rulers, and all of my current works in progress are packed up in boxes that have not yet been delivered, but I do have access to my AccuQuilt GO! fabric cutter and all of my dies, my Bernina 475QE and my vintage 1935 Singer Featherweight 221 sewing machines, my travel iron, Best Press, and a tabletop ironing mat, and a bolt of Moda Bella Solid fabric in Off White.  These items traveled to Florida with me in my car so I have them in our temporary housing situation.  My husband is abandoning me for a couple of days for a business trip to Ft. Lauderdale, so I decided to self-medicate my moving jitters with a quick fabric shopping trip to my new LQS/Bernina & Baby Lock dealer, Flash Sew & Quilt.

New Tilda Precuts for Scrappy Celebration Quilt (Maybe)

I know, I know — if there’s one thing a quilter becomes acutely aware of when packing for a household move, it’s how much more fabric she already owns than she could ever reasonably use within her lifetime…  But medical science is making advances every day, and the cost of fabric keeps going up, so I’m rationalizing that I am wisely buying fabric while it’s still affordable, before global warming makes the planet too hot to grow cotton anymore, and I need to buy enough of it in case scientists cure everything and I am still here quilting away in my 200s.  Ahem.

In all seriousness, though, I was judicious with my purchases.  I bought precuts because they will be easier to manage with my GO! cutter on a kitchen table than yardage, and I didn’t want to buy enough for a whole new quilt, just enough to give me something to cut up and sew back together again for stress relief over the next couple of weeks until I get my hands on the rest of my stash.  I bought a fat quarter bundle of Tilda Solids and several fat eighth bundles of the newer Tilda print collections that I don’t already own, knowing that I have bundles and scraps of older Tilda prints (leftover from my Halo quilt) that will coordinate with the new stuff.  I also bought myself a pair of fabric scissors (the purple handled micro serrated Karen Kay Buckley Perfect Scissors) so I can rough-cut my Bella Solid Off White yardage and my fat quarters before running them through the die cutter, and I bought some pins and a spool of neutral Aurifil 50/2 cotton thread because I’m pretty sure both of my travel machines are current threaded with the dark navy I was using for my Deco quilt.  (Side note: TOTAL BUMMER that I packed my Deco Quilt and my FrankenWhiggish Rose projects in boxes and loaded them into the moving pod, because either of those projects would have been ideal to work on right now).  

The quilt you see on my iPad in the photo above is Scrappy Celebrations by Lissa Alexander for American Patchwork & Quilting, and it was a quilt along project in 2023.  I haven’t purchased the pattern and don’t intend to — I like the idea of mixing up a variety of 9-patch and 4-patch blocks but I’m not interested in making the exact quilt, and I definitely don’t need any instructions for such simple blocks.  I’m sure the pattern instructions call for rotary cutting and strip piecing anyway, which I won’t be doing since I don’t have any of those tools available right now.  

You know what else I don’t have access to right now?  My computer!  I’m writing this post on my iPad right now and it’s really annoying.  I am missing my big desktop monitor where I can do photo editing and have multiple windows open for adding links etc.  And by the way, my email subscription service is still paused (need to work some kinks out with that) so that’s why this post wasn’t delivered to your in-box even if you’ve subscribed to receive my blog posts that way.  Honestly I don’t know when I’m going to have time to deal with that, so please check here on the blog from time to time for new posts.  Thanks for understanding.

I hope you’re all sewing and quilting up a storm wherever you are today!  I’ll be linking up today’s post with the following linky parties:

MONDAY

Design Wall Monday at Small Quilts and Doll Quilts  

TUESDAY

To-Do Tuesday at Quilt Schmilt  

WEDNESDAY

Midweek Makers at Quilt Fabrication

Wednesday Wait Loss at The Inquiring Quilter

THURSDAY

Needle and Thread Thursday at My Quilt Infatuation  

FRIDAY

Peacock Party at Wendy’s Quilts and More

Can I Get a Whoop Whoop? at Confessions of a Fabric Addict

Finished or Not Friday at Alycia Quilts

Off the Wall Friday at Nina Marie Sayre

Beauty Pageant at From Bolt to Beauty

 TGIFF Thank Goodness It’s Finished Friday, rotates, schedule found here: TGIF Friday

SUNDAY

Frédérique at Quilting Patchwork Appliqué

Oh Scrap! at Quilting Is More Fun Than Housework

Tuesday, December 12, 2023

Custom Deco Quilt Palette for 2024 + QAL Week 4, 108 Weeks Behind Schedule

56 x 68 Deco Throw Quilt, PANTONE Pairings Palette for 2024

This is the time of year for sleigh bells, twinkling lights, caroling... and complaining on social media about how much we disagree with the design industry's color forecasters' predictions for Color of the Year.  PANTONE Europe's Color of the Year for 2024 is Peach Fuzz:


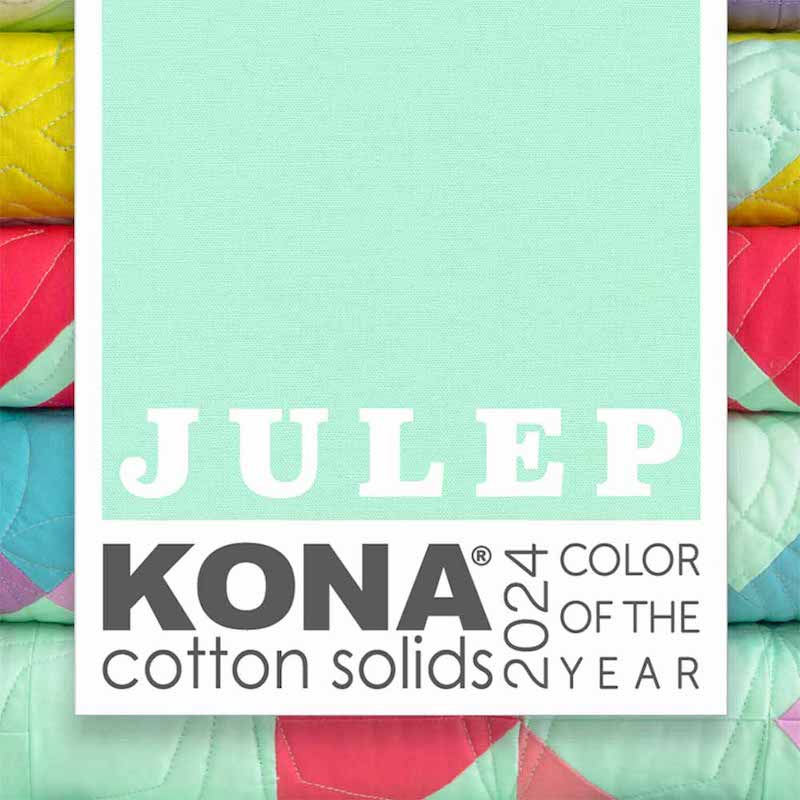
And Robert Kaufman's Kona Solid Color of the Year for 2024 is a pale aqua they're calling Julep: 


Looking at these two "new" color trend predictions side-by-side, many of us are getting flashbacks of  Margo and Todd's bedroom decor from the 1989 holiday movie National Lampoon's Christmas Vacation.  

Pantone Peach Fuzz Walls with Kona Julep Vase and Window Blinds

"Why is the floor all wet, Todd?"

"I don't know, Margo!!"  

"Why does Pantone think our 1989 bedroom set will be the embodiment of global lifestyle trends at the macro level in 2024?"

"I DON'T KNOW, MARGO!!!" ðŸ˜†

Sunday, August 21, 2022

Lucky Stars and Oriana for Ramona: Behind the Scenes with Backing, Design Choice, and Thread Selection

Good morning, my lovelies!  I have missed you!  These past few weeks have been busy for me with travel, family celebrations, and moving Son-the-Elder into his off-campus apartment at Appalachian State, and as a result I have quite a backlog of quilts to share with you.  Today we're looking at two gloriously colorful quilts, both made by my client Ramona who blogs at Doodlebugs and Rosebuds Quilts.  

Ramona's Lucky Stars Quilt

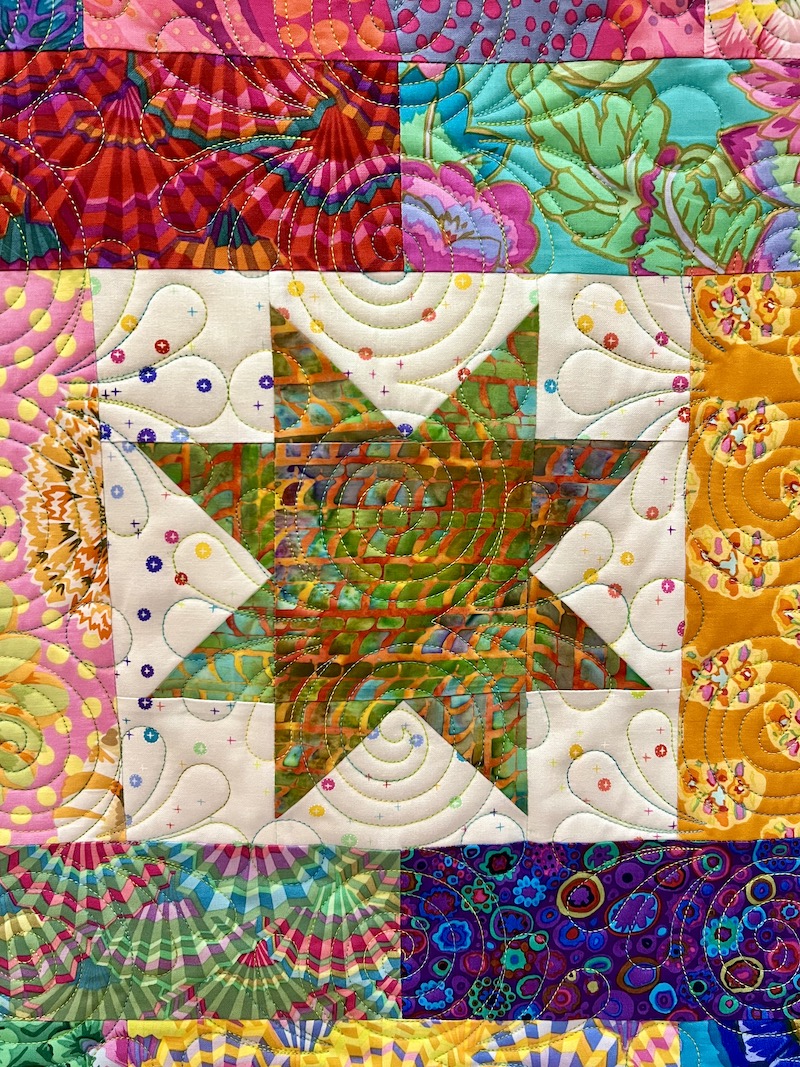
Detail of Lucky Stars with Grecian E2E

First up is Lucky Stars, a pattern by Atkinson design that you can find here on Etsy (this post contains affiliate links).  Lucky Stars is a fat-quarter-friendly pattern that is perfect for showing off Ramona's collection of Kaffe Fassett prints and batiks.  I love how the sawtooth star blocks are designed so the stars float just within the background fabric -- no risk of losing your star points if your piecing is less than perfect, which makes this a great pattern for beginners, too.  I am adding this to my own ever-lengthening list of wanna-make-its!  Wouldn't this be great as a baby quilt? 

Ramona's 76 x 91 Lucky Stars Quilt with Grecian E2E

This quilt was unusual for me in that, after some initial back-and-forth with design options, Ramona ultimately left the choice of the quilting design completely up to me and she had no idea how I was quilting her Lucky Stars until it was finished.  Ordinarily I consult with clients and make design recommendations, but get their approval on the final selection.  

Tuesday, November 23, 2021

Rebecca's Ultimate Etsy Gift Guide for Quilters and Crafters

 Hello, friends, and happy Nearly Thanksgiving to those of you in the United States!  Today's post is something I've never done before -- a shopping guide chock full of gift-worthy goodies that I personally would love to find under my tree on Christmas morning.  If you have quilters, sewists, or embroiderers on your shopping list this year, I have some suggestions that are sure to be received with delight.  (If YOU are the quilter/sewist/embroiderer reading this post, you may find a few items for your OWN wish list).  What's more, every item on my list is in stock and coming from a small craft business owner via Etsy -- and none of them contains those pesky microchips that are delaying just about everything else you might want to buy for the holidays this year.

A Few of My Favorite Tools

Each of the items on this list is something I personally own and love, or something I currently have on my own wish list.  Feel free to share this post with others, post on social media or wherever.  Disclaimer: this post does contain affiliate links, which means I may receive a small commission (at no additional cost to you) if you make a purchase after clicking my link.  I do appreciate your support of my wicked thread addiction!  ðŸ˜‰

 Beautiful Tools: Where Form Meets Function

The items in this section are a pleasure to own and use because they combine the finest craftsmanship with beautiful design.  Bonus: They make great Instagram props to "style" your work-in-progress photos.

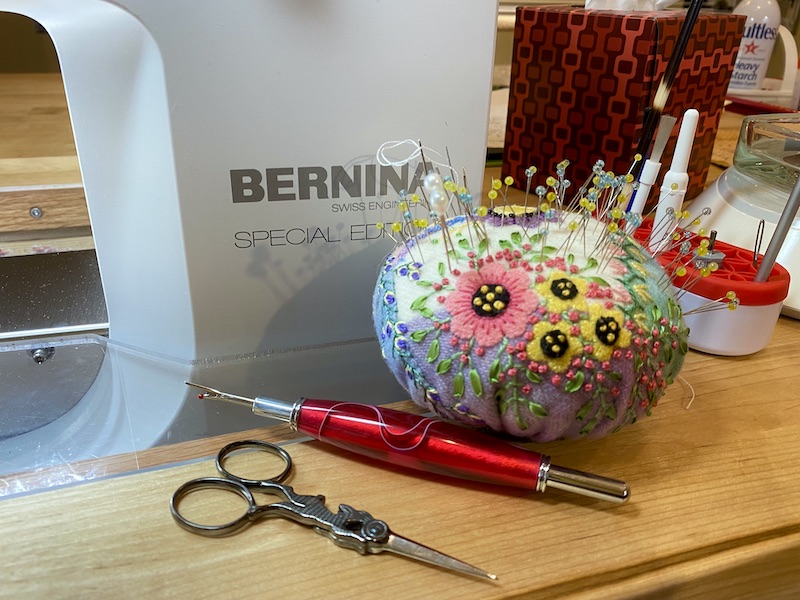
1. Hand Embroidered Felted Wool Pin Cushion from Etsy maker Martha of Quilt Shenanigans.  Who is this good for?  Anyone who does any kind of sewing at all can use a pin cushion, and these must take Martha hours to individually hand stitch and embellish with tiny beads.  Her hand stitching is exquisite, the felted wool is soft and luxurious to the touch, and the pin cushion is well-packed to hold its shape and is stable on a flat surface.  Even the slenderest pins slide in and out with ease, and she has lots of beautiful designs in stock to choose from.   

My New Favorite Pin Cushion, made by Martha of Quilt Shenanigans on Etsy 

2. Handmade, Hand Paired Embroidery Scissors from Maison Sajou.  These are manufactured by a 200-year old company in France, but available in several Etsy shops.  I got mine from Penelope Textiles' Etsy shop.  A few things to know: There are lots and lots of cheap imitations out there for a fraction of the price, but while the mass-produced knockoffs might look just as cute as photo props, there is no comparison to the way they actually cut.  It's like the difference between a Wustof steak knife versus the plastic knife that comes with your takeout order.  The lesser version SORT of cuts, but not cleanly or easily and it's not a joy to use!  Authentic Maison Sajou scissors are individually handmade by French craftsmen, with hand paired blades that are kept together throughout the entire production process to ensure that they match up perfectly. They are sharp, accurate, and cut smoothly and cleanly all the way to the tip (which is absolutely crucial for snipping the inside corner seam allowances in needle turned applique).  Who is this good for?  Anyone who enjoys any kind of hand stitching like cross stitch, embroidery, needle turned applique, or hand quilting would love to receive a pair of Sajou scissors!  In addition to the Hare design that I own, there is also a cute Eiffel tower version, gorgeous Art Nouveau Peacock scissors, and other historic reissue designs to choose from.  Of course, if you just want a cute pair of scissors for a photo prop, those cheaper knockoffs will suit you just fine!

Hand Paired Hare Embroidery Scissors from Maison Sajou, via Penelope Textiles on Etsy

Sunday, February 28, 2021

In Which the Ghost of Claude Monet Wrests Artistic Control of My Kaleidoscope Quilt and Turns It Into Giverny

Oh-Ma-Goodness; It's MARCH Already!  I'll save you the suspense and tell you right up front: Finishing all 63 blocks for my son's high school graduation quilt is my one-and-only monthly goal for March.  By which I mean, finishing the octagonal centers of all 63 blocks is my goal -- I'll be deciding on the corner triangles once all of the octagons are completed and arranged to my liking on my design wall.  

Nine 11 Inch Kaleidoscope Blocks Completed

Behold, 9 of the 63 block centers are completed and up on my design wall.  That's one row down, and six more rows to go.  I'm planning to make three blocks from each fabric, so there will be much greater variety in the finished quilt than what you see on my wall right now.

The First Four Blocks

Keeping my time constraints in mind, I'm trying not to be TOO neurotic about the center points matching absolutely perfectly.  Meaning that I'm taking care to match them as perfectly as I can the first time, but have resisted the urge to grab my seam ripper over minuscule misalignment that you can only see from 2" away with your high-power reading glasses.

Tuesday, February 16, 2021

First Personal Quilt Finish of 2021: Christmas Sweets Disappearing 9-Patch Snuggle Throw

Yes, I see you all posting your timely Valentine's Day and Spring-themed quilts all over the Internet.  I know what month it is!   But I'm like that straggler way at the back of the race, finally stumbling across the finish line a month after the marathon ended...  Or something like that!  


I actually finished quilting my Christmas Sweets Disappearing 9-Patch throw on New Year's Day, when I wrote my goofy fairy tale spoof about it (you can read that here if you missed it).  But then, as the Christmas trees were piling up at the curb and the decorations were being packed away, I just wasn't feeling very motivated to get it labeled and bound.  I also had a few customer quilt commitments that I needed to attend to first.  

Saturday, January 2, 2021

First New-FO of 2021: Kaleidoscope Grad Quilt for Anders

Alright you guys, I know you've heard me sing this song before, but THIS time I mean it.  THIS is the quilt I'm making for Son-the-Younger's upcoming high school graduation:

77 x 99 Kaleidoscope Quilt in Blues, Greens, and Purple

Some of you are raising your eyebrows at this, recalling my previous announcement about a year ago that I would be making Anders a version of Karen Kay Stone's spectacular Cinco de Mayo quilt for his graduation, but that idea has been abandoned for the following reasons:

  1. Graduation is only 5 months away, and I have customer quilt commitments that will demand my attention in addition to my own ongoing projects.
  2. While I still love the elaborately foundation paper pieced New York Beauty blocks in Karen's design, I know that all of those seams add up to a stiffness that is fine for a wall display quilt, but not so soft and snuggly to sleep under.
  3. It bothered me that the New York Beauty blocks were too similar to the curved flying geese arcs in my older son Lars's high school graduation quilt, and I wanted Anders' quilt to be completely different.
  4. Most importantly, I think, is that I just don't want to devote such a significant block of time to recreating a version of someone else's design right now.
So I may (or may not) end up making a quilt like Cinco de Mayo someday, but it's not going to be Anders' graduation quilt.

Saturday, November 28, 2020

SANTA SQUIRREL! I Need to Make a Christmas Throw Quilt, and I Need to Do It TODAY!


Today is the Drop-Everything-And-Make-It linky party at MMM Quilts, which is the perfect excuse (as if I needed one) to give in to the "squirrel" of an idea that's been chasing me around for the past few days!  I've seen so many cute Christmas quilts over the years, but have never had a strong urge to make a holiday-themed quilt before this year.  Maybe it's the pandemic, maybe it's the adorable snowflake E2E quilting designs that I'm dying to try out with R2D2, who knows -- but the squirrel won't leave me alone until I swap out the year-round throws that grace my sofa for something red, green, and scrappy, full of nostalgic and happy Christmas prints.

I didn't have as many Christmas novelty fabrics in my stash as I thought I did, so I had to trek out to two different quilt shops to come up with this assortment:

Assorted Squirrel Project Fabrics, With Neglected Sampler Blocks as a Backdrop

My mom just finished piecing another scrappy tumbler charity top for me to quilt, using my 4" AccuQuilt GO! Tumbler die.  It looks very similar to this one that I quilted a few weeks ago:

Charity Quilt Made With AccuQuilt 4" Tumbler Die

Isn't it cute?  I'm always surprised how quickly these come together.  It only took me an hour or two to cut out all of the tumblers for this, and my mom had the top sewn together in two days.  I need to make more projects like that, y'all, instead of only making quilts that take 6 months to 7 years to finish.  I went to the quilt shop planning to make a throw quilt just like this one, but with solid red fabric in place of the purple and Christmas prints instead of the juvenile novelty prints.

But when I got to the quilt shop, I was delighted to discover that they had a 6" AccuQuilt Tumbler die.  Bigger tumbler patches means fewer tumblers need to be cut out and fewer seams needed to sew them all together!  

57 x 72 Quilt Design Using 6 inch AccuQuilt Tumbler Die

Using the 6" tumbler die instead of the 4", I can get a 57" x 72" quilt top out of just 78 red tumblers and 78 prints.  Not sure if I'll match my seams as shown above or if I'll go with my mom's staggered layout, which gives a nifty chevron/ricrac effect.  This layout was fastest to draw up in my EQ8 quilt design software, and my primary objective was to quickly calculate how many tumblers I'd need to cut out.  (I won't be doing those partial tumbler slivers along the sides, either -- instead, I'll trim the edges to the narrow point on the final full tumbler).  

I haven't decided on the backing fabric yet, although I do have a couple of appropriately Christmasy fabrics in sufficient quantity in my stash.  I'd almost like to back it with a minky cuddle fleece to make it extra warm and snuggly, but that would mean another trip to the store...

Oh, and here's another DREAMI project that I stopped everything to make earlier this month, the one I MEANT to be sharing for today's linky:

My Notorious R.B.G. version of Preeti's International Sisters Block

Once I got the idea in my head to make a "Notorious R.B.G." version of Preeti's International Sisters block, I was helpless to resist!  First, I drafted a foundation paper piecing pattern in EQ8 to change the head wrap of the International Sisters block into Justice Ginsburg's no-nonsense, swept-back hairstyle and the crown that she wears in all of the memes.  The solid black, skin tone, brown hair, metallic gold crown, and floral background fabrics were all pulled from the stash, but I had to hunt down the perfect fabrics to appliqué for her glasses and her dissent collar on the Internet and then wait ever so (im)patiently for them to arrive.  It was a fun little diversion, for sure!  The glasses, collar and "jade" earrings are all hand stitched needle turn appliqué.  If you want to read more about that one, check out this post.  

And that's all you get from me today!  We started putting up Christmas decorations yesterday so there are boxes and debris from that strewn all over the house, and a few gifts that I've ordered have already started to arrived and are wrapped and ready to stick under the tree as soon as I locate the tree skirt.  This year more than ever, the song that's stuck on repeat in my brain is "We Need a Little Christmas" from Auntie Mame!

Rosalind Russell as Auntie Mame

In addition to Sandra's DREAMI linky, I'm also linking up with the following weekly linky parties:

SATURDAY

UFO Busting at Tish in Wonderland

SUNDAY

Frédérique at Quilting Patchwork Appliqué

Oh Scrap! at Quilting Is More Fun Than Housework
MONDAY

Design Wall Monday at Small Quilts and Doll Quilts  

Monday Making at Love Laugh Quilt

Tuesday, November 10, 2020

Monogram Baby Quilt Finish + IntelliQuilter Computer Robotics Installation

C is for Charlie, 42 x 42 prior to washing

First Big News: A Quilt Finish!

My AQS Letter Home QAL (resized, recolored, and with EPP monogram block added) is finished!  I wrapped it up last night, carefully packed it in a box along with big sister Margot's butterfly/clam shell quilt, and Bernie just entrusted the package to the safekeeping of UPS for its journey to New Mexico.  Godspeed, little quilts!  May you arrive safely and be literally loved to pieces!


Letter Home Monogram Baby, Quilting Completed

I ended up really liking how the the custom quilting came out with the Superior Fantastico variegated thread in shades of pale green.  All of the quilting is hand guided free motion or ruler work and SID.  For that center monogram block that was English paper pieced, my seam allowances are pressed open rather than to one side, so instead of quilting in the actual ditch where I would have risked piercing the piecing thread and breaking the seam, I shifted my quilting slightly inside the seam line onto the green fabric instead.

Letter Home Monogram Baby Quilt Trimmed

The larger-scale meandering against that white background fabric reminded me of jumbo marshmallows and Caspar the Friendly Ghost as I was quilting it.  ðŸ‘»

Applying Binding with my Bernina 475QE

My 750QE started throwing tantrums in the middle of embroidering Charlie's quilt label, and I skipped her annual Spa Visit last year, so I dropped her off at the Bernina dealer for a good cleaning and servicing.  I love having my 475QE as a backup machine that can do everything the 750 does except for embroidery, using all the same feet and bobbins, with all of the features I'm used to on the big machine.  

Should Have Done Machine Binding...

My IntelliQuilter had already arrived by the time I got to the binding stage of Charlie's quilt, making me REALLY wish I'd gone with a machine binding so I'd be done with it already!  I wanted these two baby quilts to be finished and out the door so I could focus on the new computerized quilting system!  It took me two days, probably somewhere between 4-6 hours total, to hand stitch the binding on this 42" x 42" baby quilt, and that does not include the time it took to cut the strips, join them, press the strip in half, machine stitch it to the front of the quilt, and join the ends of the binding.

Hand Stitching is 3/4 of the Way Completed after 4 Hours

C is for Charlie After Washing, 39 x 39

Here's what "C is for Charlie" looked like after washing and drying (above).  The quilt was SO much softer after washing out all of the starch!  This quilt started out at 42" x 42" just like Margot's quilt, has roughly the same quilting density, and the same 80/20 batting.  However, Margot's quilt was made with unwashed fabrics and all of Charlie's fabrics were prewashed in "Very Warm" water to shrink them ahead of time.  Margot's quilt finished at 38" x 38" after washing, for a shrinkage rate of roughly 10%, whereas Charlie's quilt finished at 39" x 39" for a shrinkage rate of approximately 7%.  

My Binding Looks Ruched After Washing!

The biggest post-laundering surprise with Charlie's quilt is how my binding appears to be ruched after washing it!  Apparently I did an excellent job of getting all the shrinkage out of the binding fabric prior to cutting the strips, so the binding stayed the same size even though the quilt it was attached to still had some shrinking to do.  I need to remember this, because it would be interesting to recreate this effect deliberately with some projects -- but I think that next time I make a quilt with a cotton or a cotton blend batting, I'll use UNwashed fabric for the binding regardless of whether or not the fabrics in the quilt top were prewashed.  The ripply-textured binding is fun on a baby quilt for little fingers to explore, but on most quilts I'd prefer a flat, smooth binding and allowing the binding to shrink in the wash along with the batting would minimize the rippled effect.  

THIS Arrived on Wednesday!!!  FINALLY!

Second Big News: The IntelliQuilter System Arrived!

Oh my gosh, you guys -- I ordered my IntelliQuilter computer robotics for my APQS Millennium long arm machine at the end of August, and it finally arrived last week.  My husband installed motors and tablet for me on Thursday.

My In-House Tech Guy, Working on My IntelliQuilter Installation

Thursday is the day I was having trouble embroidering my quilt label and taking my 750QE in for service, and when I got back from the Bernina dealer I wanted to get my label stitched to my quilt and get the binding sewn to the front of the quilt, so I didn't get a chance to run the software tests on the IntelliQuilter system until Friday.  Bernie did a fantastic job with his installation so the X and Y motor engagement strengths, calibration, and drift tests went perfectly the first time without requiring any additional adjustment to the motor positioning.  Whew!

My Robot!  THIS is the Droid I Have Been Looking For!

Doesn't Millie look like a robot now?  The 12" tablet is her face and the machine handles look like arms.  The IntelliQuilter makes cute little beeping noises that remind me of R2D2 from Star Wars, but my teenaged sons tell me she sounds "like an evil alien space ship that decides the human crew is expendable."  ðŸ˜’

IQ's X and Y Motors Mounted to Machine Carriage

Besides the tablet that mounts to the front of my machine head, the only other hardware to the IQ system are the two motors that drive the machine on the X and Y axis.  One motor rides along the machine's carriage to control vertical movement of the machine, and the other motor rides along the edge of my frame to control horizontal movement.  No belts or pulleys and no giant computer hanging off the end of my frame.  It's very streamlined, and the motors engage and disengage with the touch of a single button on the tablet so it's easy to switch back and forth between manual, hand guided quilting and computerized work.  Very cool.

Friday was the last day of the big semi-annual 25% off sale at Urban Elementz, a site that sells thousands of fabulous digital quilting designs that I can use now that my long arm is computerized, so I spent a good deal of time (and money!) stocking up on a variety of edge-to-edge, block, sashing, and border designs that I am SUPER EXCITED to start playing with.  On Saturday, I figured out how to upload my installation logs to IQ's Support page, the final step in the self-installation instructions, and then I spent some time downloading all the digital designs I'd purchased, transferring them to my IQ tablet, and organizing them all in Evernotes on my iPad/Mac computer so I can pull up all of my E2E feather designs, or all the designs with florals, or all of the geometrics, etc and find what I want quickly.  I still need to do that for the designs that came preloaded with my IQ system.  I stepped away from the IQ for all of Sunday, since it was Bernie's birthday and we had Important Birthday Things to do with our Important Birthday Boy.  I got a lot of hand stitching done on that binding while "watching" football with Bernie on Sunday.  Yesterday I finished the binding, washed the quilt, took the photos, and wrapped everything up for shipping...  And here we are again on Tuesday!

Tuesday's Weekly Goals

My two goals last week were to finish Charlie's quilt and to install my IQ system, both of which are completed.  Here's what I'm hoping to accomplish this week:

  • Back to Anders' Nanu Nanu quilt!  This is the next block to be foundation paper pieced (on my 475QE, since Big 'Nina 750QE is away at the Bernina spa):

Next 15 inch Block for Nanu Nanu!


My Queen Nanu Nanu! Sampler (Adapted from Moda Modern Quilt Blocks)

  • A little bit of Secret Sewing that also involves paper piecing, to be revealed at a later date
  • Continue learning my new IntelliQuilter system.  I need to rethread the machine, incorporating the new IQ thread break sensor wheel, and play around in manual mode to readjust my tensions to accommodate for the additional "pull" on the top thread from the altered thread path of IQ.  I also want to experiment with different speed settings for IQ and the APQS machine, since they work together to determine stitch length rather than using the stitch regulator built into my APQS machine.  
  • Once I've got nice, pretty stitches on both sides of my quilt sandwich, I want to go back through the hands-on IQ lessons provided by my dealer, Angela Huffman of Quilted Joy.  I went through all 6 hours of training videos while I was waiting for my IQ system to ship and found them extremely helpful for learning the interface and the various tools available within the software, but now I want to cement that knowledge by following along with my machine for each of the exercises.  Angela's excellent video classes cover all the basics for setting up and stitching out E2E/pantograph (edge-to-edge) designs as well as custom quilting blocks, borders and sashings, and I love how she filmed the classes in 10-minute segments so it's easy to find the bit you want to review quickly without having to rewatch or fast-forward through an hour-long class when you need a refresher.

That should be plenty to keep me busy this week, don't you think?  Considering that I also need to start planning and shopping (and baking and freezing) for Thanksgiving...

I'm linking up today's post with the following linky parties:

TUESDAY

·       To-Do Tuesday at Home Sewn By Us

WEDNESDAY

·       Midweek Makers at Quilt Fabrication

·       Wednesday Wait Loss at The Inquiring Quilter

THURSDAY

·       Needle and Thread Thursday at My Quilt Infatuation  

·       Put Your Foot Down at For the Love of Geese

·       Free Motion Mavericks with Muv and Andree

FRIDAY

·       Whoop Whoop Fridays at Confessions of a Fabric Addict

·       Peacock Party at Wendy’s Quilts and More

·       Finished Or Not Friday at Alycia Quilts

·       Off the Wall Friday at Nina Marie Sayre

·       TGIFF Thank Goodness It’s Finished Friday, rotates, schedule found here: http://tgiffriday.blogspot.ca/p/hosting-tgiff.html

Friday, October 30, 2020

Butterflies in Margot's Garden (Modern Baby Clam Shells) Ta-DONE!

I'm finally able to share my Modern Baby Clam Shells finish with you!  Its final name is "Butterflies in Margot's Garden," named after the little girl for whom it was made.  (This quilt is my original design; no pattern currently available).

Butterflies in Margot's Garden, Before Washing, 42" x 42"


I have always washed my finished quilts prior to gifting them, for a number of reasons: I want to remove any skin oils, hand lotion, dust, quilt markings, washable basting glue, spray starch, etc that may have been applied to the quilt during the process of making it.  I also want to be the one to discover any disastrous issues that a quilt might have (like a dye bleed) BEFORE I give the quilt away, so I could correct the problem and save the recipient the heartbreak of thinking that they had done something wrong to "ruin" the quilt.  I have also always felt like the quilt isn't 100% finished until it comes out of the dryer all soft and snuggly, ready for cuddling, and I want to be able to assess the quilt's changes in size and in texture to better inform my batting selections for future quilts.

I'm ESPECIALLY glad that I washed this particular quilt, because when I took it off the frame initially I was a little disappointed by the extent to which my E2E quilting (Daisies Galore pantograph) seemed to compete with and obscure the smooth curves and crisp points of my clam shell piecing.  Maybe it's just the change in the natural lighting from when I took the unwashed photo (above) and when I took the post-laundering photo (below), but even in real life I feel like the washed quilt is much closer to my intention.  Upon close inspection you can see the daisy quilting design, but the impact from a distance is of the pieced clam shells and the appliquéd butterflies, with soft, crinkly quilt texture throughout that is no longer screaming "LOOK AT ME!  

Butterflies in Margot's Garden, After Washing, 38" x 38"

Also of note: The quilt top measured 42" x 42" when I loaded it on my frame for quilting.  I did not measure it after quilting, before washing it, but after washing it in cold water and then tumbling dry with low heat, the finished quilt measures closer to 38" x 38".  That's nearly 10% shrinkage!  I used leftover 80/20 cotton/polyester batting, most likely Hobbs Heirloom, so some of the shrinkage is from the cotton in the quilt batting.  There is also some shrinkage that happens from the quilting stitches drawing up the quilt.  However, most crucially, I did not prewash any of my fabrics for this quilt because I was using a layer cake for the 9 1/2" clam shell prints.  

Pieced Backing, Butterflies in Margot's Garden

This is my first time piecing a quilt backing from two different fabrics.  I know everyone else has been doing this forever.  I was short on the giant scaled Kaffe Fassett floral print I'd purchased for the backing when I was first planning this quilt in December of 2018, and decided that I really liked how this leftover strip of backing trimmed from a previous quilt looked with the florals.  Look at that, you guys -- maybe I'm becoming THRIFTY after all these years!  ("Unlikely," says my husband...)

Detail of Hand Quilted Butterfly on Backing


I was a little worried that the heavy hand quilting stitches that I added to the butterflies might look weird from the backing side, but they blend in rather nicely (Can you see them in the photo above?).  I was grateful that the red dye in the cotton perle #5 thread did not bleed.  The skein was marked "colorfast" but sometimes they lie, especially with red.  ;-)

The Binding Shot


I remembered to take a picture of my binding this time.  I cut my strips at 2" wide, sewed them to the front of my quilt with a 1/4" seam allowance, and then stitched them to the back by hand with regular 50/3 Mettler cotton thread.

Butterfly Detail, Before Washing

Another interesting observation: The butterfly print fabric that I used for my broderie perse butterfly appliqués does not appear to be 100% cotton like the quilt shop cottons that were used for the rest of the quilt.  It was an eBay remnant that I purchased online, so I didn't have access to the bolt information and, frankly, I didn't care because the style, scale, and colors of the print were exactly what I wanted for this project.  The hand of the fabric felt slightly thicker and stiffer when it showed up in the mail.  The butterflies still feel slightly stiffer after washing and they didn't shrink as much as the background fabric, but this is actually a GOOD thing because it makes them puff up slightly for almost a trapunto effect after washing, helping to create the illusion that the butterflies are flying across the surface of the quilt rather than being stitched down.  Let's pretend I meant to do that! 

Butterfly Detail, After Washing


So, in my experience, an 80/20 cotton/polyester batting gives a very traditional, crinkly cotton batting look after quilting and washing, with just a bit more loft and less flattening in the larger spaces between quilting stitches than I'd get with 100% cotton batting.  That little bit of loft helps the machine quilting stitches look better on both sides of the quilt, and gives a little more definition to the quilting design.  But what I really like about 80/20 batting over 100% cotton is that the polyester fibers help a quilt with 80/20 batting to resist holding creases where it's been folded.  It's a little lighter weight than 100% cotton, too.

Butterflies in Margot's Garden, 38 x 38, Completed October 2020


All the Juicy Details:

I started this quilt in December of 2018, a few weeks before Margot was born, and it was supposed to be something "quick and easy."  I got bogged down in technical difficulties and design dilemmas, and then had to set it aside to make my son's high school graduation quilt, after which I took a detour with my Spirit Song/Sermon Scribbles quilt...  It feels really good to finally get this project finished and shipped off to its final destination!  I hope it gets heavy use as a snuggling blanket, superhero cape, living room fort, etc.  

I'm linking up today's post with the following linky parties:

FRIDAY

·       Whoop Whoop Fridays at Confessions of a Fabric Addict

·       Peacock Party at Wendy’s Quilts and More

·       Finished Or Not Friday at Alycia Quilts

·       Off the Wall Friday at Nina Marie Sayre

·       TGIFF Thank Goodness It’s Finished Friday, rotates, schedule found here: http://tgiffriday.blogspot.ca/p/hosting-tgiff.html

·       UFO Busting at Tish in Wonderland

SUNDAY

·       Frédérique at Quilting Patchwork Appliqué

·       Oh Scrap! at Quilting Is More Fun Than Housework

·       Slow Stitching Sunday at Kathy's Quilts

MONDAY

·       Design Wall Monday at Small Quilts and Doll Quilts  

·       Monday Making at Love Laugh Quilt

TUESDAY

·       To-Do Tuesday at Home Sewn By Us

WEDNESDAY

·       Midweek Makers at Quilt Fabrication

·       Wednesday Wait Loss at The Inquiring Quilter

THURSDAY

·       Needle and Thread Thursday at My Quilt Infatuation  

·       Put Your Foot Down at For the Love of Geese

·       Free Motion Mavericks with Muv and Andree