Showing posts with label accuquilt GO. Show all posts

Tuesday, May 13, 2025

Cleopatra's Fan Test Block Completed: Construction + Pressing Plan

Remember this blog post from mid-March, when I was contemplating whether or not to make a Cleopatra's Fan quilt?  You can catch up here if you missed that one.  I decided to make a test block with my AccuQuilt GO! 12" Cleopatra's Fan BOB (Block On Board) die cutter (this post contains affiliate links) and, although this was fiddly and slow-going to piece, I like how it turned out.  I was unsure about the large 12" block scale initially, but I really like it paired with large scale print fabrics like this scrap of older OOP (out of print) Kaffe Fassett floral.  Isn't this fun?


12 inch Cleopatra's Fan Test Block Completed


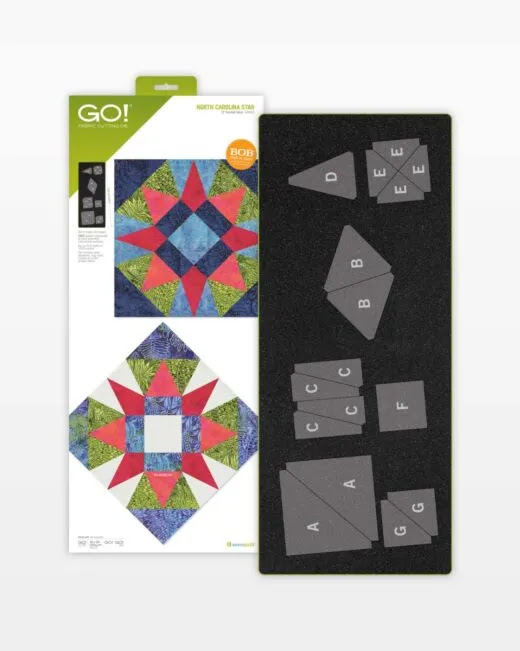
First, my thoughts on cutting the fabric patches out with the AccuQuilt die, because as I explained in my earlier post, there are multiple different options for cutting out this block.  Due to the orientation of the fabric shapes on the BOB die, I needed strips of each fabric cut PARALLEL to my selvages, which caused me to mess up and miscut the violet fabric I originally planned to use in place of the green solid.  I was on autopilot, selvages together, then selvages to the fold and cut off a slice, but that would have resulted in feeding the slightly stretchy crosswise grain through the die cutter, and my patches from that color would likely have stretched during cutting and come out slightly too small in one direction.  Following AccuQuilt's directions about fabric grain really does make a difference, I've found.  The other thing I knew I would need to do was to heavily starch that flimsy, filmy Kaffe Fassett print fabric before feeding it through the cutting machine.  Even with the grain oriented correctly, that fabric still was unlikely to behave without being starched with old school Niagara Spray Starch Plus.  These days I'm more likely to be using   for pressing seams as they're sewn and for pressing finished blocks, but nothing beats the real starch like Grandma used when it comes to a slippery fabric that doesn't cooperate.


Rear View: The Pressing Plan


The PDF instructions for assembling the Cleopatra's Fan block don't say anything about how the seams should be pressed.  I did my online research and found a few different tutorials, but in addition to reading them I scrutinized the accompanying photos.  Lots of people are saying to just press ALL the seams open with this block -- and lots of those tutorials show photos of finished blocks with misaligned seam intersections and wavy stretched fabric edges.  

Wednesday, March 19, 2025

Deep Dive Tangent: Exploring the 1934 Cleopatra's Fan Block

Happy Tuesday, my Lovelies!  Today's post is a break from the Lo & Behold Deco quilt I've been working on (just four more rows to stitch together before that's a finished quilt top!), but we're not veering into totally unrelated territory.  Brittany of Lo & Behold Stitchery, who designed my Deco quilt pattern, says she was inspired by the Art Deco style of the 1920s-1940s in 2019, when she realized that we we were coming up on the centennial anniversary of this iconic design movement (and all of the dizzying cultural, social, and technological transformations that happened during its heyday).  

Despite the great number of surviving quilts dating to the 1920s-'40s, not many of these quilts reflect the Art Deco style that was dominant when these quilts were being made.  Perhaps that reflects who was (and who wasn't) making quilts during those years and what sewing and quilting symbolized at that time -- a traditional female domestic activity and not something the giddy modern flapper girls were excited about.  Were the "Modern Girls" of the 1920s and '30s too busy exploring new social and economic opportunities outside the home, working in shops or factories during the day and dancing their nights away in jazz clubs, challenging traditional Victorian gender ideals (and giving their mothers plenty to worry about as they stitched more traditionally styled quilt blocks by the fire)?  ;-). That's my theory, anyway.  Sometimes I just make things up as I go along.

In any case, we don't have a great many examples of the Art Deco style influencing quilters in the surviving vintage quilts from the period, but we do have some and the Cleopatra's Fan design is one of my favorites.  I'm taking you on a Deep Dive into the Cleopatra's Fan block today, because I own (but have not yet used) the AccuQuilt GO! 12" Cleopatra's Fan BOB (Block On Board) die (this post contains affiliate links) and I'm trying to decide whether to actually make a quilt with it -- or just rehome my die to someone else who will use it!


52 x 69 Cleopatra's Fan in Kaffe Fassett Collective Prints, 12 inch Blocks

Above is a Cleopatra's Fan quilt rendering that I created in my EQ8 Quilt Design software using Kaffe Fassett Collective print fabrics with coordinating solids.  I've said it before and I'll say it again -- my Electric Quilt software is the best value for the money of any quilting tool I own, including my Bernina sewing machine and my long arm!  With most of my quilts taking multiple years from the time I cut into fabric until I finish the binding, the ability to experiment with design ideas and see what a quilt would look like in the actual fabrics I'm considering ahead of time saves me from sinking time and money into quilts that disappoint me when they don't turn out looking as great as I imagined when I pulled those fabrics at the quilt shop.  So, in that rendering above, these are 12" finished Cleopatra's Fan blocks just like my 12" AccuQuilt die will cut out for me, and those Kaffe Fassett fabric prints are to scale as well, so the design rendering is actually giving me a pretty good idea of how those large scale botanical prints will look when they are cut into the actual size patches of these blocks.  Do I like this enough to make it?  I haven't decided yet; we'll circle back to that at the end of the blog post!  Next I want to explore the original Cleopatra's Fan pattern as it was published in 1934 in the Cincinnati Inquirer by Laura Wheeler Designs (note that "Laura Wheeler" was one of several fictitious byline used by a New York City pattern syndication company that also went by many different names; you can read more about the company on Barbara Brackman's blog here):


Cleopatra's Fan Pattern Attributed to Laura Wheeler Designs, First Published in 1934


Up until fairly recently, the vast majority of quilts were designed and made as bed coverings rather than as wall hangings or throws.  Just to give you some context, here's an example of "modern" Art Deco bedroom furniture from a 1934 advertisement.  (I was unable to find a source attribution for this image but will update in the future if possible):


1934 Ad for Art Deco Bedroom Furniture


Isn't that fun?  And now, can't you just imagine this vintage Cleopatra's Fan quilt (below) on the bed in the magazine ad, with the sleek radiating curves of the quilt block's piecing lines echoing the radial seams in the headboard's veneer?  You may need to zoom in to see that on the photo if you're reading this on your mobile phone.


Vintage Cleopatra's Fan Quilt circa 1940s, Augusta Auctions


This is actually the first Cleopatra's Fan quilt I ever saw, an image from Augusta Auctions that I stumbled across on Pinterest years ago.  I was intrigued because I'd never seen the block before and the auction house didn't identify the quilt pattern in their auction description.  They just dated it to circa 1940s based on the fabrics.  

Monday, February 10, 2025

Custom Quilting Marybeth's circa 1984 UFO + Cranking Out Deco Blocks

Happy Monday, everyone!  Congratulations to the Eagles fans out there, and my condolences to the Chiefs fans.  Not that I watched even five minutes of the Superbowl -- I'd rather sit in my laundry room for four hours watching the clothes go round and round than sit in front of a television watching grown men run around and clobber each other over a weird-shaped, ugly ball.  So HAH!  My husband and sister-in-law are from Philly, however, so while they were up at the house cheering their team I snuck off to the quilting studio to start quilting the borders on my friend Marybeth's UFO sampler quilt that dates back to 1984.


Wasatch Bella Bella Feather Border and Corner Quilting Design


When Marybeth showed me these blocks and told me the story of the quilt, I promised her that if she finished the quilt top I would custom quilt it for her.  This was supposed to be a "big boy" quilt for her son Nathan, who is now a married father in his forties.  The blocks are hand pieced and hand appliqued in neat, even stitches and it would be an intolerable shame if the quilt never got finished at all.  

Challenges for Marybeth included finding suitable border fabric, because she didn't have enough left of the fabrics from the blocks and may have used the fabric for some other project over the years.  Although there is no purple in her quilt blocks, I think the solid purple border fabric she chose works really well because it's the right value and hue to coordinate with the other colors well.

Challenges for Rebecca included coming up with quilting designs that would complement the vintage 1980s style of the sampler blocks and fabric without overpowering them, and without skewing too modern or too formal.  Another challenge was remembering how to lay out and size a border design to fit the quilt border and to accommodate for the quilt drawing up during stitching...  Too bad I didn't revisit this Q-Matic border quilting tutorial on Bernina's We All Sew blog before I loaded this quilt.  I loaded, basted, and did all of the stitch in the ditch quilting with monofilament thread a couple of months ago, and I did not remember Bernina Educator Denise Jones' tips about marking the center and quarters of the long sides of the quilt to make placing the border designs easier.  Next time!  Here's a shot of Marybeth's quilt on my frame where it languished for weeks, waiting for me to pick a design and get up the courage to start quilting it already!


Post-SID, Pre-Border Quilting Paralysis Syndrome


Sunday, March 31, 2024

My Slow Progress: Scrappy Tilda Celebration, Scandi Deco, New Sewing Room + Kitchen Update

Hello from sunny Naples, Florida, my lovelies!  Happy Spring and Happy Easter to all who are celebrating!  Son the Younger went off to spend the weekend with a friend in North Carolina, but Son the Elder, Bernie and I will be having Easter dinner with Bernie's dad and sister.  Alas, no little ones hunting eggs or keeping their eyes peeled to spot an Easter bunny.  Those years sure went by fast!

I haven't written a blog post in a LONG time, so fair warning -- I have lots to say.  ;-)

My Tilda Scrappy Celebration

On to the eye candy, because I know that's what you're here for.  My most recent accomplishment was cutting out all of the pieces for six of these double nine patch blocks, for my Scrappy Celebration quilt project.  The small scale green floral is Tilda Farm Flowers in Green (available here on Etsy).  This fabric is also included in the Tilda's Jubilee Mega Blenders Bundle if, like me, you are crushing on Tilda prints lately and want to add a whole coordinated assortment of these sweet Norwegian prints to your current projects (or to your stash -- no judgement!).  And now, for that icky but necessary disclaimer: This post contains affiliate links.  If you make a purchase after clicking on one of my links, I might be compensated at no additional cost to you.  I feel so dirty now.  Moving on...  

The rose pink solid in the center of my little 9-patch blocks is from a Tilda Solids fat eighths bundle (not sure which shade), the little white squares were cut from my bolt of Moda Bella Solids Off White, and that low volume print with diagonal blue stripes and tiny red dots was pulled from my stash of Who Knows What Purchased Who Knows When.  I'm looking forward to piecing these blocks!

Yummy Tilda Fabrics Cut and Laid Out, Ready to Sew

I'm sure that, if I was following Lissa Alexander's pattern for my Scrappy Celebration-inspired quilt, the instructions probably involve time-saving strip piecing techniques.  However, when I began this project my rotary cutters and rulers were still packed in boxes somewhere, and they are still packed in boxes somewhere since we need to make modifications (amputations!) to my ginormous worktable before it will fit in the much smaller sewing room of our new house in Florida.  So instead of cutting strips for my nine patch blocks, I cut out all of my squares individually with my AccuQuilt GO! fabric cutting dies.  

Monday, October 2, 2023

Margaret Willingham's Reverse Appliqué Workshop, Charlotte Quilters' Guild + My Deco Quilt Progress

Happy Fall, Quilters!  Guess what -- I took an actual, in-person workshop with the Charlotte Quilters' Guild last month AND I finished my workshop block after I got home!  I'm so proud of myself for 1. Taking a day off, 2. Trying something new, 3. FOLLOWING DIRECTIONS during the workshop 😬, and then 4. Adapting what I learned in class to suit my personal preferences once I got home to my own studio.  

My 12 x 12 Block from Margaret Willingham's Reverse Appliqué Workshop


I'll tell you more about the workshop in a minute.  First, I have other news to share -- I've made some progress and gotten over the Cutting and Kitting Hurdle with my Deco Quilt that has been in-progress/abandoned for the past two years!  Well, better late than never.  I am supremely pleased with my clear plastic tote bag containing all of the pieces for all of the blocks, neatly organized and labeled in little Ziplock bags.  Our guild has lots of social sewing opportunities throughout the month and, as President of the guild, I try to attend as many of them as possible.  Having a project packed up and ready to go (versus strewn around my studio!) is my biggest challenge, but now I'll just be able to grab a Ziplock bag of block pieces and wheel my travel machine out the back door.  I have a feeling this project is about to pick up STEAM!

My Deco Quilt Completely Cut Out and Kitted, Block One Variations In Progress

Now that I've finished ALL of the cutting for my Deco Quilt, I am officially caught up with Week Two of the Deco QAL (Quilt-Along) that I committed to in the Fall of 2021!  ðŸ˜‚. Week Two was cutting out all of the fabric pieces for the entire quilt.  I am like that last straggling marathon runner who crosses the place where the finish line used to be, two years after the race has ended...  Not only am I caught up with Week Two, but I'm also about a third of the way through with Week Three of the Deco QAL, which is the week where you piece all of the Block One log cabin variations.  All 16 blue/green log cabin blocks are finished and all 12 of the half blocks in both colorways are finished and I have 32 blue/purple log cabin blocks remaining to be sewn. The cutting for this quilt was monotonous, but the actual sewing is pretty easy.  I think that completely finishing this quilt top was supposed to be my OMG (One Monthly Goal) for November of 2021; maybe I can get it finished by November of 2023 instead!

Friday, March 10, 2023

Another Fresh Start On My Horizon: A Halo Quilt for Marlies

 Good morning, quilters!  Despite waking up to a muddy, rainy day here in Charlotte, I am in a sunshine mood today.  I think I may have finally figured out how to get my blog posts to automatically email to all of you wonderful people who have signed up for my email subscription!  Woo hoo!  Any of you who are not signed up for email but would like to be, just scroll to the bottom of my web site to find the signup box.  In case anyone else out there has been having a similar problem, here are the boring technical details: The RSS feed generator I'd been using successfully with that free email subscription service for years (can't even remember the name of it now!) and then with MailChimp created an RSS feed with slightly different tag names than the ones my new SendinBlue service is looking for when it checks my blog for new content.  The tags that were incorrect were "Published" instead of "pubDate" and "Content" instead of "Description," and SendinBlue's tech support identified that problem for me and directed me to a different website that would generate a new RSS feed with the universal RSS tags that their robots look for when they check my site for a new blog post.  The reason those awful blank emails were going out with just a header, a post title, and a footer, with no photos and no text, is that the SendinBlue robots were finding a new blog post title but couldn't "see" any of the text or photos when it wasn't associated with the tag name "Description" that they were looking for.  Clear as mud, right?  Anyway, I've been going back and forth with tech support about this and pulling my hair out over it for three months now, so it will be a huge relief to me if it's finally fixed.  The test email that I sent to myself last night came through correctly, so fingers crossed that THIS blog post shows up in everyone's inbox complete with text and photos, too!

But no one came here to talk about RSS feeds and computer bots, did they?  

Another NewFO for Rebecca: Halo Quilt by Jen Kingwell

I know I just posted last week about starting a new challenge project (the upcoming Star Upon Stars QAL from Laundry Basket Quilts), but the fabric and templates haven't shown up in my mailbox yet and the quilt along doesn't kick off until the middle of next week.  Meanwhile, my restless heart fell under the spell of a more intermediate quilt that will go together faster for me, one that involves curved piecing that I enjoy and find satisfying.  This is all the fault of my client Megan, by the way, because she's going to be starting this quilt in a class at the Quilt Patch shop in Matthews at the end of March and she tempted me with photos of a quilt that is way too adorable to refuse.  I'm also blaming Teresa, the Quilt Temptress who is teaching this class and who has been sharing photos of the gorgeous Halo quilt she made as a sample!  Teresa's class is already full and has a wait list, but I have a feeling she'll be teaching it again in the future.  As for me, I have a constitutional inability to follow directions anyway, so I'll be diving in on this one totally unsupervised.

Halo Pattern, Templates, and Tilda Pie In the Sky Fabric Bundles


If you're local to the Charlotte area and you'd like to make a Halo quilt of your own, Quilt Patch Fabrics in Matthews has both the Jenny From One Block pattern booklet and the optional acrylic template set for sale in their shop.  I purchased my Halo pattern booklet and my Tilda Pie In the Sky fabrics from the fabulous Flash Sew and Quilt shop in Naples, Florida while I was there visiting my in-laws, and I'll be making my Halo quilt as a gift for my mother-in-law Marlies.  

Friday, January 27, 2023

Star of North Carolina: AccuQuilt vs. Electric Quilt Software

Happy Friday, Quilty Peeps!  I took a little design detour yesterday, playing around with a historical quilt block called Star of North Carolina in an updated color scheme of Kona Solid fabrics.

My 58 x 74 Star of NC Design, Using 8 Inch Blocks

I became aware of this block recently when AccuQuilt reintroduced their limited edition 12" North Carolina Star BOB (Block On Board) die as a permanent offering.  "Block On Board" (BOB) refers to AccuQuilt dies that are designed to cut all of the shapes needed for a particular quilt block with a single pass through the die cutting machine.  (By the way, all of AccuQuilt's BOB dies are on sale 20% off, now through January 30th.  This post contains affiliate links).

AccuQuilt's 12 Inch North Carolina Star BOB Die

Barbara Brackman's definitive reference book, the Encyclopedia of Pieced Quilt Patterns, 3rd Ed., identifies this as Block #473 in the Ladies' Art Company Catalog that was published from 1889 through the 1970s.  

Thursday, January 13, 2022

Whig Rose Applique Progress, Christmas Tumbler Top + a Sizzling Star Quilt Finish

Hello, my friends!  How is your January shaking out so far?  Our Christmas decorations are packed away, my sons are out of my house and back at their respective colleges, and I've been sewing up a storm.  I won't get my hands on the first patterns for my Sarah Fielke BOMs until the LAST day of January, so I've been working on the backlog of client quilts in my queue and moving personal projects along so I'll be ready to kick off an Applique-Palooza on January 31st. Today I have two personal projects to share and one client's quilt to showcase.  I'll be linking up with all the usual suspects (favorite linky parties, listed on my blog sidebar).

FrankenWhiggish Rose Applique

Thanks largely to the Medici the Magnificent series on Netflix, I stitched the last of the leaves on my Whig Rose blocks last night.  Woo-hoo!  

FrankenWhiggish Rose Needleturn Applique In Progress

This is the first time I've had all nine blocks in progress on my design wall and I've gotta say, it's looking really encouraging!  The center block is the only one that's 100% finished, but I had forgotten that I had a second block (bottom left) that was nearly finished except for the stuffed berries near the corner tulips.  

Thursday, June 3, 2021

Rebecca vs the Cavalier King Charles Spaniel: A Corn and Beans Vintage Quilt Repair In Progress

Just as I was about to type "Good Morning, Lovelies," my grandfather clock struck noon...  Ah, well -- good afternoon, then!  Today I'm sharing the first chapter of a vintage Corn and Beans quilt repair that I'm working on for a client.  

Client's Vintage Corn and Beans Quilt, With "Window" Added By Her Dog


Why, yes -- OF COURSE I can fix that!  ðŸ˜‚. I am such a glutton for punishment, aren't I?!

This vintage Corn & Beans quilt is actually in pretty good shape overall, except for worn binding, a few small holes/open seams here and there...  and a giant window chewed right through the middle of it by my client's Cavalier King Charles Spaniel!  It's machine pieced and quilted by machine (minimally, by today's standards) and I've been mulling over how to fix it for awhile now, knowing it was coming up in my queue.

My Replacement Block, Next to the Original


When working on a vintage repair for a client, I'm charging by the hour and trying to stick as closely as possible to the agreed-upon estimate, so I start with the absolute worst damage first and try to work as efficiently as possible.  This area of the quilt needs to be completely reconstructed through all three layers, so that's where I chose to begin.

Tuesday, May 11, 2021

Tuesday's To Do List: Champagne in Giverny for Son-the-Younger

Well, I hope everyone likes the champagne bubbles because we're committed to them now!  After agonizing over trying to choose the perfect design for Anders' graduation quilt for weeks now, I finally decided to show a few options to the soon-to-be-graduate himself and see what HE likes.  Anders chose this design for his quilt, Kristin's Champagne Bubbles E2E, and I started stitching it out this afternoon.

Kristin's Champagne Bubbles E2E on Kaleidoscope Quilt

I just LOVE how my IntelliQuilter can quilt out such smooth, perfect circles onto a quilt, don't you?  This is one of those quilting designs that can only be stitched out with a computerized machine.  I chose 100% Quilter's Dream Cotton batting for this quilt since Anders complains about being too hot at night -- and since he'll be attending college in South Carolina.  The thread is Glide in color Split Pea, selected because it blends into most of the lighter colored fabrics in the quilt top and is a near-perfect match to the backing fabric.

Sunday, February 21, 2021

Kick-Starting the Kaleidoscope Quilt

Son-the-Younger's high school graduation quilt has begun!  And it's SOOO exciting!


In the photo above, the isosceles triangles have not yet been sewn together into an octagon, but I just loved the way the strippy pieced triangles came out and had to snap a picture.  This idea was born of necessity, because I didn't pay attention to the size of the hand dyed fabric pieces in the assortments I ordered from Marjorie Lee Bevis on Etsy and I do not have enough of any one of them to cut four identical 5" x 6" triangles out of any one fabric.  Bummer -- but also opportunity for inventive solutions!  I cut two different marbled fabric pieces into four strips each, then pieced them with strings of Kaffe Fassett, a green batik, and a strip of Tula Pink spots that was trimmed away from leftover quilt backing, all from my overflowing scrap bins, and then I layered for of these me-made string fabrics over my AccuQuilt 5" x 6" Isosceles triangle die to get two different sets of pieced triangles for my kaleidoscope blocks.


My GO! cutter did not appreciate me cramming four layers of pieced fabric with stacked seam allowances through at once, and it was really hard to turn the crank handle -- but it cut them cleanly and without breaking anything...  So I'll be doing that again!

Saturday, November 28, 2020

SANTA SQUIRREL! I Need to Make a Christmas Throw Quilt, and I Need to Do It TODAY!


Today is the Drop-Everything-And-Make-It linky party at MMM Quilts, which is the perfect excuse (as if I needed one) to give in to the "squirrel" of an idea that's been chasing me around for the past few days!  I've seen so many cute Christmas quilts over the years, but have never had a strong urge to make a holiday-themed quilt before this year.  Maybe it's the pandemic, maybe it's the adorable snowflake E2E quilting designs that I'm dying to try out with R2D2, who knows -- but the squirrel won't leave me alone until I swap out the year-round throws that grace my sofa for something red, green, and scrappy, full of nostalgic and happy Christmas prints.

I didn't have as many Christmas novelty fabrics in my stash as I thought I did, so I had to trek out to two different quilt shops to come up with this assortment:

Assorted Squirrel Project Fabrics, With Neglected Sampler Blocks as a Backdrop

My mom just finished piecing another scrappy tumbler charity top for me to quilt, using my 4" AccuQuilt GO! Tumbler die.  It looks very similar to this one that I quilted a few weeks ago:

Charity Quilt Made With AccuQuilt 4" Tumbler Die

Isn't it cute?  I'm always surprised how quickly these come together.  It only took me an hour or two to cut out all of the tumblers for this, and my mom had the top sewn together in two days.  I need to make more projects like that, y'all, instead of only making quilts that take 6 months to 7 years to finish.  I went to the quilt shop planning to make a throw quilt just like this one, but with solid red fabric in place of the purple and Christmas prints instead of the juvenile novelty prints.

But when I got to the quilt shop, I was delighted to discover that they had a 6" AccuQuilt Tumbler die.  Bigger tumbler patches means fewer tumblers need to be cut out and fewer seams needed to sew them all together!  

57 x 72 Quilt Design Using 6 inch AccuQuilt Tumbler Die

Using the 6" tumbler die instead of the 4", I can get a 57" x 72" quilt top out of just 78 red tumblers and 78 prints.  Not sure if I'll match my seams as shown above or if I'll go with my mom's staggered layout, which gives a nifty chevron/ricrac effect.  This layout was fastest to draw up in my EQ8 quilt design software, and my primary objective was to quickly calculate how many tumblers I'd need to cut out.  (I won't be doing those partial tumbler slivers along the sides, either -- instead, I'll trim the edges to the narrow point on the final full tumbler).  

I haven't decided on the backing fabric yet, although I do have a couple of appropriately Christmasy fabrics in sufficient quantity in my stash.  I'd almost like to back it with a minky cuddle fleece to make it extra warm and snuggly, but that would mean another trip to the store...

Oh, and here's another DREAMI project that I stopped everything to make earlier this month, the one I MEANT to be sharing for today's linky:

My Notorious R.B.G. version of Preeti's International Sisters Block

Once I got the idea in my head to make a "Notorious R.B.G." version of Preeti's International Sisters block, I was helpless to resist!  First, I drafted a foundation paper piecing pattern in EQ8 to change the head wrap of the International Sisters block into Justice Ginsburg's no-nonsense, swept-back hairstyle and the crown that she wears in all of the memes.  The solid black, skin tone, brown hair, metallic gold crown, and floral background fabrics were all pulled from the stash, but I had to hunt down the perfect fabrics to appliqué for her glasses and her dissent collar on the Internet and then wait ever so (im)patiently for them to arrive.  It was a fun little diversion, for sure!  The glasses, collar and "jade" earrings are all hand stitched needle turn appliqué.  If you want to read more about that one, check out this post.  

And that's all you get from me today!  We started putting up Christmas decorations yesterday so there are boxes and debris from that strewn all over the house, and a few gifts that I've ordered have already started to arrived and are wrapped and ready to stick under the tree as soon as I locate the tree skirt.  This year more than ever, the song that's stuck on repeat in my brain is "We Need a Little Christmas" from Auntie Mame!

Rosalind Russell as Auntie Mame

In addition to Sandra's DREAMI linky, I'm also linking up with the following weekly linky parties:

SATURDAY

UFO Busting at Tish in Wonderland

SUNDAY

Frédérique at Quilting Patchwork Appliqué

Oh Scrap! at Quilting Is More Fun Than Housework

MONDAY

Design Wall Monday at Small Quilts and Doll Quilts  

Monday Making at Love Laugh Quilt

Tuesday, February 18, 2020

Spirit Song Quilt: Are We Done Yet? (NO). But Blocks On the Move is Ready to Debut at Quilt Show!

My progress on the Spirit Song Dress Code quilt has slowed way down because I'm at a tedious point in the construction.  After spending so much time planning my mix of colors and prints in my design software, I barged ahead with my piecing without bothering to create  a pressing plan...  So now as I'm joining the 4" inch Birds in the Air blocks together to form the large 16" composite blocks, none of my seam allowances "nest" where the blue triangle points touch one another.  As you can see in the completed block below, that happens EIGHT times in every single block.  Therefore, every time I'm joining two units together with blue triangles that need to touch, I've got six layers of fabric stacked up on one side of those triangle points and only two layers of fabric on the other side, and the nasty little triangles want to slide apart as they pass under the presser foot, and even pinning them is a vicious business involving savage stick pin wounds and a fair amount of swearing.  UGH. Therefore it's taking me a lot longer than expected to join 16 four inch units into one 16" block -- about 2 hours or more per block, including pinning, stabbing myself with the pins, seam ripping, fudging, swearing, pressing...


Block 6 of 12.  This is Getting Tedius.
I left this project in Time Out for a week while focusing on the needs of our new puppy, but I started piecing again a few days ago and I'm feeling better about it now that I'm past the halfway point!  

Yesterday I decided that, for the remaining blocks, I should just bite the bullet and stitch every one of the blue points together by hand first before machine stitching the rest of the seams.  I think it's the only way to get them to line up precisely without shifting when that mountain of bulk passes under my presser foot, and that hand tacking up front will save me a lot of time in the long run, ripping and restitching over and over again!  


NOTE TO SELF: ALWAYS MAKE A PRESSING PLAN FOR THE WHOLE QUILT BEFORE I START PIECING IT!

The best explanation of how and why to create a pressing plan is in Donna Lynn Thomas's book Quiltmaking Essentials 1: Cutting and Piecing Skills.  When I'm looking at a quilt block, or an entire quilt that I've designed on the computer, trying to decide the best way to press seams in order to get crisp points, matched seam intersections and a flat quilt top free of speed bumps, I always consult this book for a refresher.  Highly recommended!


I should be back to smooth sailing with nesting seams at every intersection once I'm assembling those big blocks into rows, if I can only get the rest of these stinking blocks pieced together...


Eight 16 inch Blocks Completed, Four Left to Piece
The Spirit Song quilt was meant to be a "quick detour" project, just to try out the Accuquilt GO! half square triangle dies, before loading and quilting my Jingle appliqué quilt.  And here we are, several months later, with nothing finished and one more work-in-progress!

Meanwhile, Thoroughly Modern Millie (my APQS Millennium longarm machine) is going to be awakened from her deep slumber within the next day or two, because I need to quilt and finish a couple of 16" mini quilt tops that other guild members made to contribute to the Blocks On the Move program I'm launching as Community Education chair of the Charlotte Quilters' Guild.  (I got this idea from Donna Shervington's blog where she mentioned making a 16" block for the Modesto California Country Crossroads Quilters' Guild Blocks on the Move program).


One of Two Blocks On the Move Displays Built by Bernie
Loisann and husband Sig, the geniuses behind the Country Crossroads Quilters' Guild in Modesto, have been so unbelievably kind and generous, providing detailed plans and photographs of exactly how their display units were built so that my handy husband Bernie could recreate them for our Charlotte Quilters' Guild in North Carolina.  Pictured above is one of our two display units, designed to hold mini quilts of 16 to 16 1/2" square.  Because these displays will be set up and left unattended in public spaces, the quilts are mounted with sleeves on dowels that screw into the sides of the display unit and you can't get them out without a screwdriver -- that will significantly reduce the chance of mischief/theft of the beautiful donated mini quilts.  Isn't that COOL?!  We're going to "debut" our Blocks On the Move display at our upcoming Carolina Lilies Annual Quilt Show on March 6-7.  


My Husband Bernie, Fixer of Longarm Machines and Builder of Quilt Displays
The idea behind Blocks On the Move is to move this display throughout the city, setting it up for a month at a time at venues such as assisted living facilities, libraries, hospitals, museums, etc.  I think this will be a great way to raise awareness about who we are and what we do in the community.  Readers who are members of quilt guilds, I'd love to hear what YOUR guild does for community education -- please share those great ideas in the comments!


To-Do List for Tuesday:

This week I'm hoping to accomplish the following:

  • Finish piecing all of my Spirit Song blocks
  • Quilt the two 16" Blocks On the Move flimsies that were pieced by another guild member
  • Go through all of the tax receipts (blech!) and fill out my accountant's tax prep packet
  • Work on an assignment that's due March 1st for a seminary class I'm taking

Well, that puppy isn't going to nap all morning -- if I want a shower today, I'd better get off the computer and do that right now!  Have a wonderful week.
I'm linking today's post with:

MONDAY

·       Design Wall Monday at Small Quilts and Doll Quilts  
·       Monday Making at Love Laugh Quilt
         BOMs Away Katie Mae Quilts  

TUESDAY

·       Colour and Inspiration Tuesday at Clever Chameleon
·       To-Do Tuesday at Home Sewn By Us

WEDNESDAY

·       Midweek Makers at Quilt Fabrication
·       “WOW” WIPs on Wednesday at Esther's Blog

THURSDAY

Needle and Thread Thursday at My Quilt Infatuation

Friday, January 3, 2020

Spirit Song Blocks Nearly Completed, Only 38 Blocks to Go

So, in the midst of my sadness over losing my dog to cancer, I have not yet loaded the Jingle quilt that I was planning to start quilting between Christmas and New Year's.  That is a challenge that requires more positive energy than I could muster right now.  Instead, I've been piecing more of those Birds In the Air blocks for my Spirit Song Dress Code quilt, which is a total tangent (squirrel) from the projects I'd intended to be working on and finishing right now, but it's cathartic.  I had intended to use these HST blocks as leaders and enders, but the bright colors and frustration-free simple construction are cheering me up.  I think to myself, "I'll just go up to the studio and sew for 15 minutes," and then two hours slips by without my noticing it.  Just what I need right now.  And so the collection of blocks on my design wall has grown to this:


Spirit Song On My Design Wall: Only Three More Rows to Go
To recap, this project is made up of traditional 4" Birds In the Air blocks and I designed the layout and scrappy color scheme in EQ8 quilt design software as an experiment.  


My objective was to design a simple quilt that could be made with my Accuquilt GO! dies, so each block is comprised of three 2" finished HSTs (Accuquilt die 55393) and one 4" finished HST (Accuquilt die 55031).  


50 x 66 Design Rendering Created in EQ8
I used the EQ8 design printout as a rough guide as I was choosing fabrics for this project, since the virtual fabrics loaded in my software are similar to but not identical to the actual, physical fabrics in my studio stash.  I ended up not using as much purple in the real quilt and my little blue triangles are true blues rather than teals as in the design rendering, but I still love how accurately the software tool helps me predict what a quilt will look like BEFORE I cut into any fabric.  EQ8 gives me super powers!

Yes, I spent some time fiddling around on the computer before I came up with this design that I liked enough to commit to making it, but I tried out lots of different color options and layouts before settling on this one.  Without the software, I would have been making the first idea that I came up with, the one that I did NOT like when I previewed the design in my software.  It takes so much time to cut, piece, and quilt a project from beginning to end.  Even without factoring in the cost of materials, the software is my most valuable quilting tool because it ensures I'll never again get 3/4 finished piecing a quilt top and realize that the color/value/scale aren't working the way I envisioned it in my mind.


Piecing WIPs on My Design Wall: Spirit Song and Beware the Ishmaelites Sampler
You can see the scale better in this photo for how much I've got done and the size of the finished quilt.  I know that the seam allowances between all of those 4" blocks are going to shrink this down dramatically.  If I feel like it's too small once the top is assembled, there are always borders, right?  The huge blocks off to the right are for an in-progress FPP (foundation paper piecing) project, my Beware of the Ishmaelites Queen sampler quilt for my younger son's bedroom.  The last quilt I made for him was for his Twin size "big boy bed" when he turned two, but now that he's 16 years old and 6' tall, he needs a bigger quilt for his BIGGER boy bed!  Hah!  I'll return to piecing that quilt after I finish the Spirit Song blocks and clear away the debris of pink/peach/coral fabrics that have taken over my cutting table.

To make the 50" x 66" throw size like my EQ8 rendering, I need two more blocks to complete those partial rows near the bottom plus three more rows of twelve blocks each, for a total of 38 more blocks.  I have already started chain piecing all of the remaining blocks so I should be able to finish them today.  Then I'll fine-tune my layout, borrowing my sons' and husband's eyeballs to help me check for balance and avoiding two patches of the same fabric placed adjacent to one another.  I don't know how I'll quilt it yet, though.  I think it would be a perfect candidate for a lovely computerized edge-to-edge design, but my longarm machine isn't computerized and it won't be computerized any time soon.  Wouldn't this one be perfect?  It's called "Dave's All That Jazz" and it's available from Urban Elementz here.


Dave's All That Jazz Digital/Paper E2E Quilting Design from Urban Elementz
Dare I attempt another paper pantograph on this one?  Dave's All That Jazz is available to order as a paper pantograph, but it's definitely not in the Beginner/Easy category.  My initial experiments with paper pantographs taught me that following the paper pattern with a laser light is not as easy as it looks!  Stay tuned...


OMG: One Monthly Goal(s)


It's a new year, and that makes it a great time to try something new with goal setting.  I'm going to set THREE goals each month, one for Piecing, one for Quilting, and one for Garment Sewing (something I'd like to do more of this year!).

  • JANUARY PIECING GOAL: Complete Spirit Song Dress Code Quilt Top
  • JANUARY QUILTING GOAL: Load Jingle BOM Christmas Quilt Top and Begin Custom Quilting
  • JANUARY GARMENT SEWING GOAL: Set up a dedicated garment sewing work station in my former guest room.  I don't have room in my quilt studio to be working on garments and long-term quilt projects simultaneously, so I'm thinking about setting up a separate cutting table, ironing board, serger and cover stitch machines in the spare bedroom along with the dress form.  That way everything is ready to go for quick mending, alterations, or whatever knit dress or top I might want to whip up...

I'm linking up today's post with:

·       Needle and Thread Thursday at My Quilt Infatuation  
·       Whoop Whoop Fridays at Confessions of a Fabric Addict
·       Beauty Pageant at From Bolt to Beauty
·       Finished Or Not Friday at Busy Hands Quilts
·       UFO Busting at Tish in Wonderland
·       One Monthly Goal at Elm Street Quilts