
YOU GUYS!!! Today is August 20th, and I finished my first quilt of the year yesterday. I keep looking out my window for the parade but they must be stuck in traffic somewhere... Surely there will be fireworks, or at least I'll get a mention on the news tonight??? 😐. Seriously -- does anyone else feel a little anticlimactic about finally finishing a quilt, or is it just me? So much work and effort, and then it's just OVER. It feels so abrupt!
 |
| My 66 x 66 Halo Quilt Finish, Pattern by Jen Kingwell |
I started this project in mid-March, so it took me five months from start to finish to cut, piece, quilt, label, and bind it. The pattern for this quilt is available in Jen Kingwell's Jenny From One Block pattern booklet and there's a set of acrylic templates for the Halo quilt sold separately that are worth their weight in gold. The curved patches for Halo can be cut with a 28 mm rotary cutter (a larger diameter blade is too big to follow the curves, but a smaller diameter blade is too shallow to glide along the edge of the acrylic templates -- the screw holding the blade in place would get in the way). The other product I highly recommend for this project is Odif Grippy, a spray-on translucent nonslip coating for the acrylic templates that greatly reduces their tendency to slide on the fabric when you need them to stay put for accurate cuts (this post contains affiliate links).
Halo is suitable for either hand or machine piecing; I hand pieced just one block just to see if I liked it better than machine piecing. The verdict? Hand piecing these blocks is easier but slower than doing it by machine, and I wanted to get this done as quickly as possible so I opted for machine piecing the rest of the blocks. I used lots of Karen Kay Buckley's Shorter Perfect Pins to machine piece all of those curves.
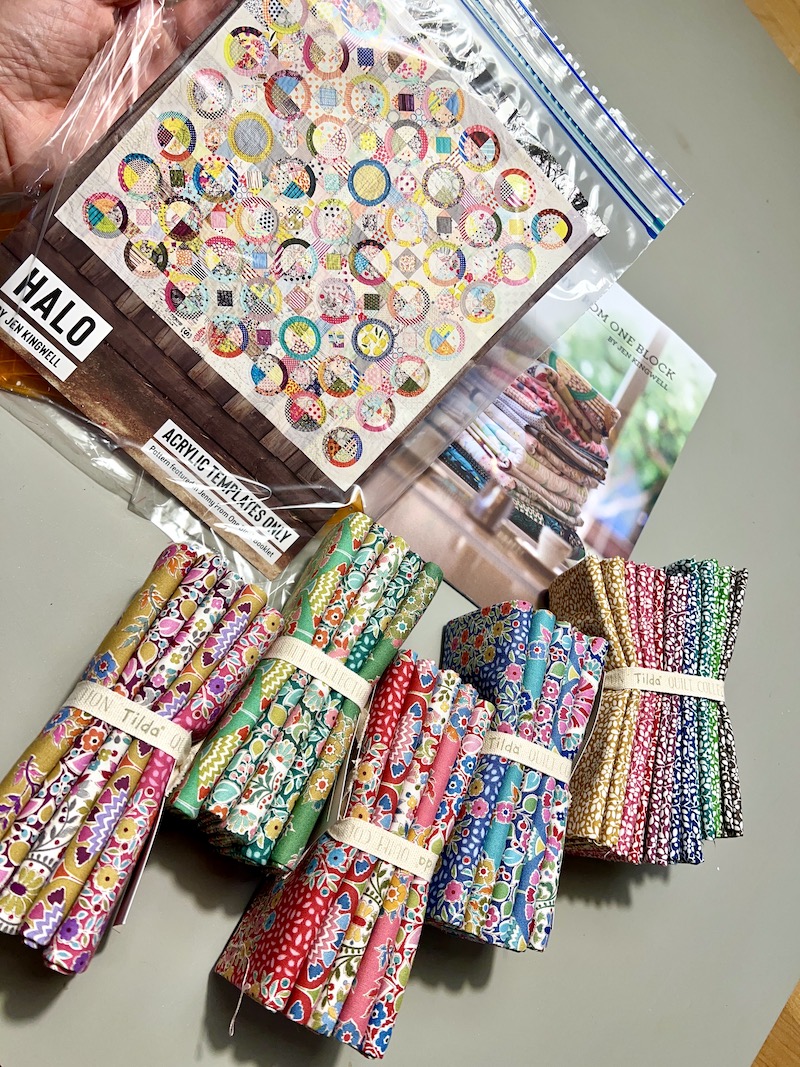 |
| Halo Pattern Booklet, Halo Templates and Tilda Pie In the Sky Fat Eighths |
The Tilda Pie in the Sky fabrics pictured above were my starting point for this quilt, but I pulled lots and lots of fabrics from my stash, from my scrap bins (and from the treasure trove of scraps sent to me by Nann!). What most intrigued me about Jen Kingwell's original version of this quilt was the way her quilt initially seems "random scrappy," but carefully planned elements reveal themselves on closer inspection (Most blocks are scrappy, but several blocks are planned. Several blocks are planned to create an entire matching circle with a matching ring where the corners come together, and several other blocks are planned to create a scrappy circle with a solid matching ring). She set general guidelines for value placement within her blocks (such as generally using darker/higher contrast fabrics for the rings and lighter value/lower contrast fabrics for background patches), but then only followed those "rules" about 60-70% of the time. This resulted in a really interesting effect where some rings, circles and squares come forward visually in the composition and others appear to recede. I attempted to recreate these "special effects" in my own version of the quilt and I'm pleased with how that turned out.


