Showing posts with label Kona Solids. Show all posts

Thursday, September 12, 2024

The Power of a Really Great Stripe: Maria Shell Workshop + Only Murders In the Building

Good Morning, Stitchy Peeps!  I am feeling clammy and gross and drowning in mucus quantities that have not been seen since the ectoplasm in the movie Ghostbusters.  I have an appointment at Urgent Care in an hour and a half, fingers crossed that whatever ick I've got is something that they can treat with medication.  Most likely it's COVID since my son just had it and I started getting sick several days after he tested positive, but my husband is just as sick as I am and he has tested negative for COVID four times.  Blech, blech, BLECH!

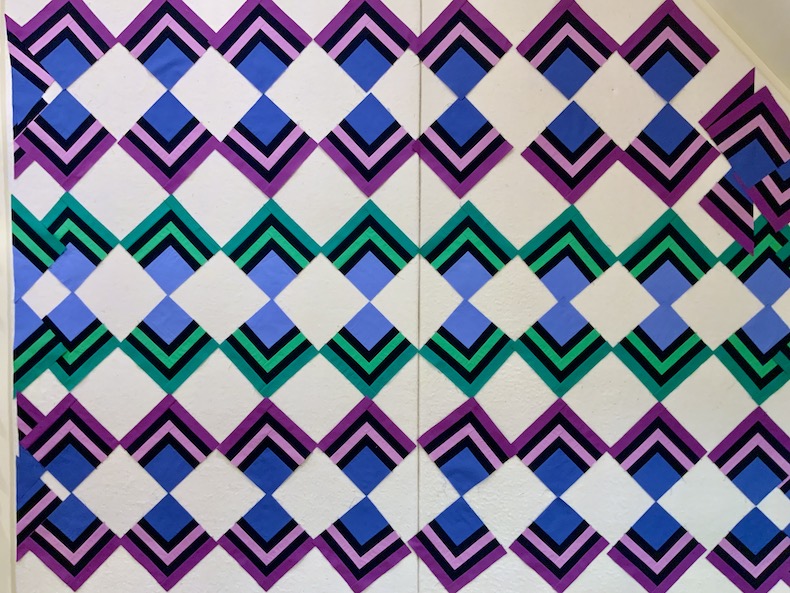
Meanwhile, here's what my design wall looks like three days after Part One of my 2-part Making Prints workshop with Maria Shell:


My Design Wall, 9 AM on Thursday


Our assignment between classes was to make a bunch of units based on the techniques/"prints" that she demonstrated in class, and put them up on our design walls.  Students are permitted to cut their fabric with rulers, but encouraged to try cutting without rulers in order to create more organic, irregular lines with their patchwork.  I'm cutting my fabric without rulers and finding that it's more difficult than you'd think to cut crooked and sew crooked on purpose!  


My Design Wall, 9 AM on Wednesday


The irregular striped units above were pieced the first day after class, and they incorporate all of the colors from my palette.  Initially we were told to create a 12-color palette, but I asked if I could sneak in more and got permission to do so during the class.  The extra colors allowed me to have three shades of brown instead of one and a royal blue as well as light blue.  I think I have 15 colors going on.  Anyway, when I did this first exercise of randomly pairing up my colors I was really pleased that I liked how pretty much every color looked with every other color in my palette.  I struggled to sew my strips together, though -- somehow even though I hadn't cut them straight, they were annoying me by looking straighter after I sewed them together and pressed the seams.  

Tuesday, December 12, 2023

Custom Deco Quilt Palette for 2024 + QAL Week 4, 108 Weeks Behind Schedule

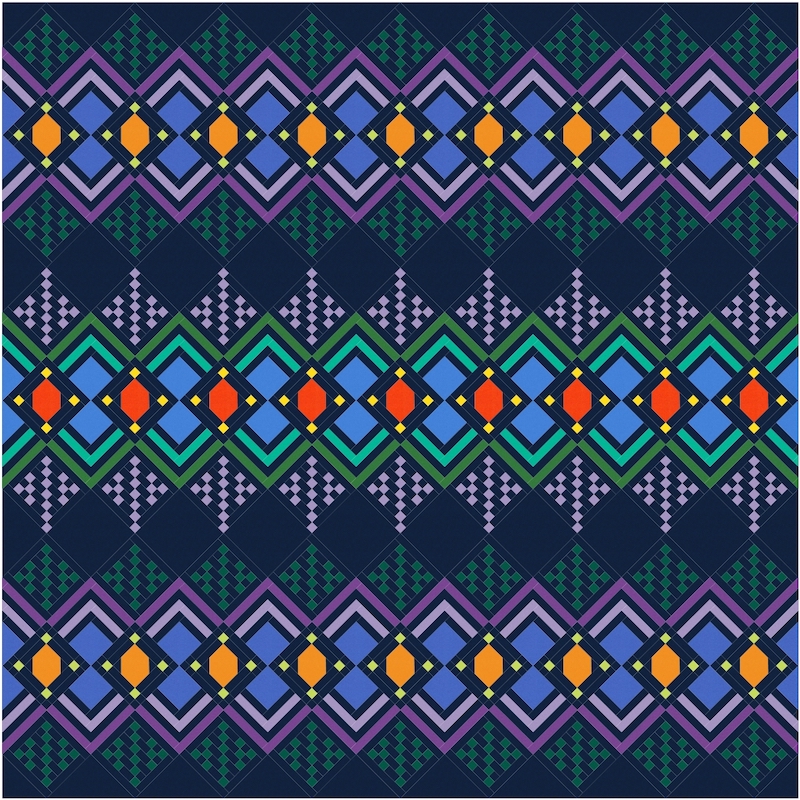
56 x 68 Deco Throw Quilt, PANTONE Pairings Palette for 2024

This is the time of year for sleigh bells, twinkling lights, caroling... and complaining on social media about how much we disagree with the design industry's color forecasters' predictions for Color of the Year.  PANTONE Europe's Color of the Year for 2024 is Peach Fuzz:


And Robert Kaufman's Kona Solid Color of the Year for 2024 is a pale aqua they're calling Julep: 


Looking at these two "new" color trend predictions side-by-side, many of us are getting flashbacks of  Margo and Todd's bedroom decor from the 1989 holiday movie National Lampoon's Christmas Vacation.  

Pantone Peach Fuzz Walls with Kona Julep Vase and Window Blinds

"Why is the floor all wet, Todd?"

"I don't know, Margo!!"  

"Why does Pantone think our 1989 bedroom set will be the embodiment of global lifestyle trends at the macro level in 2024?"

"I DON'T KNOW, MARGO!!!" ðŸ˜†

Saturday, October 14, 2023

Deco QAL Week 3, Completed Only 101 Weeks Behind Schedule!

You guys, if this was the year 2021 instead of 2023, I would be SO AHEAD OF SCHEDULE for my Deco QAL!!  Here it is, only October 14th, and I have finally finished all of my log cabin blocks for Week 3 (Nov. 1-8, 2021) of Lo & Behold Stitchery's Deco Quilt Along.  

16 Blue-Green Blocks, 32 Blue-Purple Blocks, and 12 Half Blocks

Unfortunately, it is NOT 2021, so instead of being ahead of schedule I'm actually 705 days behind schedule, or 100 weeks plus 5 days behind schedule.  Sadly, I am no longer eligible for winning any of the prizes.  ðŸ˜†. Good thing I still like this quilt!

My 102 x 102 Deco Bed Quilt, pattern available here

In case anyone out there is interested in making a Deco Quilt of their own, the pattern from Lo & Behold Stitchery is available as an instant PDF download on Etsy here (this post contains affiliate links). 

I'm making the largest 102" x 102" bed sized version of Deco, but the pattern also has instructions for making the more manageable baby and throw sized versions and those are striking, too.  I quilted a baby sized Deco for my client Liz back in 2021 and a throw sized Deco more recently for my client Megan.  I've seen this quilt made up in so many different color combinations and I haven't seen any that I didn't like.  I had a great time coming up with my own color palette of Kona Solids and then tweaking it to complement my Anna Maria Horner floral print backing fabric (it's Hindsight "Honorable Mention" in Turquoise from Free Spirit Fabrics, available on Etsy here).

(Note to Self: It would have saved a lot of time to pick the backing print FIRST and then just pull the solid colors from the selvedge instead of coming up with a custom palette first and then trying to find a print that had exactly the same colors in it!)


My Deco Quilt Fabrics with Anna Maria Horner Backing Print

Saturday, December 10, 2022

Megan's Knitted Star Quilt + Janita's Wintry Batik Table Runner

 Hello, there, Quilty Peeps!  I hope you are all staying warm (or cool, if you live in a hot climate) and are managing the hubbub of the holiday season with a level head, a grateful heart, and an overflowing glass of eggnog (if you’re into that sort of thing).  I am 95% finished with my gift shopping, the trees are up and decorated thanks to Bernie, and Christmas carols are looping through my brain like jolly elvish ear worms.  How about y’all?

I did finish the custom quilting on Jingle but I’m waiting to share it until it's labeled, bound, and is hanging on my wall.  Meanwhile, I have a couple of clients' quilts with seasonal flair to share with you today.

Megan's Knitted Star Quilt

Check out this striking Knitted Star quilt made by my client Megan!  The pattern is by Brittany Lloyd of Lo & Behold Stitchery, and you can purchase the pattern alone or a complete kit here (this post contains affiliate links).  

Megan's 64 x 64 Knitted Star Quilt with Gems 2 Quilting Design

Megan used a Kona Solids kit pairing Kona White with Gotham Gray.  I've seen other versions of this quilt made up with a white background and red and green snowflakes, red background with green or white snowflakes, which also look great.  Brittany hosted an eight week Knitted Star QAL (quilt-along) on her blog when she released this pattern two years ago, and those step-by-step tutorials are still available here if any of you are interested in making this project.  If you are local to Charlotte, North Carolina, Megan is hoping to offer this quilt as an in-person class at Quilt Patch Fabrics in Matthews.  Call the shop at 704-821-7554 if you're interested.  One more "helpful hint" from me is that this pattern, like many of Brittany's designs, involves cutting and piecing many, many strips of fabric and the accuracy of your cutting (and piecing) those strips will have a huge impact on how easily this goes together for you.  Accuquilt is offering their strip cutting dies at steep discounts right now, and being able to cut 24 perfectly straight, exact width strips in a single pass would not only speed you through the cutting process so you could start sewing sooner, it would also improve accuracy and reduce the possibility of cutting mistakes that can happen when rotary cutting hundreds of strips.  

I quilted Megan's Knitted Star with a pattern called Gems 2 that creates a wonderful illusion of depth, an effect that is further enhanced by the loft of Megan's favorite batting, Quilters Dream Wool.  The thread is Glide in White.

Detail of Gems 2 on Megan's Knitted Star

The thread was chosen to disappear against the white patchwork snowflakes.  Had I used a dark gray or black thread to disappear into the background, it would have detracted from the bold graphic design of the patchwork.  

Saturday, June 11, 2022

Nanu Nanu! Borders Are In Progress for My Retro '80s Building Blocks Sampler

Y'all, PROGRESS IS HAPPENING on my Retro '80s Building Blocks quilt!  I foundation paper pieced my 6" border corner blocks yesterday:

6 inch Border Corner Blocks Completed

The fabrics in my corner blocks are Kona Cotton 1019 BLACK Kona Cotton 146 GLACIERKona Cotton 25 OCEANKona Cotton 317 PERIDOTKona Cotton 476 GRELLOW, and Kona Cotton 1370 TANGERINE (By the way, this post contains affiliate links.  If you scroll all the way to the bottom, I've got links to where you can find every single fabric that I used in this quilt).  

Meanwhile, I've finally sewn the interior blocks of this quilt together.  (At which point a little devil on my shoulder whispers "You could be done with this now, if you skipped the borders..."). Begone, Devil!  Without the borders, the quilt would be too small to fit the bed!  ðŸ˜¤

Here it is, draped (sideways) over my longarm frame for measuring:

Quilt Top Sewn Together, Sans Borders

I always take border measurements through the vertical and horizontal centers of the quilt top rather than at the edges, and that bar on my 13' long arm frame comes in handy for measuring.  It's a lot longer than my cutting table.

Monday, March 28, 2022

Y-Seams Make Me Feel Like a Boss: My Retro '80s Sampler Blocks Are Finished!

Good Monday morning, everyone!  I am delighted to share that, FIVE and a half years after starting my version of the 2014 Moda Modern Building Blocks sampler quilt, I have finally finished making all 48 blocks!  

Woo Hoo!  All 48 Sampler Blocks Are Finished (Finally)!

No, the blocks aren't sewn together yet.  Expect that to take me some time, because after all of the time I've invested into making these blocks there is no way I'm willing to sacrifice any pointy points along the seam lines where the blocks join together.  This quilt top will be assembled slowly, with lots and lots of pins and probably also with lots of help from my BFF, the seam ripper.  Which is fine, because I can use that time to think about how the heck I'm going to quilt this when the top is finally done.

5 Inch Finished Block, Not In Original Moda Pattern

The black, orange and yellow block shown above was not in the original Moda pattern.  It's a traditional block design that I swapped in from my EQ8 quilt design software (Disclaimer: this post contains affiliate links), either from the main EQ8 block library or from the BlockBase Plus add-on containing all of the blocks from Barbara Brackman's Encyclopedia of Pieced Quilt Patterns.  I don't remember the name of this block, but it supports the early 1980s graphic design vibe I am aiming for with this quilt, especially with the opportunity to use two shades of orange and yellow for a three dimensional effect.  There are two Y-seams in that block, on either side of center where the black QST (quarter square triangles) on the outside edges of the block are sewn to pairs of 45 degree diamonds.  The Kona Solid colors used in the block above are Tangerine, Goldfish, Grellow, Sunflower, and Black (links take you to where those Kona colors can be found from Etsy sellers).

Sunday, January 30, 2022

Four More Blocks for My Retro '80s Building Blocks Quilt + Layout Options for FrankenWhiggish Rose Blocks

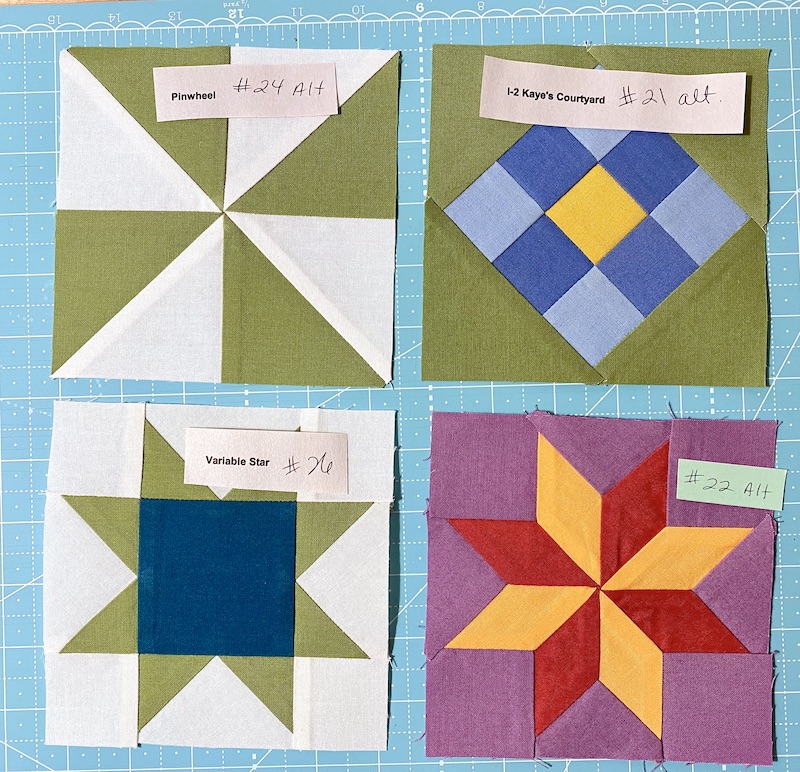
Happy Week End, everyone, and happy Month End as well!  One of the goals I'd set for myself at the start of January was to make some more blocks for my Retro '80s Building Blocks sampler quilt, and I finally did that yesterday.  Four more happy little 5" blocks are completed, only one of which was in the original Moda Modern Building Blocks design.  The other three blocks were among the many that I swapped out when I was redrafting the quilt in EQ8 Quilt Design Software (affiliate link) to suit my purposes.

Four More 5 Inch Blocks for Retro '80s Building Blocks

Gotta admit, I am still not 100% thrilled with the center of the little Lemoyne Star but it took me a LONG time to piece that one with all of its little Y-Seams, and I decided it's Good Enough.  Or at least, it's the best I could do that day.

Here they are, my completed blocks back up on the design wall, with the new ones added into the mix:

Back on the Design Wall: 38 Blocks Finished, 15 Remaining to be Made

For those of you who haven't seen any of my earlier posts about this quilt, here's a quick recap.  I started out with the idea that I wanted to make the Moda Modern Building Blocks quilt that was a popular BOM (Block of the Month) about eight years ago.  But I wanted mine to finish a different size to fit a particular bed, and I did not have the kit or the pattern anyway, so I set about redrafting the quilt in EQ8 from pictures of...  But instead of sizing my blocks as ruler-friendly multiples of 6", my blocks were multiples of 5" in order to get the finished quilt size I wanted with the borders I added.  The whole idea behind the "building blocks" sampler was for it to be a skill builder, so I eliminated all of the unecessary seams that Moda had added to simplify the piecing, adding back Y-seam construction because that's a skill I wanted to focus on.  I also swapped out 40% of the blocks in the original quilt for different ones in order to get that retro 1980s vibe I wanted and/or to include blocks that were more interesting (to me) or more challenging.  And I added rainbow borders that were inspired by the suspenders Robin Williams' character wore on the television show Mork & Mindy.  

Monday, November 1, 2021

November OMMG, Lightning Round: One Million Monthly Goals for Rebecca

 Hello, friends -- I've missed you!  Happy November!  

The longer it's been since writing a blog post, the more I have to share, the longer it would take to write about everything I'm working on, and the less time to get anything finished.  I have a folder on my computer desktop where I keep photos of things I want to post about and if it was a REAL folder, it would be splitting at the seams and pictures would be falling off the desk and onto the floor.  I've been working on so many different quilts for clients lately that I'm dying to share with you, but since it's a brandy-new month I've decided to keep it personal and just share my own projects and plans with you today.  I'll be linking up today's post with One Monthly Goal (as if) and To-Do On Tuesday linky parties in addition to my other favorite parties. 

Deco Quilt-Along: Behind Schedule Already

The Deco Quilt QAL hosted by pattern designer Brittany Lloyd of Lo & Behold Stitchery is running from October 18th through November 29th, and I was hoping to keep up with the QAL schedule to prevent this project from turning into yet another languishing UFO (UnFinished Object) hanging around my studio.  I had a delay with the fabrics I'd ordered online, then when they got here I didn't love some of the colors with the Anna Maria Horner backing print I'd fallen in love with while waiting for the solid quilt top fabrics to show up.  But I finally made it out to a bricks-and-mortar quilt shop about 40 minutes away from me a few days ago, and now I'm happy with my "fabric pull."  (Side note: Pulling Fabric (out of quilt shops) is MUCH MORE FUN than Puling Teeth (out of your face).

My Deco Bed Quilt Fabrics, Revised to Coordinate with Anna Maria Horner Backing Print

Obviously I could have saved myself a lot of aggravation and time if I'd chosen the backing print FIRST and THEN pulled solid fabrics to match colors in the print.  I'll still be using these fabrics more or less as shown below in my original color plan, with that inky dark Kona Solids Indigo as my background fabric.  I love bright colors with dark background fabrics!  

Deco Bed Quilt Will Finish at 102" x 102"

According to the Quilt Along schedule, I was supposed to be Planning the first week, then Cutting and Organizing ALL the fabric for the whole quilt last week, and this coming week is supposed to be making all of the Block One blocks (those are the ones that are like log cabin blocks -- in my version, they will have large dark or medium blue squares and logs of Indigo alternating with either purple or green).  In order to get back on schedule somewhat, and because of my track record in the past when cutting EVERYTHING out first, I think I'm going to just cut and piece as I go along.  

Wednesday, October 13, 2021

Ann's Magic Carpet Quilt + TWO NEW PROJECTS for Rebecca!

First Things First: Ann's Mesmerizing Magic Carpet Quilt

Oh my gosh, you guys -- check out the quiltaliciousness of this fabulous Magic Carpet Quilt that I completed last week for my client Ann!  Ann pieced the top using Paula Nadelstern's Duets and Poured Color fabrics from Benartex.  She followed a FREE Benartex pattern called Magic Carpet that was designed by Stephanie Sheridan specifically to promote the fabric collections, available from Benartex here.  

Modern Eccentric E2E in Variegated 40 wt YLI Cotton Thread

I quilted Ann's Magic Carpet quilt using Ann Shackelford's Modern Eccentrics E2E quilting design and I just love how it turned out -- great texture with a wonderful illusion of motion.  I feel like I really could step onto this "magic carpet" and go sailing off into the night sky.


Ann made this quilt as a wedding gift.  I think the pattern does a great job of showcasing the distinctive Paula Nadelstern fabric prints.

Sunday, September 19, 2021

A Couple More Blocks for My Retro 'Eighties Building Blocks Sampler

Good morning, my lovelies!  I have been "SEW" busy lately that I'm starting to accumulate a backlog of things I wanted to share here on my blog.  Today I'll show you the last two 10" blocks I made for my Retro 'Eighties Building Blocks sampler (adapted from the 2014 Moda Modern Building Blocks QAL).  Here's what the design wall is looking like these days:

All of the 10 inch Blocks Are Completed!

This project would be a finished quilt top by now if I was able to work on it consistently, but I've been more focused on customers' quilts lately.  I've also been responsible for more church music over the past few weeks, now that Church Council has decided we have to wear masks while we're singing and a lot of our singers are staying away because of health concerns etc.  So, those are my excuses for only having TWO new blocks to share since the last time I posted about this project!

Block 18

Both of these blocks finish at 10" and use Kona Solids in Lipstick, Snow and Black.

Wednesday, July 28, 2021

Happiness is an Eight-Pointed Star, and Y-Seams Are My Super Powers

If Prince Charming was a LeMoyne Star quilt block, then Wendy Welsh of Wendy's Quilts and More would be my Patchwork Fairy Godmother.  I am just ridiculously happy about how perfect this 10" eight-pointed star block turned out on my very first try, nice and flat and zero puckers in those Y-seams, and all this was accomplished without any seam ripping or swearing, thanks to Wendy's fabulous Hand Piecing 103 - 8 Pointed Stars video.

10 inch LeMoyne Star, Block 15 for my Retro '80s Sampler Quilt

In the original Moda Modern Building Blocks quilt, this Eight Pointed Star block (also known as LeMoyne Star, Lemon Star, and Puritan Star) was simplified to be more beginner-friendly by bisecting the 45 degree diamonds into half square triangles, eliminating the set-in seams as shown below:  

I prefer the cleaner look of the traditional block with the Y-seams for my own quilts, and I relish a good piecing challenge.  This is supposed to be a skill building project, after all!

I finished the partially-pieced block I shared in my last post (also with unnecessary simplification seams removed in favor of Y-seams) and that one came out pretty good, but I'm regretting using white thread because I can see little white thread dots at the center of the block.  I might redo that center bit with red or blue thread.

Block 12 Completed, 10 inches

Block 12 from the Moda Modern Quilt Blocks Sampler was first published as Mosaic #13 in the Ladies' Art Catalog #341, according to Barbara Brackman's Encyclopedia of Pieced Quilt Patterns, 3rd Ed.

Thursday, February 4, 2021

The Fabulousness That Is February: One (or More) Monthly Goals

Hello, my lovelies!  Happy Thursday, and happy FEBRUARY!  Now that I have replenished my supply of Kona Solid in Ocean, I came close to finishing two more sampler blocks for my Retro '80s Building Blocks quilt last night.  The 10" block below wasn't quite done yet when I took this photo:

Progress on Another 10 Inch Sampler Block

All of my block sections had been foundation paper pieced and trimmed, but they still needed to be pieced together and, in order to nest the seams the way I wanted them for crisp, perfectly matched seam intersections, I designed my foundation paper piecing pattern so that the sections go together with partial seam construction.  I weighted the finished sections down with my acrylic square ruler just to keep it crisp and flat overnight.

Here it is, finished:

10 Inch Block Finished

As my dad used to say, "I think that's close enough for government work!"  (I have no idea WHY he used to say that, but he did).

Friday, January 29, 2021

January OMG, Smashed to Smithereens

Well, folks, my January OMG (One Monthly Goal) was to make four more sampler blocks for my Retro Building Blocks quilt.  I made six!


Four Retro Building Blocks Added to the Design Wall...


Plus This One...


...And Also This One

I know that making six blocks in a whole month might seem like a pretty weak goal, but I also completed a vintage quilt repair for a client, quilted several charity tops for our guild's outreach to local pediatric hospitals, and I just finished quilting a huge, gorgeous Rainbow Scrap Challenge quilt for a client that I am DYING TO SHOW YOU -- but I can't because she reads my blog and she deserves to see her finished quilt in person before I show it to everyone on the Internet...  (You know who you are!  ðŸ˜‰)

I also ordered and received all of the Kona Solids yardage that I was short on for the Retro Building Blocks sampler, and I've prewashed all of it so that it's ready to go.  Now that I'm caught up with customer commitments, my next order of business will be to cut and piece the Rainbow Mork Suspenders borders and set them aside.  I just want to make 100% certain that I get those long, skinny strips I need out of the yardage before I start cutting into what's left for my remaining blocks.

I'm linking up with the One Monthly Goal finish party at Elm Street Quilts!


Saturday, October 3, 2020

Nearly Completed EPP Monogram Block + Backing, Binding Fabrics Selected for Welcome Home, Baby Quilt

You guys, as soon as this pandemic is over and the quilt shows start up again, I need to sign up for an in-person English Paper Piecing (EPP) class.  I am happy with how my EPP monogram block came out, but I'm pretty sure it should not have taken me this long to sew just the one block:

EPP Monogram Stitched and Trimmed

That's what I miss most about live-taught classes -- the individual feedback you get from the instructor looking at your work up close and saying things like "When your stitches get that small, you're not sewing anymore.  You're WEAVING!"  But, not having anyone to show me how small EPP stitches need to be in order for the seams to be tight and secure, and knowing this is going into a baby quilt that will hopefully be used heavily and laundered repeatedly, I erred on the side of too many tiny stitches rather than risk too few stitches spaced too far apart.

6.25 x 6.25 Monogram Block Center, EPP Completed

Those hand stitched seams are about eight times stronger than my machine pieced seams.  Overkill, but glad it's done!  So, after I finished all of the EPP, I pressed the block from the front and back and let it cool before pulling out the card stock templates from each patch.  They came out very easily despite the swipe of glue stick I used to adhere them to my fabric patches prior to basting the edges.  I tried two different ways of thread basting, by the way.  I started out not basting through my card stock templates at all, just tacking the seam allowances at the corners of each patch without stitching through to the front of the work at all.  If I was making a Grandmother's Flower Garden quilt with thousands of 1 1/2" hexies, that method would be a great time saver as there's no need to go back and remove basting threads at all if they don't show on the front of the work.  But I felt like my longer trapezoid edges weren't well enough secured with this method, so I switched to the more traditional method of basting all the way through to the right side midway through.  It wasn't a big deal to remove the basting threads with just one EPP block in the project.  

Basting and Templates Removed, Seam Allowances Opened, Excess Trimmed

After removing the pink basting stitches and the card stock templates, I pressed the block again from the right side and then flipped it over to carefully open up and flatten the outer seam allowances.  I deliberately avoided removing that outer crease line with my iron so I could use it as a reference as I trimmed the excess seam allowances to 1/4" from the points on my "C."  This center portion of the block measures 6 1/4".  

Right Side View

Pardon the fuzzies on my dark Indigo fabric; I've still got batting fuzzies all over my cutting mat from when I was joining batting scraps last week.  The last step to complete this monogram block will be to frame it in Indigo strips with Wasabi corner stones to float the "C" and get the block to the 8" finished size required by my quilt, but there's no reason that bit can't be done by machine.

This is the 42 x 42 Baby Quilt I'm Making

This block would probably be done, and the whole quilt top would probably be together, if I hadn't scampered off with my mom to visit my Not-Quite-Local favorite quilt shop yesterday afternoon.  I had not been to a quilt shop since pre-pandemic, so it was quite the treat.  However, we got stuck in accident traffic on the way there and by the time we arrived at the shop, there was only an hour left before their 5 PM closing time.  And I had a HORRIBLE time finding a backing fabric that would work with this quilt!  It would have been so much easier if I'd started by selecting a print backing fabric that I liked and then pulled my solid fabrics from the print for the quilt top palette.  But NO, I didn't do that -- I wanted to come up with my very own palette from the Charley Harper illustration on Pinterest...  

I saw so many fabulous prints that would have been perfect if only my Bone fabric had been whiter, or if my Grasshopper green had been more turquoise, or my Indigo had been black...  My Wasabi yellow has an awful lot of green in it.  Which I personally loved until I tried pairing it with print fabrics that had a true yellow.  Blech -- those fabrics made my lovely Wasabi fabric look like BOOGERS!!!  This is why I had to pick the backing fabric in person.  (When I'm matching fabrics in a quilt shop and I'm not bringing a whole quilt top or block with me, I just use a safety pin to hold scraps of each of my quilt top fabrics together while I'm shopping).

Backing and Binding Fabrics Purchased

Anyway, as you can see above, a couple of Kaffe Fassett prints from Free Spirit Fabrics saved the day.  The circles/squares print will be my backing and the variable width stripe will be my binding.  I know I could have saved myself a lot of aggravation (as well as frantic rummaging through a quilt shop that was about to close) by choosing a solid backing fabric, and I know that solid backing fabrics show off the quilting better than busy prints...  But I could not help myself, because it's for a baby, and I like brightly-colored, happy quilts for babies.  This will be lovely.

Well, that's all for now, as my Saturday is slipping away from me and there is still a lot left on my very aspirational To-Do list for today!  I'll be linking up and sewcializing with the following linky parties:

SATURDAY

·       UFO Busting at Tish in Wonderland

SUNDAY

·       Frédérique at Quilting Patchwork Appliqué

·       Oh Scrap! at Quilting Is More Fun Than Housework

·       Slow Stitching Sunday at Kathy's Quilts

MONDAY

·       Design Wall Monday at Small Quilts and Doll Quilts  

·       Monday Making at Love Laugh Quilt

Wednesday, September 30, 2020

My AQS QAL "Letter Home" Continues, Complicated With Some English Paper Piecing

I'm making some headway with my baby boy quilt NewFO!   I haven't cut out the four Wasabi (greenish yellow) QSTs yet, but I'm almost done piecing the rest of the blocks for this "quick and easy" project.

Piecing is in Progress!

I changed my mind about foundation paper piecing my center monogram block, too.  I just could not abide with those extra seams that I would have in the center of my "C" if I did FPP, so this block will be my second ever attempt at English paper piecing (EPP).  

FPP Version, with Extra Seams in the Middle of the "C"

Same Block, EPP Version, Cleaner Look with Fewer Seams

I really prefer the cleaner look of the second version with fewer seams, and I think it's worth fiddling around with hand stitching just this one block in order to get the look I want.  (Both of these blocks are in my EQ8 Block Library, by the way, under Alphabets.  I don't remember whether they were in the original Block Library that came with the software or if they were part of the BlockBase add on).  There's nothing in the software that says that the first block is supposed to be foundation paper pieced and the second block should be English paper pieced; that's just my own assessment of which method in my "quilter's tool box" would yield the best results for each version.

Sunday, September 27, 2020

A NewFO: Welcome Home, Baby

You guys, I started a new project yesterday!  I'm so excited!

42 x 42 Welcome Home, Baby, based on AQS Letter Home QAL

A few weeks ago, I shared in this post how I was playing around with resizing and recoloring the AQS Letter Home quilt along.  The original quilt from AQS finishes at 60" x 60" and you can find the free pattern and instructions for that here.  

AQS Coloring and Block Construction

Although I love the AQS design, unnecessary seams in blocks are a huge pet peeve of mine.  Why would they add a seam down the middle of a flying geese unit to turn it into two half square triangle units?!  I removed those seams, scaled the blocks down so my quilt would end up baby quilt sized, and customized the color palette.  Then, because I like to personalize quilts for little ones, I swapped out the plain square at the center of my quilt and will be replacing it with this 8" paper pieced "C" monogram block:


So far, I've prewashed and preshrunk all of my Kona Solid fabrics in HOT water, ironed them, and cut out all the pieces.  I even started piecing some of the 8" HST units (although I cut one of them twice and it's still too small, so I think I'm going to have to do that one over...)


This morning I printed out my foundation paper piecing patterns from EQ8 for the center monogram block.  This quilt is intended for the baby brother of my butterfly clam shell quilt recipient, and the new baby's due date is October 1st.  I need to get a move on!  

I'm linking up today's post with the following favorite linky parties:

SATURDAY

·       UFO Busting at Tish in Wonderland

SUNDAY

·       Frédérique at Quilting Patchwork Appliqué

·       Oh Scrap! at Quilting Is More Fun Than Housework

·       Slow Stitching Sunday at Kathy's Quilts

MONDAY

·       Design Wall Monday at Small Quilts and Doll Quilts  

·       Monday Making at Love Laugh Quilt