Showing posts with label Whig Rose. Show all posts

Sunday, November 13, 2022

Ten-Year Projects In Progress: Update on Frankenwhiggish Rose, Jingle BOM, + Deco Quilts

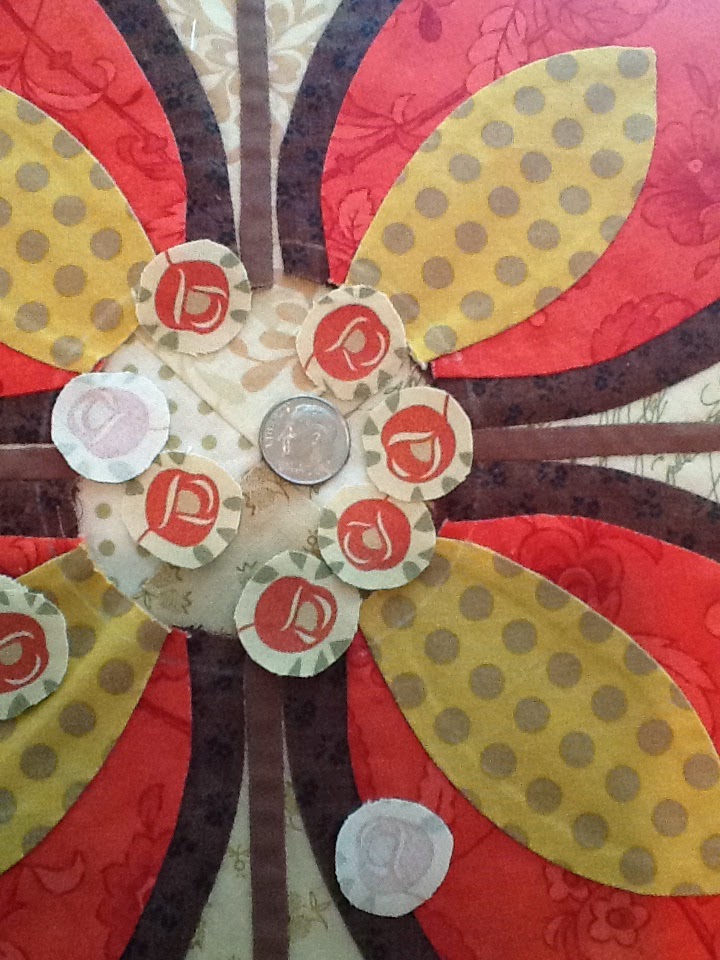
So...  I put my Whig Rose blocks back up on my design wall yesterday morning to see how much work remains to be done on them.  I started this needle turn appliqué project in March of 2014 (you can read about it here) and it's been an on-again, off-again kind of thing.  I'm finding it really monotonous to appliqué the same shapes over and over again.  The reason I haven't started any of the Sarah Fielke 2022 Block of the Month projects I signed up for is that I wanted to finish THIS appliqué project before starting on a new one, and this one ain't finished yet!

FrankenWhiggish Blocks on November 12, 2022


Just for kicks, let's compare today's photo to the one from the last time I had these blocks up on my design wall, back in January of this year:

FrankenWhiggish Blocks on January 12, 2022


So it took me TEN MONTHS to complete eighteen of those wretched little tulips!  AAAARGH!!  And I still have ten more to go.  

Thursday, September 6, 2018

Because Quilters (Like RAMONA!) Are the Nicest People, I Am FINALLY Joining a Quilt Guild

I'm starting today's post with a shout-out to Ramona, who blogs about her quilting and other needlecrafts over at Doodlebugs and Rosebuds Quilts.  I have never met Ramona in person, but she is one of the many kind and generous quilters I've had the pleasure to connect with on the Internet through the various quilting linky parties in which I participate.  So Ramona read my last blog post  where I mentioned that I'd given up all hope of finding anymore of the leaf fabric I needed to complete my eight remaining FrankenWhiggish Rose needle turned applique blocks.  And then Ramona, out of the sheer goodness of her quilter's heart, took it upon herself to hunt down my discontinued, out-of-stock fabric and FOUND IT for me on eBay!!!


This Project Has Been SAVED By the Kindness Of a Stranger
Can you believe that?!  Of course you can, because if you're reading my blog in the first place, chances are good that YOU'RE a quilter and you have heart of gold, too.  I cannot even begin to express how grateful I am.  Of course I had done every Internet search I could think of when I first discovered the fabric shortage a few months ago, but at that time I came up empty-handed and it didn't occur to me to keep checking since the fabric was so old to begin with.  I started working on this in 2014, so the "Sandy's Garden" fabric was LONG since discontinued.


YES!!!  New Yardage From eBay Is An Exact Match to My Strip From 2014!
Seriously, you guys -- my heart runneth over.  And Ramona, if you ever need a kidney or anything, please give me a call.  I owe you one!

I'll probably give this quilt another name if I ever finish it, but for now I'm calling it the FrankenWhiggish Rose because I cobbled the pattern together from different sources like a Frankenstein monster.  The traditional Whig Rose applique pattern was very popular with 19th century quilters, there are lots of variations, and I love every antique Whig Rose quilt that I've ever seen.  The quilt pictured below is a stunning example of an antique Whig Rose quilt from the collection of the International Quilt Study Center and Museum:
Whig Rose Quilt Attributed to Del Patterson circa 1895-1905, International Quilt Museum Collection
Isn't that gorgeous?  Quilter Kim Diehl reinterpreted the traditional Whig Rose pattern in 2004 in her book Simple Blessings:
Kim Diehl's Country Whig Rose Wallhanging, from her Simple Blessings Book (affiliate link)
I hadn't seen Kim's original quilt when I started mine, though -- I was smitten by another quilter's adaptation of Kim's pattern when I saw it published in the September 2006 issue of Quilter's Newsletter Magazine:


Joyce Stewart's Village Gardens Quilt, Adapted From Kim Diehl's Country Whig Rose Pattern
So I started with Joyce's pattern from the QNM magazine, but I am not a fan of hearts so I swapped those out for reverse appliqued tulip and leaf templates that I got from an antique quilt reproduction pattern in another magazine, and then I added the stuffed berries because stuffed berries are fabulous, and the broderie perse rose buds that I decided to put around the center of my main flower were because I'd never tried needle turned broderie perse and wanted to see if I could do it...  See?  An arm from this pattern, a leg from that one...  If Dr. Frankenstein had been a quilter, I'm sure this is how he would have put his quilts together, too.  

Anyway, that's where my quilt block came from, and then after making one complete block, I imported a photo of my actual quilt block into EQ software, using that photo to color plain blocks in my quilt design (the same way you'd import a photo or scan of a fabric and use that to color patches in your design).  I like to work this way, making a single block out of real fabric and then using the design software to try it out in different settings so I am sure I really love what I'm seeing on my computer screen before I go ahead and make all of the blocks, especially when it's something really time-consuming. 


My EQ8 Design for My FrankenWhiggish Rose Blocks
When I made my first block, I didn't have a whole quilt design in mind and didn't know whether I'd be making one block or several.  Once I finalized my design and knew I'd need eight more blocks just like the first one, I decided to do them assembly-line style for efficiency.  So, by the time I realized I had nowhere near enough green fabric for all of my leaves, I had already spent hours and hours and HOURS appliqueing the stems, the large layered petals, and the stacked centers onto all eight remaining blocks.  When I discovered the fabric shortage and wasn't able to locate anymore of it, I got so discouraged that I shoved the project in a bin and stopped working on it.

Now, do you understand why Ramona's gesture of kindness, taking the time to hunt down discontinued fabric for a fellow quilter she's never even met, means so much to me?  I am so excited to get this project back in my fingers again!

And the kindness of Ramona got me thinking about ALL of you wonderful quilters that I've come to know online.  My Internet quilting buddies are the best -- when I asked for help, you have emailed me lengthy tutorials, mailed me samples of your favorite products, notions, etc.  Someone made me a beautiful embroidered needle book and mailed it to me from New Zealand when I broke my collar bone in a bicycle accident a few years ago, just to cheer me up -- from NEW ZEALAND!  

And so an introverted, secretive closet quilter named Rebecca ventured forth to last night's meeting of the Charlotte Quilters' Guild, thinking that if quilters from all over the country and all over the world who've never even met me can be such wonderful people, then maybe it's worth the risk of walking into a room full of strangers to meet some of the quilters who live in my own town.  I'm going to have to play hooky from choir rehearsal on the first Wednesday of the month so I can give this quilt guild thing a try...  Wish me luck!


Do you belong to your local quilt guild?  Any advice you'd care to share with me in the comments? 

 I'm not even 100% sure that I know what one does as a member of a quilt guild besides paying the dues and showing up at the meetings.  But for now, if you'll excuse me, I have 128 leaves to cut out of my green fabric!


Today I'm linking up with:

Let’s Bee Social at www.sewfreshquilts.blogspot.ca/ 
Midweek Makers at www.quiltfabrication.com/
WOW WIP on Wednesday at www.estheraliu.blogspot.com 
Needle and Thread Thursday at http://www.myquiltinfatuation.blogspot.com/  
• Whoop Whoop Fridays at www.confessionsofafabricaddict.blogspot.com 

• Finished Or Not Friday at http://busyhandsquilts.blogspot.com/ 
Slow Sunday Stitching at http://kathysquilts.blogspot.com/  
Oh Scrap! at Quilting Is More Fun Than Housework at http://quiltingismorefunthanhousework.blogspot.com
Design Wall Monday at Small Quilts and Doll Quilts http://smallquiltsanddollquilts.blogspot.com  
Main Crush Monday at Cooking Up Quilts http://www.cookingupquilts.com/ 
Monday Making at Love Laugh Quilt http://lovelaughquilt.blogspot.com/ 
Moving it Forward at Em’s Scrap Bag: http://emsscrapbag.blogspot.com.au/ 

Saturday, September 9, 2017

Slow Stitching Progress: Frankenwhiggish Rose Applique

Finishing Up the Last of the Layered Petals
Good morning and happy weekend to you!  I've reached a mini milestone in my hand applique project.  One block is completed in its entirety, and I have now stitched down stems and all three layers of petals on my eight remaining blocks.  Those petals took me a LONG time, all needle turned and secured with tiny hand stitches in silk thread.  I have certainly had some practice with inside and outside corners!

Here's a reminder of what the first block looks like, and where I'm headed with the remaining eight 16" blocks:


Block One of Nine, Completed in October of 2014
I finished that block in October of 2014, nearly three years ago.  I began planning the project in March of 2014, so the first block took me 7 months to complete.  Can you believe that?!

Of course, it's not like I've been working on this nonstop.  I take this hand stitching project with me when I know I'll be sitting around waiting somewhere for an extended period of time, and when I get tired of it, I put it away and do something else.

Although the layered petals are all needleturned, I am using a prepared edge, starch and press technique for the circles at the centers of my Whig roses to ensure that they are perfectly round and smooth with no wobbles or pleats at the edges.  I ran a gathering thread through the turning allowance of each circle, pulled it up taut around a heat proof plastic template, wetted the edges with Mary Ellen's Best Press starch alternative, and then set the crease around the edges of the template with a travel iron set on medium.  Once it's completely cooled off, I loosen the gathering thread to remove the template and press it flat again.
Prepared Edge Circle Ready with Drops of Glue
So instead of pinning the center circles in place on each block, the way I pinned all of my petals to the block background, I'm gluing them with tiny drops of Roxanne's Glue Baste-It.  Another nice thing about a preturned fabric edge is that I am able to position the circles more precisely.  I had already marked the petals with a chalk line showing where the circles should overlap.


Chalk Line on Petals Indicating Circle Placement
The biggest challenge was that the stitching of the petals makes the block want to pull in to the center slightly, so I weighted down the block on the horizontal and vertical grains as I was positioning and glue basting my circles in place.


Block Weighted to Keep it Flat and Square
...and then goes the circle:


Circle Positioned and Glued
...ready to stitch!

At some point during the stitching of my first block, I did carefully cut away the layers of fabric behind these stacked petals and flower centers, but I don't remember when i did that.  I started stitching the first flower center down but accidentally caught the background fabric in one of my stitches, so I'm thinking that I might trim all of that away before attempting to stitch the remaining circles down.

Meanwhile, I want to get another quilt up on my longarm frame this weekend so I can get some more quilting practice under my belt in advance of my APQS new owner class a week from Monday.  Can't wait!

Today I'm linking up with:

Monday, December 1, 2014

FrankenWhiggish Rose Quilt Design Continues to Evolve

FrankenWhiggish Rose, Current Fave Design
Ah, EQ7, my virtual design wall -- how do I love thee?!  You may remember that I posted a photo of my first completed FrankenWhiggish Rose needle turned applique block back in mid October.  I did not have an entire quilt in mind when I started on that block -- I combined several different applique patterns to come up with a block that would be suitable for learning needle turn applique, incorporating different sizes and shapes of inside and outside points, curves, bias stems, reverse applique, and stuffed berries.  I knew I would be spending a lot of time hand stitching the block, so I put in the time up front to ensure that the design would appeal to me aesthetically.  The applique itself was a technical challenge for me, but I threw in a design challenge as well -- I wanted to create something with a country French vibe that would tie in with the mood and color scheme of my kitchen and family room drapery fabric:
Monado by Vervain, Havana colorway
This is the finished applique block:
Completed 16" FrankenWhiggish Rose Applique Block
I was really pleased with how the first block came out, and decided to make "some more of them" for a lap quilt that would live in the family room for sofa snuggling.  I cut out lots of yellow petals and I have been appliqueing them to coral red petals, assembly line style, for the past few weeks, still having no idea how I was going to use these blocks.

So today I fired up the EQ7 software and started playing around with different layouts.  I primarily wanted to figure out how many FrankenWhiggish Rose blocks I would need to prevent myself from wasting time making too many petals!

In these designs, I am using an imported photo of my one finished applique block and combining that with the sashing, border and block designs in the EQ7 software in order to preview some of the different quilts I could create using this block.  This is the second runner up:
Second Runner Up Design

...And this is my current favorite:
Favorite!  (Click to make the photo larger)

This quilt would finish at 74 1/4" x 74 1/4", which is on the generous side for a couch throw quilt but still okay, I think.  Those measurements would be BEFORE quilting and laundering, so the real quilt would finish a bit smaller.  The border blocks would be 7 1/4" square, so I should be able to do those pieced blocks without too much trouble.  Why do I like this design better than the first one?  I can't say for sure.  I really like the repeated Xs and plusses in the applique block, sashing posts and pieced border blocks.  I spent an hour or two playing around with different layouts and alternate blocks before I came up with this design, and I will probably play around with it some more before I commit to it 100%, but this will be the basic idea.

So that means I need a total of nine appliqued blocks (one down, eight more to go) and twenty of those pieced border blocks for this quilt.  I'm even more excited to make them now that I have a plan!

I'm linking up with Design Wall Monday at Patchwork Times as well as Anything Goes Monday at Stitch By Stitch.  Have a great week, everyone!

Sunday, October 19, 2014

Whiggish Frankenstein Applique Block is FINISHED!

16" Whiggish Rose Block FINISHED!

I finally finished my Whig Rose applique block over the weekend!  Now that the tulips (that look like duck feet) and the stuffed berries are in place, the "rotary phone dial" rosebuds in the center of the big flower are nicely balanced and don't bug me anymore.  I love little stuffed berries on applique quilts, and I centered a tiny flower print on each of these to look like the end of the berry where it came off the vine.

Someone asked after my last post about where I got this pattern.  It's actually my own reinterpretation of Joyce Stewart's reinterpretation of Kim Diehl's reinterpretation of a classic Whig Rose block, combined with tulips from a reproduction quilt pattern that I found in a back issue of Quilter's Newsletter Magazine, plus the stuffed berries that were Bernie's idea (he liked the stuffed berries on the Jingle applique project).  That's why I've nicknamed the block "Frankenstein."  So I can't point you to a pattern that you can purchase to make a block exactly like mine, but if you hunt down my sources you should be able to cobble together something similar -- hopefully with your own personal twist!  You can read more about the sources I combined and adapted for this block in my earlier post here

Meanwhile, I am still thinking about how I want to use this block in the quilt I'm planning, but I'm leaning towards either an alternate block layout (blank alternate blocks? pieced alternate blocks?  appliqued wreath alternate blocks) or else some kind of a medallion quilt that would use this block to anchor the outer corners.  So at some point next week I hope to get started with prepping at least three more blocks just like this one. 

I'm linking up with Slow Stitching Sunday at Kathy's Quilts and with  Design Wall Monday over at Patchwork Times, and I'm looking forward to seeing what others are working on this week.  Maybe I'll get some ideas for my Whiggish Rose project!  Have a wonderful Monday, everyone!

Thursday, October 16, 2014

Design Indecisions: What to Do With My Bear Paw Blocks? And What's That Applique Block For, Anyway?

New Idea for My Bear Paw Blocks
I've had these bear paw blocks on my design wall for a couple of months now.  Originally they were going to be diagonal set with plain alternate blocks, then I thought I might straight set them with 4" wide white sashing and these sawtooth stars as sashing posts, but I just couldn't get excited about either of those two ideas.  So the new idea is something like this -- add white fabric around the sawtooth stars to make them kind of float in between the larger blocks.  Kind of like a square in a square block, except that the center square is smaller.  Alternatively, instead of floating the stars in plain white fabric, maybe I could surround my stars with some kind of newsprint or handwriting fabric to balance out the bright splashy print and marbled fabrics.  I'll leave them on the wall like this and see how I feel about this arrangement after I've lived with it for a few days.

Meanwhile, I finished appliqueing the tulips that look like duck tracks to my needle turn applique block:
Almost Finished, Just Needs Some Berries

Now all it needs is a smattering of stuffed berries that I haven't made yet.  My husband keeps asking me if this block is destined to be a pillow.  He usually asks me this while he is chucking other pillows onto the floor so he can sprawl on the couch.  The applique block will NOT turn into a pillow; it needs to grow into a throw sized quilt, but I have no idea what that quilt will look like.  Should I make a bunch more blocks just like this one?  Should I make a bunch more applique blocks in different patterns, but with the same fabrics, like a sampler quilt?  Should I make a mixture of different pieced and applique blocks in different sizes?  Once I get the berries done, I think I'll need to play with the block in the EQ7 software to explore some of those ideas.

This is what comes of starting off on projects with only a half-baked idea of where you're headed with it.  Not that that's a bad thing -- but it does present challenges!

Sunday, October 12, 2014

Of Rose Buds and Rotary Phones


Broderie Perse Rosebuds Appliqued
After all that worrying, I finally appliqued my broderie perse rose buds to the center of my Whig Rose block this week, and they weren't as bad as I thought they would be.  Broderie Perse means that I cut the rose buds out of a scrap of my Vervain Monado print drapery fabric (it's 100% cotton, very lightweight, and I did prewash it). 
Monado print from Vervain, Havana colorway
 
I used Jeanne Sullivan's Patch Back product to give the rose buds a little dimension and preturned the fabric edges with glue stick, then used Roxanne's Glue Baste It to secure them in place for stitching. 

As you can see, the rose buds that initially appeared to be identical in the drapery fabric are more obviously NOT identical now that I've stitched them onto the dark brown fabric.  I think that's okay.  What may or may not be okay is that now the center of my Whig Rose block bears an uncanny resemblance to a rotary telephone dial: 

Would it help if I tried to squish additional rose buds between each of these to reduce the rotary dial effect, or should I leave it alone?  It would be a pretty tight fit if I tried to add more rose buds.  Alternatively, I could do some kind of embroidered embellishment between the rose buds.  Who knows -- maybe the rotary phone dial look will grow on me.
Tulip Thingys Up Next

Next up for this block will be the tulip thingys, or whatever they are supposed to be.  Today I think they look like Daffy Duck footprints.  I've already reverse appliqued the centers, and now the challenge will be in needle turning the tight outer curves smoothly as I stitch these onto the block.  Wish me luck!  I'll try to take the sharp curves slowly, just turning enough for one stitch at a time, and hope for the best.

Tulip, or Daffy Duck Foot Print?
Before I get back to more hand stitching, though, I have to dust off Sergei the Serger and thread him up for a cover stitch.  This will require a consult with his instruction manual, since I haven't done it in awhile.  The BBC Shop only sells Dr. Who tee shirts in adult sizes, and I bought Anders an adult size small that needs to be shortened for him lest anyone mistakes it for a nightgown!

I'm linking up with Slow Sunday Stitching at Kathy's Quilts today and Anything Goes Monday at Stitch By Stitch.  Enjoy the rest of your weekend!

Friday, October 3, 2014

Meanwhile, Applique... and Dog Arias

Leaves Finished on Whig Rose Applique Block
I finished the last of the leaves on my Whig Rose block a few days ago.  This is my first needle turned applique project (the applique shapes for the Jingle BOM project had preturned edges, starched and pressed over heat resistant mylar templates).  As you may remember from this post, I was having trouble getting that curved edge of the leaves nice and smooth at first.  As usual, I'm learning new skills by reading a book -- in this case, I'm following the instructions in The Best Ever Applique Sampler by Becky Goldsmith and Linda Jenkins, a.k.a. Piece O'Cake Designs.  I contacted Becky Goldsmith via her web site and blog, and she was unbelievably generous and kind in helping me troubleshoot my Lumpy Leaf Dilemma.  You can read her wonderful suggestions on her blog here: http://pieceocakeblog.com/tag/curves/.  What helped me most was Becky's advice to work slowly and only worry about turning enough fabric for one stitch at a time on these tight outer curves.  I see a lot of improvement from that first leaf to the last leaf that I appliqued.

I'm still getting the hang of the whole vinyl overlay and pinning process.  With preturned edges, it was easy to use a lightbox with the pattern BENEATH my block to precisely position applique shapes and glue or pin them in place for stitching.  With needle turn applique, Piece O'Cake recommends tracing the pattern onto a clear vinyl overlay that you lay over your block and then carefully slide your shapes into position between the block fabric and the overlay, lining up the chalk lines on your applique shapes with the traced lines on your overlay, while using registration marks on the block fabric and overlay to keep everything straight and positioned properly.  I'm finding it difficult to do this as accurately as I would like it to be.  I get that, in nature, no two leaves are identical, but this is not a naturalistic applique design that I'm working on and for my purposes the goal is identical, perfectly symmetrical leaves and flowers. 

Evidence of Shape Shifting During Pinning
See how that one leaf shifted when I pinned it down and ended up touching the leaf below it?  If these leaves had preturned edges, that would have been much more obvious before I began stitching, but with the fabric allowance sticking out all the way around it was too late by the time I realized it.  My stitches are really tiny, which is good because you can't see them, but not so good if I have to pull them out with a seam ripper.  I'm not willing to risk accidentally cutting into the background fabric, so that leaf stays where it is.  What's next for this block?  The fussy-cut rosebuds that go around the center of the main flower!

Up Next: Rosebuds!
Another famous applique teacher and author has also gone out of her way to help me out.  Jeanne Sullivan, whose classes sell out faster than rock concerts, reached out to me in response to my post on the Applique Addicts Yahoo group.  I already had Jeanne's book, Simply Successful Applique, and she was kind enough to suggest that her prepared freezer paper template method would work well for these tiny shapes.  The difficulty I'm anticipating is in preserving the not-quite-round shape of the rosebuds without having them look lumpy and misshapen, like I tried to make them round and I just did a terrible job.  I also don't want the rosebuds to "shrink" when I turn them, but I can't let any of the off-white turning allowance show, either, because it would really stand out against the chocolate brown fabric to which these shapes will be applied.

This afternoon, Lars has a math tutor coming (don't ask) while Anders will be at church for his Youth Orchestra rehearsal.  I'm planning to set up my supplies on the kitchen counter so I can experiment with rosebuds while I eavesdrop on the tutoring session.

Anyone who has read through this entire boring post deserves a treat, so here you go: I made a recording yesterday of my three-year-old male Rottweiler puppy singing his favorite song, Mozart's Laudate Dominum aria.  Enjoy:


I'm linking up with Can I Get a Whoop Whoop Friday at Confessions of a Fabric Addict, because I think those leaves are definitely whoop-worthy.  Like I tell my son with regards to math (which we're not talking about here, because this is a happy place), being smart doesn't mean you automatically know how to do everything the first time you try it.  Your brain gets smarter every time you struggle with something that is NOT easy, and you keep working on it and ask for help if you need it and refuse to give up until you've learned how to do it.  Everything is difficult before it becomes easy!

Have a wonderful weekend!

Friday, September 12, 2014

Pineapple Progress and Less Lumpy Leaves

Progress on Pineapples and Applique

I finished another pineapple log cabin block this week!  So now that's three down, thirty-three to go in order to make a California King sized quilt.  Paper piecing these blocks is fun and relaxing, and the only downside is that I have strips of fabric in blues, greens, and neutrals covering every available surface in my studio, which makes it hard to work on other projects.  I have not yet come up with a good way to move this project out of the way when I want to work on something else.  I could just toss the fabric strips into three bins according to color, but then they would get all rumpled and wrinkled and I'd have to iron each strip before sewing it to my block.  Hmmm...  I really wanted to be able to alternate between sewing pineapple log cabin blocks on the 'Nina 750 and piecing more 4" sawtooth stars on Bette (the 1935 Singer Featherweight), but right now I can't even get to the Featherweight for all of the fabric strips spread out around that machine. 
 I also found time in odd moments to add a few more leaves to my Whig Rose needle turned applique block.  Ta da:

3 Leaves Stitched, 3 More Pinned and Ready to Go
 Subsequent leaves (top two quadrants of the block) came out slightly less lumpy than the first attempt (lower left quadrant).  None of the little leaves are as perfectly shaped as I would like them to be, but this is a learning project.  Since it's getting better, I'm counting it as a win!

The first two weeks of having the boys in a new school went fairly smoothly.  Their workload is much more reasonable, and they are both enjoying having some time for normal childhood activities like bike riding and shooting baskets in the driveway after school.  Less homework doesn't mean less learning, though.  From what I've seen so far, much more emphasis is put on teaching the structure and process of writing at the new school, both in 6th and in 8th grade Honors Language Arts.  I like that they have an A/B schedule where they have math and language arts every single school day for 90 minutes, but that social studies and science alternate.  After all, math, reading, and writing are the foundation of all future learning in science and in the humanities.  Those skills need to be rock solid by the time they get to high school.  Anders is getting his violin practice done in the mornings before school, and both boys are joining academic clubs this year as well (Chess Club for both boys, LEGO Robotics League for Anders, and Science Olympiad for Lars).  I think Lars is planning to get involved with the school musical, too.  So we're off to a good start this school year.

Best of all, the school principal called me personally yesterday to ask how Lars and Anders were adjusting to the new school and whether there was anything she or her staff could do better.  Can you believe that?  I never got a call like that from anyone at their old school, the much smaller charter school that was supposed to be like one big happy family.  Not even when Lars was the only new transfer student in the entire 5th grade, skipping an entire year of math and having to catch up with kids who had been taking Chinese since kindergarten.  No one from the charter school ever bothered to call me unless there was a problem, or unless they wanted me to donate more money to the capital fundraising campaign.  I am hugely impressed with Community House Middle School!

Since today is Friday and I did finish another block this week, I'm linking up with Finish It Up Friday at Crazy Mom Quilts, and Whoop Whoop Fridays at Confessions of a Fabric Addict.  Have a wonderful weekend, everyone!

Monday, September 8, 2014

Design Wall Monday: Back to the Whig Rose Applique

Needle Turn Applique In Progress
I finally got back to my needle turn applique practice block over the weekend.  After several unsatisfactory attempts to needle turn the stacked flower center circles and stitch them off the block, I finally adjusted the circle diameters slightly so that I could use my Perfect Circle templates: I ran a gathering stitch around the outer edge of the circles and then used the starch and press method to preturn the edges. 

Smooth Circles, but Uneven Petal Gaps
Once I had lovely preturned circles ready to go, I used Roxanne's Glue Baste It to position the circles on my block for hand stitching. 

Now, I'm pleased with how nice and smooth the circles are, but it is obvious that something went awry when I stitched the stacked petals to my quilt block earlier.  See how there is more of a gap between petal and stem in some places than in others?  I couldn't tell that happened until I had the center circles in place, and by then it was too late to move the petals.  Either I turned under a little too much of the dark brown print on some of those petals, or I didn't get them positioned accurately enough.  This could be an issue with the chalk pencil I'm using to mark the turning line on my applique shapes, because the chalk does seem to smudge as I'm handling the applique for hand stitching and it is sometimes unclear just where edge of the line is.  Or the inaccuracy could be happening when I'm positioning the applique shapes and pinning them to the background fabric.  I must say, I'm not enjoying fiddling with the giant vinyl overlay and it seems to me that each time I lay that placement overlay back on the block, it's harder and harder to get the block to match up with the lines on the overlay.  With my earlier applique project, I preturned the edges of all of my shapes and then glue basted them in place with a light box instead of reaching under a sheet of vinyl, and I think that method might be more accurate for me.  Should I have lightly traced some of the major placement lines on my block background with a pencil? 

But this is a learning project, so on we go!  I will probably add something to the design to hide those oopses later.

Last night I finger pressed a few leaves and pinned them in place for stitching.  This block is my first attempt at needle turn applique and I knew that the tight outer curve on the small leaves would be more challenging than the softer curved edges on the large flower petals.  My first leaf came out kind of lumpy, as you can see in the photo:
Lumpy First Leaf
I suppose it isn't terrible for a first attempt.  My applique stitches are really tiny and close together, so it's not easy to take of an applique shape without risking a hole in the background fabric.  I can probably live with this leaf as long as the others come out better.  I think I had an issue with the chalk line smudging as I was working, and I also probably need to go slower around the curve and only turn enough of the fabric edge for one stitch at a time.  I'm going to try a few more leaves this way, but if they all come out looking like rocks I might have to preturn the edges of the rest of these leaves with templates.

Which wouldn't really be the end of the world.  One of the primary reasons I wanted to learn to turn the fabric edges under at the point of stitching the applique is that I thought it would make my projects more portable -- no more hours spent at the ironing board, fiddling with starch or sizing and pressing the raw fabric edges around my templates.  However, as you can see, I'm not exactly making speedy progress with this method, either.  With preturned shapes I was able to glue baste more shapes onto my block at a time and it was easier to make sure I always had something ready to hand stitch when I headed out the door.  With the method I'm using for this block, I can only really position one or two pieces at a time, and then I have to fiddle around with the vinyl overlay and the pins at home every time I need a new piece to stitch. 

Once I've figured out my leaves, I'll go back to the rosebuds that go in the center of the flower.  I do want them to have a little bit of dimension, so I'm going to try Jeanne Sullivan's Patch Back product using the instructions in her book Simply Successful Applique


Design Wall Today
Meanwhile, I think I'd like to start another pineapple log cabin block today, if I can manage to accomplish laundry and grocery shopping before the kids get home from school!  I'm linking up with Judy's blog for Design Wall Monday at Patchwork Times, WIP Wednesday at Freshly Pieced, and WIPs On Wednesday at Esther's blog.

Thursday, March 27, 2014

Evolution of Applique Inspiration: Kim Diehl's Country Whig Rose Pattern

Country Whig Rose pattern by Kim Diehl from her Simple Blessings book, photo by Martingale
So, do those applique blocks look familiar to anyone?  Today I stumbled across Kim Diehl's original Country Whig Rose applique pattern, from her 2004 book Simple Blessings (which Martingale just rereleased in 2013, available here).  This is the pattern that inspired Joyce Stewart to make her Village Gardens quilt, the one I saw featured in the September 2006 Quilters Newsletter magazine:


Now that I've found Kim's original pattern, I can see how Joyce changed the pattern by adding a third layer to those large flower petals, changing the orientation of the leaves and berries on those little twig branches, and altering the proportions of the stacked circles that form the flower center.  She also chose to set her blocks on the diagonal and added those little bullseye appliques at the block intersections.  If you look carefully, you can see that Joyce's flower petals are more curved in the center rather than pointed like Kim's were, a detail that really appealed to me for the country French vibe of my inspiration fabric from Vervain.

Now in my version, inspired by Joyce's quilt, I've swapped the hearts out for vintage style tulips, added some berries, and am changing up the flower centers as well, adding berries or seeds or whatever in an outer ring:
My Version: No Hearts for Rebecca!
I'm thinking of setting my blocks straight like Kim's, but with alternate "blank" blocks for some special quilting.  What do you think?  Both Kim's and Joyce's quilts have a deliberate American country folksy appeal.  I'm going for more of an antique quilt style, like this gorgeous Whig Rose quilt that I found on Pinterest today:

Whig Rose variation by Lavinda Rudicil Rubottom, circa 1865

Kim's pattern was of course originally inspired by the many surviving 19th century Whig Rose applique quilts, of which Lavinda's quilt is just one variation. 

Of course, if I REALLY wanted my quilt to look like an antique, I would have used a solid white background fabric and a solid emerald green instead of insisting on combining as many print fabrics as I could possibly get away with.  Ah, well -- I seem to have an aversion to plain white fabric.  I'll have to work on that.  Anyway, I thought it was neat to see how this design evolved from Kim's original concept to inspire other quiltmakers, especially since I had only seen Joyce's quilt when I started designing my own version. 

Coincidentally, I discovered that another quilt blogger is currently using Kim Diehl's Country Whig Rose pattern in one of her current projects.  Click here to see how Karen of Quilts... etc. is using this applique pattern as an alternate block with red and black 9-Patch blocks.