Showing posts with label Needle Turn. Show all posts

Saturday, August 15, 2026

Stonefields Blocks 30-32: " Cara's Surprise"

Well, this wasn't my goal for last week (nope, didn't piece that backing yet), but I finished the next three applique blocks for my Stonefields sampler quilt.  This is a pattern by Susan Smith and the blocks finish at 6" square.


Stonefields Blocks 30-32: Cara's Surprise


So, after machine piecing the "plus" unit for the centers of these blocks, I cut circles out of them with a turning allowance, ran a gathering stitch around the outside edge, and preturned the seam allowances with the appropriate size Karen Kay Buckley Bigger Perfect Circles heat resistant template and a bit of Maryanne's Best Press liquid starch.  I used a little roll of painter's tape to secure the template before pulling up the gathering thread and ironing the seam allowances, to prevent the template from sliding.  I wanted that plus sign to be as centered as I could get it in those circles.


Painter's Tape Kept "Plus" Centered During Starch and Press


It turned out like this, a little wonky but in a way that charmed me for some reason, so I left it be:


"Plus" Distorted a Little During Pressing


Thursday, July 2, 2026

Deceptively Simple: Stonefields Blocks 28 + 29 "Paper Flowers"

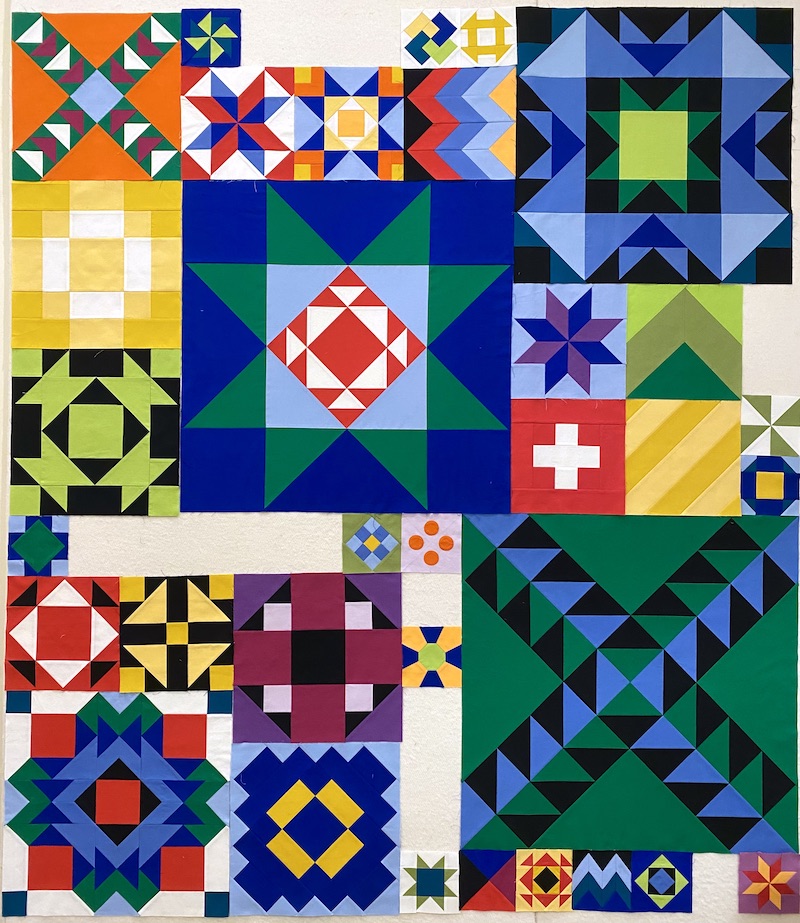
 Alright, y'all -- I finally finished those two little appliqué blocks for my Stonefields quilt that I was prepping at the end of May, and good riddance to them!  Behold, my design wall displaying meager progress:


29 Blocks Completed for Stonefields Sampler Quilt by Susan Smith


Stitching the stems was fine, but needle turning these flower shapes was a wretched and miserable stitching plan that I regretted almost immediately.  

Sunday, March 22, 2026

Conquering Stonefields Block 18, "Star in a Star"

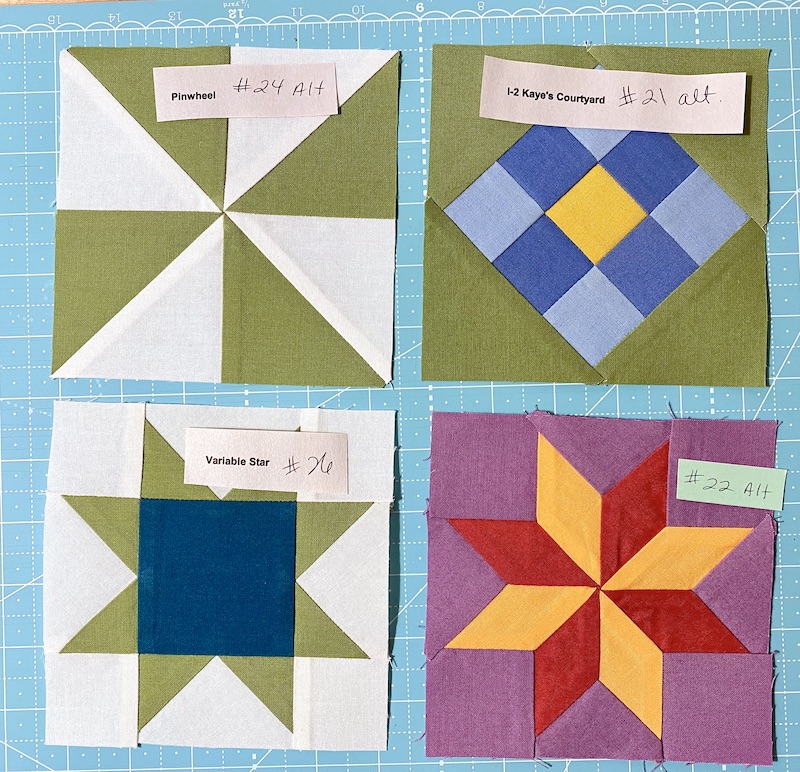
Happy Sunday, everyone!  I have another finished block for my Stonefields sampler quilt (pattern by Susan Smith) to share with you, Block 18 "Star in a Star."  It was a fiddly little bugger for sure, but I'm delighted with how it turned out.  These blocks will finish at 6" after being trimmed down and sewn into the quilt.


Stonefields Block 18, "Star in a Star"


I have heard from a few other quilters who are working on Stonefields or other Susan Smith patterns who are struggling with the lack of instructions, so I'm going to try to share a bit more about how I'm puzzling out the more challenging blocks.  This is not "the right way," "the only way," or even necessarily "the best way" -- only the way that worked for me.

Sunday, November 26, 2023

FrankenWhiggish Setting Options: To Further Complicate, Or To Finish In This Lifetime?

Hello, Quilting Friends, and Happy Thanksgiving weekend to those of you in the United States!  In between the cooking and the baking and the holiday decorating of the past few days, I've been spending an inordinate amount of time in my EQ8 quilting design software, exploring my options for the Frankenwhiggish Rose hand stitched needle turn appliqué blocks that I started in March of 2014 (you'll find that post from nearly a decade ago here).  

At this point, all that stands between me and the end of making the nine identical Whig Rose appliqué blocks is 48 broderie perse rosebuds and 96 fussy-cut stuffed berries.  However, I remain undecided about what I'm going to do with those nine blocks once they are finished.  I have tried out so many options in EQ8, each one more complicated than the last:

70 x 70 On-Point with Mariner's Compass and Pieced Setting Triangles

In the EQ8 rendering above, I've just duplicated a photo of one finished appliqué block and the EQ8 software lets me see how all nine appliqué blocks will look together when they are finished, combined with any combination of thousands of other blocks, borders, sashings, etc.  It's one of my favorite ways to use EQ8 software, and although designing on the computer can suck up a lot of time, every 10 minutes trying something out on the computer saves me weeks/months/years of cutting up fabric, sewing it together, putting it all together on the wall and then hating what it looks like!  So in this version of the quilt, I'd be making four mariner's compass blocks using scraps of my applique block fabrics mixed with other fabric scraps from the same color family and style.  The centers of the mariner's compass blocks could even be the birds from my Vervain Monado-Havana fabric, the luxe drapery fabric I've been chopping up for my broderie perse rosebuds.  Although the mariner's compass blocks look complicated, the EQ8 software lets me print out foundation paper piecing templates in exactly the right size for my quilt, directly onto newsprint paper (I get mine on Amazon here; this post contains affiliate links), which makes it so easy to get sharp, crisp, perfect points.  I'd appliqué the center circle to each compass.  As of right now, I like the way the pieced setting triangles create an illusion of scallop curves to frame the body of the quilt, but they feel a little heavy -- might reduce the scale and use smaller strips and squares for those so as not to overpower the dainty rosebuds and berries.  

But how nice it would be to just be FINISHED with this already once I have the blocks done?  This quilt, like the 8-year skirt project I finished a couple weeks ago, really has no purpose other than educational.  I wanted to try needle turn appliqué, and I know how to do it now, so it's a "win" for me already and I'd like to move on to something else!  So this is the other, simpler option I'm considering:

Keeping It Simple, 66 x 66 Straight Set with Harlequin Border

In this version, I trim my appliqué blocks to finish at 16" square and set them straight with a harlequin border and little X corner blocks to repeat the X shape of the tulip stems in the appliqué blocks.  Then I've slapped on a 6" wide plain outer border, for feather quilting or whatever.

Tuesday, January 24, 2023

Nanette's Globetrotting Quilt + My Newest Favorite Quilting Thread

 Hello, my lovelies!  Have you missed me?  I've been less motivated to write blog posts lately because I switched email subscriptions providers at the end of December (no more flying MailChimp monkeys) and still have not figured out how to get blog posts automatically sent via email with my service provider.  And knowing that the folks who subscribe to get my blog posts sent by email are the ones most interested in what I have to show and tell, and those people will most likely not be seeing the posts I'm writing now is discouraging!  (If a tree falls down on the Internet and no one is watching, does it still make a sound?). I hate wasting perfectly good quilting time on troubleshooting tech problems!!  But the upside to that is that I have been doing a lot of quilting while I've been sulking about my tech woes, so I do have a few things to share today.  

Nanette's Globetrotting Quilt with Aurifil Forty3

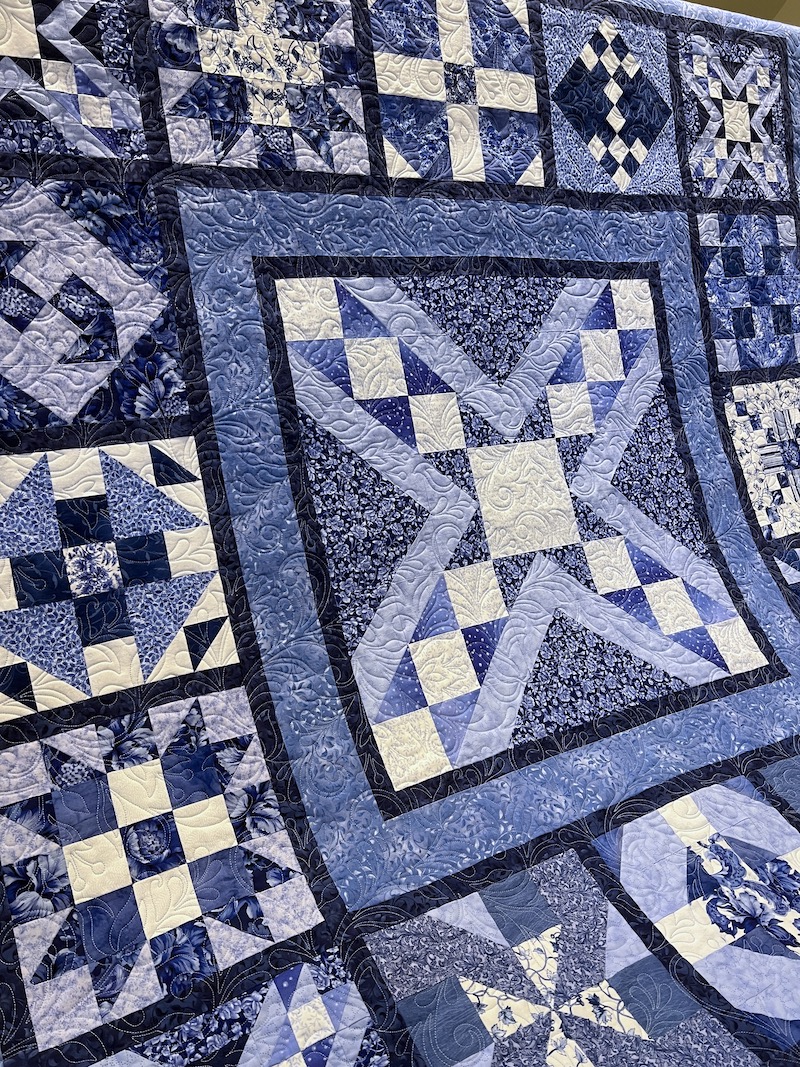
First, I have to share the gorgeous quilt I just finished long arm quilting for my client Nanette of Do It Right Quilter.  I used a new thread for the first time (well, new to me -- I think it's been out for about 5 years or so), Aurifil Forty3 long arm quilting cotton, and I am in love with it!

Detail of Feather Garden E2E Stitched in Aurifil Forty3 Light Robin's Egg

I wish I could capture in photos what I'm seeing in person.  First off, the color was an absolute perfect match to the lightest blue fabric in Nanette's quilt.  For this quilt, I wanted a thread that was simultaneously going to blend in like a chameleon to let Nanette's exquisite piecing and beautiful fabrics shine, but also needed that thread to have some presence so that we could actually see the elegant Feather Garden quilting design even though the thread was color-matched to "disappear" on this predominantly blue quilt.  Aurifil Forty3 is beefier than their 40 wt 2-ply thread that comes on green cones; Forty3 is a stronger 40 wt 3-ply thread that comes on big cones and is designed specifically for the demands of high speed long arm quilting machines.  The color saturation, luster of the thread, and its softness remind me of cotton embroidery floss, and I think it's this thread's softness that I like most of all, because of how it bends in and out of the quilt sandwich to form stitches that look more like a dashed line of tiny, perfect hand stitches than like machine quilting.  I mean, this is definitely machine quilting, but I kept doing double-takes and imagining that I was seeing hand quilting stitches coming out of my long arm.  

If you have a long arm and you want to give Aurifil Forty3 a try, you may have difficulty finding it locally but the Fat Quarter Shop stocks it here (this post contains affiliate links).  Just a word of warning: this thread kicked out more lint than any other thread I've quilted with, and I had to stop and clean the hook race and bobbin case out midway through every single bobbin in addition to cleaning thoroughly with every bobbin change.    For me personally, I am willing to deal with lint when the tradeoff is gorgeous stitches that make the quilting sing.

Nanette's Globetrotting Quilt, 62 x 62

But I am getting ahead of myself!  Back to Nanette's quilt!  This 62" x 62" beauty is a BOM (Block of the Month) design by Pat Sloan called Globetrotting, and as of this writing in 2023, the pattern is still available on Pat's website for FREE here.  Nanette started this quilt in March of 2014 and finished her quilt top in September of that year, and you can read about the changes she made to the pattern and how she used EQ7 software to preview her fabric choices on her blog in this post.   Shortly after completing this quilt top, which she'd originally planned to quilt herself, life threw Nanette and her husband some nasty curve balls that sapped a lot of her creative energy for big endeavors and she found more solace in piecing and appliqué than in quilting and finishing for the next few years.  This resulted in the accumulation of a LOT of gorgeous quilt tops needing quilting, more than Nanette felt like she could handle, so she shipped twelve of them to lucky me for long arming. 💕

Sunday, November 13, 2022

Ten-Year Projects In Progress: Update on Frankenwhiggish Rose, Jingle BOM, + Deco Quilts

So...  I put my Whig Rose blocks back up on my design wall yesterday morning to see how much work remains to be done on them.  I started this needle turn appliqué project in March of 2014 (you can read about it here) and it's been an on-again, off-again kind of thing.  I'm finding it really monotonous to appliqué the same shapes over and over again.  The reason I haven't started any of the Sarah Fielke 2022 Block of the Month projects I signed up for is that I wanted to finish THIS appliqué project before starting on a new one, and this one ain't finished yet!

FrankenWhiggish Blocks on November 12, 2022


Just for kicks, let's compare today's photo to the one from the last time I had these blocks up on my design wall, back in January of this year:

FrankenWhiggish Blocks on January 12, 2022


So it took me TEN MONTHS to complete eighteen of those wretched little tulips!  AAAARGH!!  And I still have ten more to go.  

Sunday, January 30, 2022

Four More Blocks for My Retro '80s Building Blocks Quilt + Layout Options for FrankenWhiggish Rose Blocks

Happy Week End, everyone, and happy Month End as well!  One of the goals I'd set for myself at the start of January was to make some more blocks for my Retro '80s Building Blocks sampler quilt, and I finally did that yesterday.  Four more happy little 5" blocks are completed, only one of which was in the original Moda Modern Building Blocks design.  The other three blocks were among the many that I swapped out when I was redrafting the quilt in EQ8 Quilt Design Software (affiliate link) to suit my purposes.

Four More 5 Inch Blocks for Retro '80s Building Blocks

Gotta admit, I am still not 100% thrilled with the center of the little Lemoyne Star but it took me a LONG time to piece that one with all of its little Y-Seams, and I decided it's Good Enough.  Or at least, it's the best I could do that day.

Here they are, my completed blocks back up on the design wall, with the new ones added into the mix:

Back on the Design Wall: 38 Blocks Finished, 15 Remaining to be Made

For those of you who haven't seen any of my earlier posts about this quilt, here's a quick recap.  I started out with the idea that I wanted to make the Moda Modern Building Blocks quilt that was a popular BOM (Block of the Month) about eight years ago.  But I wanted mine to finish a different size to fit a particular bed, and I did not have the kit or the pattern anyway, so I set about redrafting the quilt in EQ8 from pictures of...  But instead of sizing my blocks as ruler-friendly multiples of 6", my blocks were multiples of 5" in order to get the finished quilt size I wanted with the borders I added.  The whole idea behind the "building blocks" sampler was for it to be a skill builder, so I eliminated all of the unecessary seams that Moda had added to simplify the piecing, adding back Y-seam construction because that's a skill I wanted to focus on.  I also swapped out 40% of the blocks in the original quilt for different ones in order to get that retro 1980s vibe I wanted and/or to include blocks that were more interesting (to me) or more challenging.  And I added rainbow borders that were inspired by the suspenders Robin Williams' character wore on the television show Mork & Mindy.  

Thursday, January 13, 2022

Whig Rose Applique Progress, Christmas Tumbler Top + a Sizzling Star Quilt Finish

Hello, my friends!  How is your January shaking out so far?  Our Christmas decorations are packed away, my sons are out of my house and back at their respective colleges, and I've been sewing up a storm.  I won't get my hands on the first patterns for my Sarah Fielke BOMs until the LAST day of January, so I've been working on the backlog of client quilts in my queue and moving personal projects along so I'll be ready to kick off an Applique-Palooza on January 31st. Today I have two personal projects to share and one client's quilt to showcase.  I'll be linking up with all the usual suspects (favorite linky parties, listed on my blog sidebar).

FrankenWhiggish Rose Applique

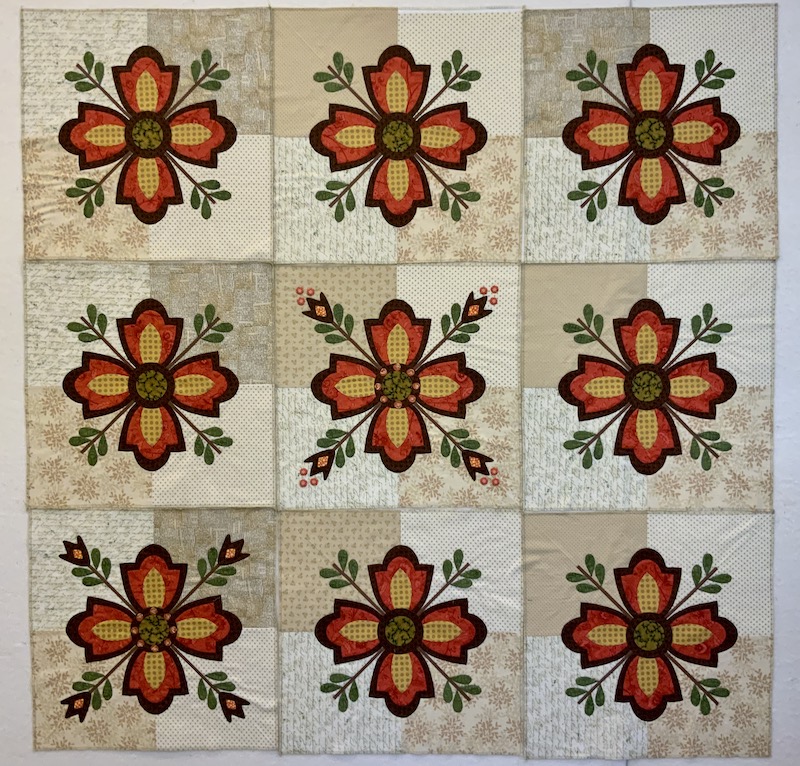
Thanks largely to the Medici the Magnificent series on Netflix, I stitched the last of the leaves on my Whig Rose blocks last night.  Woo-hoo!  

FrankenWhiggish Rose Needleturn Applique In Progress

This is the first time I've had all nine blocks in progress on my design wall and I've gotta say, it's looking really encouraging!  The center block is the only one that's 100% finished, but I had forgotten that I had a second block (bottom left) that was nearly finished except for the stuffed berries near the corner tulips.  

Wednesday, November 18, 2020

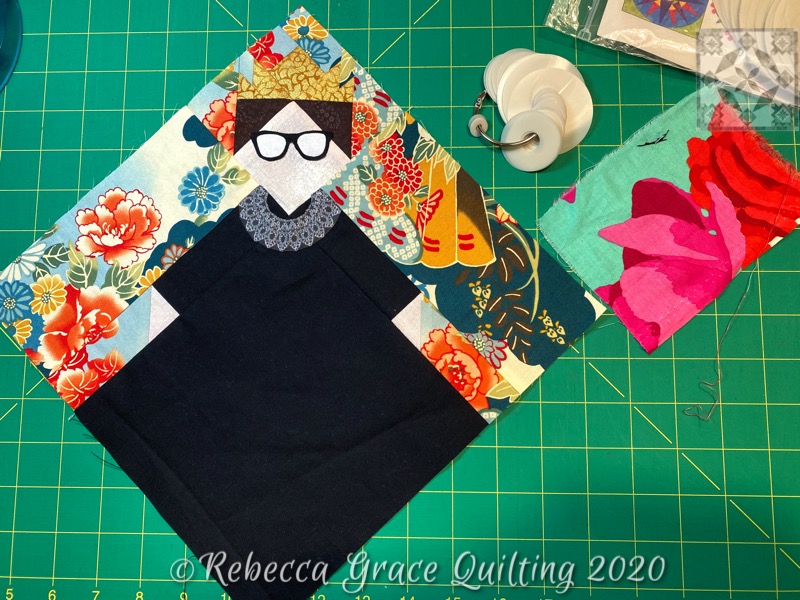
Foundation Paper Piecing + Needle Turn Appliqué: The Notorious R.B.G. is Ready to Join Her International Sisters

Do you remember seeing "a little secret sewing" on my to-do list last week?  I had SEW much fun making this "Notorious R.B.G." block for my quilting friend Preeti, based on her popular International Sisters Block Tutorial (find it on her Sew Preeti Quilts blog here).  

My Notorious Ruth Bader Ginsburg Block, Ready to Join Her Sisters

If you haven't seen Preeti's International Sisters blocks yet, you should pop over to Preeti's tutorial to read how the block came about.  Preeti stumbled upon a quilt block called African Queen a few years ago and drafted her own 10" finished version of the block when she was unable to find a pattern or instructions for making it.  Then she started experimenting with all different skin tones and it became an International Sisters block.  Here are some of Preeti's lovely International Sisters:

Four of Preeti's "Sunshine Sisters" (blocks and photo by Preeti Harris, Sew Preeti Quilts)

One of the great things about Preeti's International Sisters blocks is how fabulously they showcase wildly colorful print fabrics, and I think that is a big part of their appeal.  But of course R.B.G. needed to wear a plain black Supreme Court Justice robe instead, so I used a Japanese print from my stash for her background to set off the black dress and help her to work in a quilt with other sisters blocks, should Preeti choose that.  (She can do whatever she wants with it, or nothing at all.  There are no strings attached).

Justice Ginsburg at the 2015 Elle Women in Washington Power List Dinner

The red and orange Japanese print from my stash reminded me of this gloriously colorful embroidered Chinese silk kimono jacket that Justice Ginsburg rocked at Elle magazine's Women in Washington Power List Dinner in 2015.

My Foundation Paper Piecing Pattern, Created in EQ8 Software

In order for this international sister to be recognizable as The Notorious R.B.G., I needed to swap the head wrap for Ginsburg's trademark swept back hairstyle, topped with a crown.  I recreated Preeti's International Sisters block in EQ8 software, carefully following her tutorial specifications so the block would finish the correct size and with the correct proportions.  Then I just subdivided what would have been the head wrap with some additional seam lines. 

Foundation Paper Piecing Ruth's Crown

Foundation Paper Piecing Completed

Once I'd finished foundation paper piecing the four units that make up the whole block, I starched and pressed them nice and flat before trimming away the excess fabric 1/4" from the seam lines.  Then I removed the paper foundations and joined the units together.

Needle Turn Appliqué for the Broderie Perse Eyeglasses

I needed just a few more customizations for my R.B.G. block, and those were added with needle turn applique.  First, I cut out a pair of appropriately sized eyeglasses for my Supreme Court justice from Geekery "Spectacles" fabric (available from several Etsy sellers here).

Spectacles Fabric from RJR Fabric's Geekery Collection, Available on Etsy here

Back view of Appliqué Stitches

The white seam allowance was pretty skimpy in the deep V of the nose bridge, so there are LOTS of tiny stitches there to ensure it doesn't unravel.  For reference, those machine stitched foundation paper piecing seams have a stitch length of 1.5 and the seams sewing the sections of the block together are stitch length 2.0.

The "dissent collar" was done the same way, cut out of a Spoonflower RBG's Dissent Collar fabric (created by jbtsparkle, available from Spoonflower here) with a fat 1/8" seam allowance and then added to the already-pieced block by needle turn appliqué.

But something was still missing:

Tiniest Perfect Circle Template + Scrap of Kaffe Fassett Fabric = Jade Earrings

Justice Ginsburg Never Went to Work Without Her Earrings!

I used the smallest size of my Karen Kay Buckley Perfect Circles templates and a scrap of backing fabric from a recently completed baby quilt to recreate Justice Ginsburg's iconic jade statement earrings.

Properly Accessorized, Justice Ginsburg is Ready for a Day in Court

This block was a fun little diversion after wrapping up the two baby quilts.  I'm scheduling this post so it won't publish until after Justice Ginsburg has been safely delivered to Preeti.  I hope she likes it!

PSST!!  I'd Love to Quilt for YOU!

By the way, if you or any of your quilty friends has a quilt top or two that needs quilting, I'd be delighted to quilt for you!  My turnaround for edge-to-edge quilting is currently running about 2 weeks, and you can click here to find out how to book your quilt with me.

I'm linking up today's post with the following linky parties:

THURSDAY

Needle and Thread Thursday at My Quilt Infatuation  

FRIDAY

Whoop Whoop Fridays at Confessions of a Fabric Addict

Peacock Party at Wendy’s Quilts and More

Finished Or Not Friday at Alycia Quilts

Off the Wall Friday at Nina Marie Sayre

 TGIFF Thank Goodness It’s Finished Friday, rotates, schedule found here: TGIF Friday

SATURDAY

UFO Busting at Tish in Wonderland

SUNDAY

Frédérique at Quilting Patchwork Appliqué

Oh Scrap! at Quilting Is More Fun Than Housework

Slow Stitching Sunday at Kathy's Quilts


Sunday, July 5, 2020

Slow Stitching Sunday: Preparing Leaves for Last Two FrankenWhiggish Rose Blocks

Good morning, and happy Sunday!  I haven't mentioned my needle turned applique project in awhile, mostly because it's dragging on FOREVER and, since I'm making 9 identical blocks, it feels like treading water without ever actually making any progress.


For those of you who haven't been around that long, I started this project in March of 2014.  I'd just completed my first appliqué project, my Jingle quilt using Erin Russek's pattern and fabulous tutorials using the starch and press prepared edge method (nope, that one's not finished yet, either, but it's at least a finished top waiting its turn under the long arm needle).  Anyway, I loved the crisp, precise shapes I was able to achieve with the starch and press method, and I loved that I could just focus on my stitches as I sewed the applique shapes to the background, since the raw edges were already tucked neatly underneath.  However, I was hoping to find a method of hand stitched appliqué that was more portable throughout the process and didn't require a hot iron to get a block ready for stitching.


I bought myself a copy of The Best-Ever Appliqué Sampler Book by Becky Goldsmith and Linda Jenkins, and set about teaching myself needle turn appliqué.  It's a great book with clear instructions, but I wasn't feeling inspired by the projects in the book.  The authors had deliberately chosen some straight, skinny stems, circles, inside points and curves, outside points and curves, and reverse appliqué  to build all of those skills that a newbie would need to tackle any appliqué design.  So I set about finding a different pattern that would have all of those different elements but that was more appealing to me creatively at that point in time, and I ended up with this pattern that I found in an issue of the now defunct Quilter's Newsletter Magazine.  The quilter whose work was featured in the magazine had based her design on an older Kim Diehl pattern, and I made further changes to her pattern motivated by my loathing for cutesy folk hearts and my love of antique appliqué quilts.  I replaced the folksy hearts with reverse appliqué tulips from a historical reproduction pattern (sourced from a different issue of QNM -- man, I miss that magazine!).  And I added little broderie perse rose buds around the center of the big rose, fussy cut from leftover drapery fabric.  If you'd like to see and read more about the pattern sources, see this blog post.  


At first I was just planning to make the one 16" block, to teach myself the techniques of needle turn appliqué  but when I'd finished I liked it so much that I decided to keep going and do a whole quilt with it.  So I imported this photo of my one completed block into my EQ quilt design software and played around with how I could use it in a quilt design.  The idea I liked the most was this one, using nine of these big blocks:


And now here we are, six years later...  I am still working on the other eight appliqué blocks!  To be fair, I've only been working on this in fits and snatches.  I've discovered that it's kind of boring to make a bunch of blocks that are all exactly the same.  I've also learned that I probably prefer the starch and press prepared edge method, burned fingertips and all.  Even though I don't need an iron with needle turn, the whole business of perfectly positioning this vinyl overlay so I can get each applique element positioned just right, then fiddling with tiny 1/2" or 3/4" pins to hold them in place, is not really portable anyway -- I mean, I'm not able to do this in my lap while I'm waiting at the doctor's office, if you know what I mean.  And, although the slight variations from one shape to another that you get with needle turning the edges as you go gives a more authentic, organic look for an historical reproduction quilt (none of those antique quilts were as "perfect" as what we quilters aim for today!), my personality is probably better suited to a method where I have more precise control over the outcome.

Looking at that design I came up with in EQ today, I'm not quite as in love with it anymore -- but it's hard to know whether that's because I've got a combination of photo blocks with so-so-lighting and virtual fabric swatches from the software program.  If I do make that design, I would be using the same fabrics for the pieced blocks, sashing and skinny border that I used in the appliqué blocks.  Right now I'm still plodding along with the appliqué.  After finishing the first block in its entirety, I've been doing the remaining 8 blocks like an assembly line, so all eight of them have their layered petals, center circles, and stems stitched down.  I'm currently pinning leaves on the second-to-last block, which is nice because I am SO SICK AND TIRED OF SEWING LITTLE GREEN LEAVES OVER AND OVER AGAIN!!!  After the leaves, I'll move on to the reverse appliqué tulips for all 8 blocks, and then finish with the stuffed fussy cut berries and the broderie perse rosebuds that go around the center circles.  

I feel like we should place bets as to how many years it will take me to finish this quilt, like guessing how many jelly beans are in the jar and whoever comes closest wins a prize!

I'm linking up today's post with the following linky parties:

SUNDAY

·       Slow Sunday Stitching at Kathy's Quilts  

·       Oh Scrap! at Quilting Is More Fun Than Housework

MONDAY

·       Design Wall Monday at Small Quilts and Doll Quilts  

·       Monday Making at Love Laugh Quilt

·       BOMs Away Katie Mae Quilts  

Monday, January 6, 2020

Monday Updates: Spirit Song Quilt, Frankenwhiggish Applique, a New Fabric Shop, and a Puppy Portrait

Hello and happy Monday!  The "little one" (my 6' tall 16-year-old son) is back to high school today, but I still have my 19-year-old son home for a few more days before he heads back to college.  Now that it's Epiphany and Christmas has officially ended, Bernie is taking down our Christmas trees today.  I've been sewing 4" Birds in the Air blocks together over the weekend for my Spirit Song quilt (whose color palette was inspired by the contemporary choir dress code colors for which I never have anything to wear).

First 16 inch Block Sewn Together for Spirit Song Quilt
I'll need twelve of those 16" blocks in a 3 x 4 layout for this throw-sized quilt.  This is a total procrastination project, by the way.  I have no intended use or recipient in mind for this quilt. But, since it's Design Wall Monday, here are all of the blocks (before I started sewing them together) laid out on my design wall:

192 Four Inch Blocks on the Wall, Final Layout
Colors are weird in that photo because I took it late at night and then tried to correct shadows and yellow cast from incandescent lighting, etc.  But that's the photo that I printed out to use as a placement guide as I'm assembling the blocks into a quilt top.  

I'll be working on my never-ending Frankenwhiggish Rose needle turned applique project this afternoon with my SouthSide Stitchers Bee amigas.  I feel like I've been making little green leaves FOREVER...

Hand Stitching for Today's Sewcializing Bee
Colors in that photo are weird, too.  Here's the first completed block:

Block One of Nine for Frankenwhiggish Rose Quilt
Colors are more accurate in this photo.  I completed the first block in its entirety to see how I liked it, and then started making eight more identical blocks assembly-line style: all of the stems, all of the large petals, all of the circle centers, and now I've been bogged down with putting sixteen leaves on each block for aeons...  I am so looking forward to finishing the leaves and moving on to the reverse appliquéd tulips, stuffed berries, and broderie perse rosebuds at the center of each block!

One of my quilting friends and I checked out a new local shop yesterday afternoon, and I came home with some goodies:

Shopping Treasures from a New Local Shop, Stash Charlotte
The store is called Stash (located in the Plaza Midwood area, for those of you who are fellow Charlotteans), and they used to sell only yarn and knitting supplies until they were bought by new owners who decided to add fabrics and Janome sewing machines.  I found out about them at the Charlotte Quilters' Guild, because Stash is one of our sponsors for our upcoming March quilt show (they've donated a Janome sewing machine as a raffle prize) and I've been meaning to check them out ever since.  It turns out that they are the ONLY non-chain quilt shop near Charlotte that is open on a Sunday afternoon, a crucial piece of information that I will be storing away for sure...

Stash is a very small shop and they have a lot more yarn than fabric...  BUT...  the fabric that they do carry is an interesting mix with an aesthetic that I like, and the manufacturer names on the bolts were kind of off-the-beaten-track, not the same lines that are carried by other quilt shops in our area.  I noticed a few Japanese fabric companies that I've only seen in online shops before, and OH MY GOODNESS, y'all -- they carry LIBERTY OF LONDON!!!  I have eyed those fabrics online, but with a skeptical eye due to the higher price point.  Now, having seen the fabrics in person, I'm officially a groupie.  

Liberty's Strawberry Thief Print on Tana Lawn
The crisp clarity of Liberty's highly detailed prints reminds me of the magnificent (and stratospherically expensive) screen prints from Scalamandre.  And the cotton lawn fabric that Liberty prints on has the softest hand and drapes like silk charmeuse.  I know that Liberty is a favorite with quilters and crafters, but I'm thinking of using it for a light-as-a-feather blouse, skirt, or dress -- maybe in Spirit Song colors so I'll finally have something to wear to church!  :-). Wouldn't this fabric be luscious for a blouse like this one from the Danish pattern designer Personal Pattern?  

Blouse 4253 from Personal Pattern, available here

You might have noticed some yarn in that photo of my shopping treasures, too, even though I have never even considered learning to knit.  I picked two of the thinnest, most interesting variegated wool yarns because I couldn't stop petting and squeezing them like I was that crazy lady in the "Don't Squeeze the Charmin" commercial!  I'm planning to experiment with them in my bobbin with decorative machine stitches, and if that doesn't work, I'll play with them in my serger loopers, and if THAT doesn't work, well, I might have to sign up for a knitting class at Stash!

I have one final picture to share with you before I wrap up this post.  I have to show you what one of our pastors surprised me with after church yesterday.  He had seen my Facebook post about losing our dog Otto to cancer just before Christmas, and he painted this for us from one of my photos:

Painted by Drew Goodson, Associate Pastor at Christ Lutheran Church in Charlotte, NC
I was so overwhelmed.  I had no idea that Pastor Drew was gifted with artistic talent in addition to his gifts for ministry.  I so appreciate the outpouring of love and compassion from my blog readers as well.  Thank you all so very much.

Well, once again I've lost track of time while writing a "quick blog post" and I'm on the verge of being late for my sewing bee!  

Linking up today's post with:

·       Slow Sunday Stitching at http://kathysquilts.blogspot.com/  
·       Oh Scrap! at Quilting Is More Fun Than Housework http://quiltingismorefunthanhousework.blogspot.com
·       Design Wall Monday at Small Quilts and Doll Quilts  
·       Monday Making at Love Laugh Quilt
·       Moving it Forward at Em's Scrap Bag
·       BOMs Away Katie Mae Quilts