Showing posts with label Paper Piecing. Show all posts

Tuesday, September 30, 2025

Sarah's Scrappy Double 4-Patch Quilt + Plotting and Scheming My Next Stonefields Blocks

Happy Monday Tuesday morning, Friends!  Well, I’m delighted to report that I’ve finished all the stitch-in-the-ditch quilting on my Deco quilt, but alas — it doesn’t look any different than the last time I showed it to you.  Because, you know, invisible thread…

So I thought I’d show you this lovely double 4-patch quilt that I quilted for Sarah over a year ago, with a Baptist Fan quilting design that you CAN see.


Sarah's Double 4-Patch Quilt with Baptist Fan E2E 


I love Sarah’s carefully planned scrappy palette of fabrics, with such wonderful value contrast that makes the red and blue chain seem to shimmer.  And she had the sweetest fussy cut vintage fabrics like this little one with the children waving flags:


Baptist Fab Quilting Detail


Meanwhile, as we say in the South, I’ve been “FIXING” to start my next Stonefields Quilt blocks.  

Wednesday, September 17, 2025

Stonefields Blocks 14 & 15: Bordered 3/8" Hexagons

Hello, hello, HELLO, my Lovelies!  Look what I made yesterday and today, instead of packing or working on quilting my Deco quilt!  Behold, the Adorable and Delicious Little Bordered 3/8" Hexagon Blocks for my Stonefields sampler quilt project!  I had so much fun making these blocks!  (This post contains affiliate links).

6" Finished Stonefields Blocks 14 & 15: Bordered 3/8 in. Hexagons


The directions in the Stonefields Quilt pattern by Susan Smith are sparse, which is fine by me as I have difficulty following instructions anyway.  The pattern designer assumes everything, and I mean EVERYTHING, is stitched by hand.  That's fine if Methuselah is making this quilt, but those of us whose life expectancy is less than 900 years need to make peace with compromises from time to time.  I enjoy hand stitching but I am really, REALLY slow at it, so I'm mixing in machine work where it makes sense to me to do so.

For instance, why would I hand piece this square in a square block background when it is so easy to foundation paper piece this block and I can print my foundation paper patterns right from my EQ8 software to whatever size I need them to be?


Foundation Paper Pieced Background


I rough cut all my patches before FPP stitching and lay them out next to my machine.  Those fabrics in the lower left corner of the above photo are the ones I've selected for the hexie rosette that will be appliquĆ©d to the center of this block later.


 6" Finished Block Background Ready for Hexie Rosette


And now, for the rascally little EPP hexies!  This was my first ever experience making EPP hexies.  Five years ago, I sewed an EPP monogram letter C block for a baby quilt (read about that here) and in August of 2016 I made unsuccessful experiments combining both FPP (foundation paper piecing) and EPP (English paper piecing) methods to piece a tricky block from the Farmer's Wife Sampler book (read about that here).  

Well, I've got more experience and better skills now than I had back then, and this time around I'm a lot happier with my results.  


Thread Basted 3/8 in. Hexies


Notes to Self (and to Other Interested Parties):

  • I'm using commercially made hexagon templates with 3/8" sides.  They came in an optional kit that I purchased with my pattern.
  • After reading a blog post from the Brimfield Awakening EPP gurus where they experimented with different stitching methods and threads, I decided to thread baste my hexies using 50/3 cotton Guttermann thread and a size 10 milliners needle, but switched to 100 wt polyester Microquilter thread with a size 11 milliners needle to whipstitch the edges of my hexies together.  Microquilter from my long arm quilting thread stash was the closest thing I had to the 100 wt poly Invisafil thread that Brimfield Awakenings recommended.

Whipstitching With 100 wt Microquilter + Size 11 Milliners Needle


Even in the ultra-fine, thinnest weight available, so skinny that you can't see the stitches as you're making them, 100 wt polyester still has the strength of 50 wt or even 40 wt cotton thread.  I wish I'd known this for my previous EPP attempts!  The thread really does make a huge difference.


Whipstitched Seam in 100 wt Microquilter Thread


See?


Zoomed WAY In to See the Stitches


And here that seam is from the right side, again, this is a zoomed-in photo which is why the fabric weave looks like a waffle.


Same Seam, Right Side


I needed just one Wonder Clip to hold things securely positioned while I was hand stitching.  I made my first hexie rosette by attaching all six outer ones to the center first, then stitching the outer hexies together one short seam at a time.  On this second rosette I tried attaching each outer hexie completely, in an "L" seam, and preferred doing it that way.


Wonder Clip Love


Here's my completed hexie rosette.  I really have absolutely no idea how long it took me to make this little cutie because I was zoned out in my Happy Place, giggling and smiling like a fool and paying no attention to the sun's travels across the sky...


HEE HEE HEE HEE HEE!!!  šŸ˜


And then all of a sudden it was four o'clock in the afternoon and I was wondering where on Earth did my day go, and what about all of those other things on my To Do list!!  Having reprogrammed and saved my own personal preferred invisible appliquĆ© stitch on my Bernina B990 sewing machine (read about that here), I decided that I'd spent enough hand stitching hours on each of these tiny hexie rosettes and gave myself permission to appliquĆ© them to their respective block backgrounds by machine.


Invisible Machine Applique on My Bernina B990


More Notes to Self:

  • I gave each hexie rosette a good starching and pressing before and after removing the template papers.  Then I used tiny dots of Roxanne's Glue Baste It to secure them in position on my block backgrounds.  The starch and the extremely narrow width of my appliquĆ© stitch precluded the need for any stabilizer during machine stitching
  • I used invisible monofilament thread in a size 60/8 Microtex needle, with Microquilter in my bobbin
  • I used my open toe presser foot #20D and turned on the B990's laser feature, which shines a dot of red light precisely in the location of the next needle penetration.  That made it really easy to ensure that every stitch landed exactly where I needed it as I navigated around the perimeter of the rosettes
  • I did not use my machine's auto securing or auto trim features.  Instead I held onto my thread tails at the beginning, ended stitching at the exact point where I'd begun, threaded the tails into a hand needle and pulled them to the back of the work to tie off

Tra-la-la-la-laaaaaaa!  


So, what do y'all think?  Is this sacrilege?  Hand sewn EPP hexagon rosettes machine appliquĆ© to the block!  I should note that it IS possible to sew EPP with the sewing machine; I hunted down and watched several different methods of doing so on YouTube.  I decided that either the results shown in the tutorials didn't meet my personal standards, or that the machine  methods looked too fiddly to bother with.  Not that I wouldn't try them ever, on some other project, perhaps one where I was working with larger patches.  

Machine appliqueing the rosettes to my backgrounds made sense because I am really, REALLY pleased with how closely my new machine applique stitch resembles my hand stitching, doing this step by machine prevented any fraying of my already-to-exact-size background block due to scrunching and handling the block during hand applique stitching, and I felt I had invested my hand stitching time into the aspect of the block where I got the biggest payoff for those efforts.


How Do I Love My Sewing Machine?  Let Me Count the Ways...


Side note about how that laser feature works on the B990, because the marketing materials do a terrible job of explaining why anyone would want this for reasons other than machine embroidery.  I stopped my machine with the needle in the down position for the photo above, which is why you don't see any red dot of light on the work.  When the laser light is turned on, each time the machine's needle goes to the UP position, it shines that red dot of light onto the next place where the needle is going to go DOWN, and that helps ensure that the needle is landing in the background fabric for the straight stitches and biting just barely into a thread or two of the appliquĆ© fabric at each swing "bite" zigzag stitch.  You can also tell as you're approaching an inside or outside corner exactly when to pivot your work.  No more guessing and getting that "almost right!"  


Backing Trimmed Away


Not sure whether it was all the starch I used to ensure my hexie rosettes held their shape after template removal, but it felt like there was a lot of bulk at the center of these finished blocks so I trimmed the background fabric away behind each rosette.  Remember that these are 3/8" hexies with 1/4" seam allowances so each one is already two to three layers thick.  Not sure whether this is a "done thing" with English Paper Piecing but it's "done NOW!"

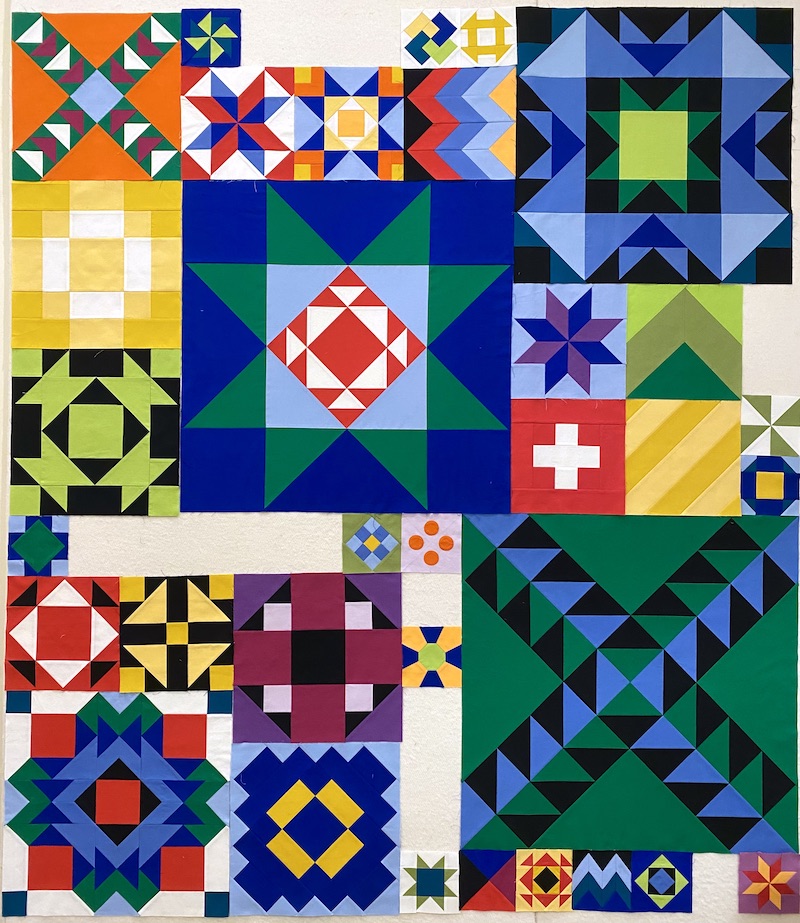
Here are all of my completed Stonefields blocks on my design wall together:


Stonefields Completed Blocks 1-15


Two things: the blocks I finished today may look "out of place" with the others from a value perspective, but I'm not worried.  They will be fine once they are joined by other blocks that have more "stage presence."  Second, most of those appliquĆ© blocks still have oversized backgrounds.  Part of me thinks I ought to wait to trim them down until I'm ready to assemble the blocks into a finished quilt.  Sometimes I think maybe I should wash the blocks to remove the starch and basting glue, and then trim them down.  And then another part of me thinks I ought to trim them down RIGHT NOW because it's harder to get a sense of how the whole quilt is taking shape when some of my blocks are 6 1/2" and other blocks have excess fabric around the edges.  Anyone have any advice?  When I take all of the blocks off my design wall for my upcoming move, I'll be storing them neatly in a project box and I don't think they are going to ravel and fray no matter what I do.  Also, it would be stressful and unpleasant to have to trim down ALL the appliquĆ© blocks near the end of the project.

Alright, enough about this for today. Gosh, I don't even know what day it is.  Wednesday?  Thursday?  I need to get back to the stitch in the ditch quilting on my Deco quilt again tomorrow for sure!

I'm linking up today's post with the following linky parties:

Tuesday, July 22, 2025

Stonefields Sawtooth Stars, Blocks 1-4, + Flying Geese Ruler Roundup

I present to you Sawtooth Stars, Blocks 1-4 of my NewFO project "Stonefields" by Susan Smith.  Ta da!  These blocks will finish at 6" square.


Stonefields Sawtooth Star Blocks 1-4, 6 inch finished


It took me the better part of two days to piece these four blocks because I decided to foundation paper piece them.  In hindsight, I'm not sure that was the best use of time.  I mean, the pattern instructions told me to piece these blocks by hand, and that probably would have been faster than the way I machine pieced them when all was said and done!

I printed my paper piecing foundation patterns on newsprint for a 6" finished sawtooth star block from EQ8 software, then used the software to print rough templates for cutting onto card stock (not pictured and definitely a waste of time because it was just triangles and squares, DUH!).  


Oversize Precut Patches, Foundation Patterns + Supplies, Ready to FPP


Sunday, January 30, 2022

Four More Blocks for My Retro '80s Building Blocks Quilt + Layout Options for FrankenWhiggish Rose Blocks

Happy Week End, everyone, and happy Month End as well!  One of the goals I'd set for myself at the start of January was to make some more blocks for my Retro '80s Building Blocks sampler quilt, and I finally did that yesterday.  Four more happy little 5" blocks are completed, only one of which was in the original Moda Modern Building Blocks design.  The other three blocks were among the many that I swapped out when I was redrafting the quilt in EQ8 Quilt Design Software (affiliate link) to suit my purposes.

Four More 5 Inch Blocks for Retro '80s Building Blocks

Gotta admit, I am still not 100% thrilled with the center of the little Lemoyne Star but it took me a LONG time to piece that one with all of its little Y-Seams, and I decided it's Good Enough.  Or at least, it's the best I could do that day.

Here they are, my completed blocks back up on the design wall, with the new ones added into the mix:

Back on the Design Wall: 38 Blocks Finished, 15 Remaining to be Made

For those of you who haven't seen any of my earlier posts about this quilt, here's a quick recap.  I started out with the idea that I wanted to make the Moda Modern Building Blocks quilt that was a popular BOM (Block of the Month) about eight years ago.  But I wanted mine to finish a different size to fit a particular bed, and I did not have the kit or the pattern anyway, so I set about redrafting the quilt in EQ8 from pictures of...  But instead of sizing my blocks as ruler-friendly multiples of 6", my blocks were multiples of 5" in order to get the finished quilt size I wanted with the borders I added.  The whole idea behind the "building blocks" sampler was for it to be a skill builder, so I eliminated all of the unecessary seams that Moda had added to simplify the piecing, adding back Y-seam construction because that's a skill I wanted to focus on.  I also swapped out 40% of the blocks in the original quilt for different ones in order to get that retro 1980s vibe I wanted and/or to include blocks that were more interesting (to me) or more challenging.  And I added rainbow borders that were inspired by the suspenders Robin Williams' character wore on the television show Mork & Mindy.  

Sunday, December 5, 2021

The Bachelorette, BOM Edition, But With a Married Quilter Bachelorette Who Just Can't Decide...

Y'all, I need HELP!!!  Australian pattern designer Sarah Fielke is relaunching her popular BOM (Block Of the Month) programs from previous years, ALL of them, running simultaneously in 2022.  I have admired her designs for several years but have never done one of them before, and I can't decide between three of them.  So I am going to show you the three BOM quilts, and then I am asking you to help me decide by either commenting here on the blog, or if you get my blog posts as an emailed newsletter, you can just hit reply to that email.  If any of you are planning to join one of these BOMs for next year, please let me know -- I'd love to have "virtual company" on the journey!

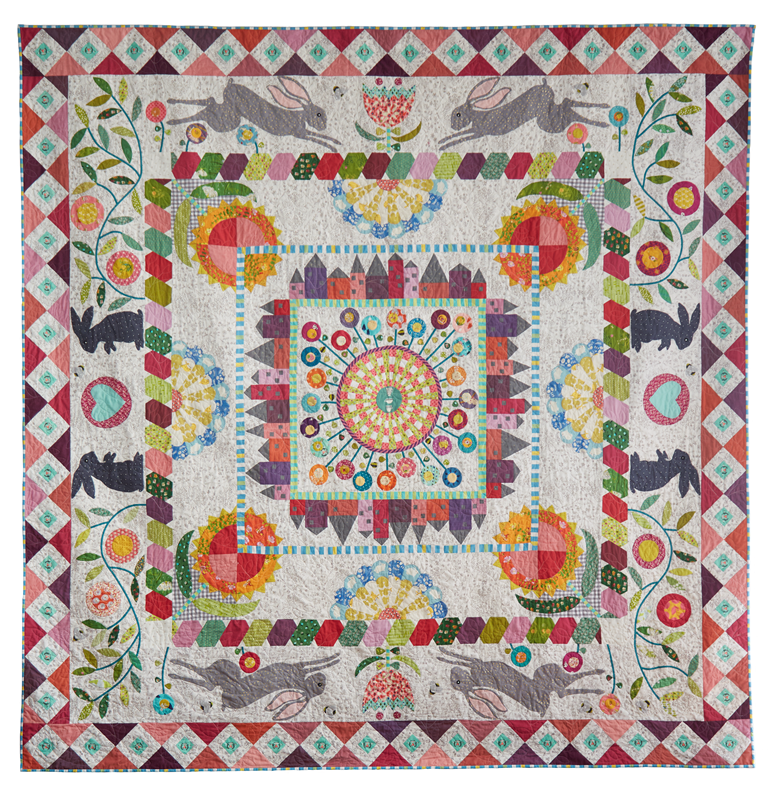
Down the Rabbit Hole (BOM from 2017)

Okay, here is Bachelor BOM Number One, the first of Sarah's patterns to catch my eye because I am totally smitten by the huge folk art style rabbits in the outer borders.  They remind me of William Morris and The Velveteen Rabbit and the fable about the Tortoise and the Hare:

Down the Rabbit Hole by Sarah Fielke, BOM from 2017

Happy Days (BOM from 2016)

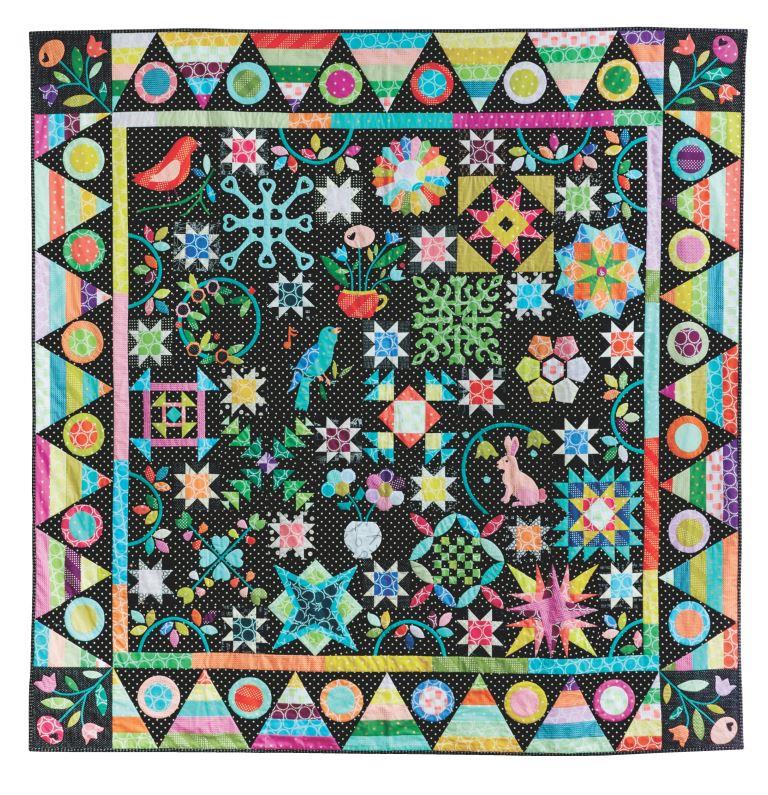
Bachelor BOM Number Two would be sure to hold my interest over the year because it involves such a great variety of techniques and skill challenges.  Do you see the sweet singing birdie with the sixteenth note to indicate that he's singing?  There is appliquĆ©, English Paper Piecing, Hawaiian appliquĆ© in this project...  Never a dull moment and only Happy Days with Bachelor Number Two!

Happy Days by Sarah Fielke, BOM from 2016


Tuesday, July 27, 2021

Yes, I DO Remember How to Make a Quilt Block…. Back to My Retro ‘80s Building Blocks Sampler!

My mom came over to sew with me after church on Sunday, and I decided to get back to my languishing Retro ‘80s Building Blocks sampler (also known as Nanu! Nanu!).  I got one simple 5” block cut out and sewn together and another more complicated 10” block cut out and partially pieced before my mom called it quits and I decided to spend the rest of the afternoon playing with my spoiled rotten Rottweiler.

Block 12 in Progress, 10 inch Version With Y-Seams


My Retro '80s Building Blocks sampler is adapted from the Moda Modern Building Blocks Sampler that was released in 2014.  I changed the block sizes from multiples of 6" to multiples of 5" to get the size I wanted, which complicated cutting considerably since I no longer have "ruler-friendly" fractions for most blocks, substituted out a bunch of blocks, and have redrafted any blocks that Moda simplified because I'd rather sew Y-seams than have unnecessary seams bisecting all of my diamond patches.  The whole point of this sampler was to be a skill builder, after all.

Moda's Version of Block 12, 12 inches, with Easier Bisected Diamonds

Tuesday, January 19, 2021

Two More Retro Sampler Blocks Completed, and Fabric Crises Averted

 Hello and happy Tuesday!  This post needs to be a "quickie" because I have a dentist appointment to get ready for.  I like making these Tuesday To-Do lists, even if I don't always cross everything off before the next Tuesday rolls around.

Last week, I managed to eke out two more 5" sampler blocks for my '80s Retro Building Blocks sampler quilt:

5 Inch Puss In the Corner Block


Neither of these blocks is in the original Moda Modern Building Blocks quilt, by the way.  I always try to mention that in case anyone out there is working on that quilt, so as not to confuse anyone. Like most of the blocks in my quilt, these were both foundation paper pieced due to the non-ruler-friendly patch sizes that happen when you take a 6" block and force it down to 5".

5 Inch Card Trick Block


Meanwhile, my order of Kona Solids from Missouri Star Quilt Company DID arrive this past week, including the Ocean blue that I was needing so desperately, and I washed, dried and folded all of it.  I HATE prewashing fabric, but the only thing I hate more than prewashing fabric yardage is frantically trying to remove dye bleed from a finished quilt.  

Wednesday, November 18, 2020

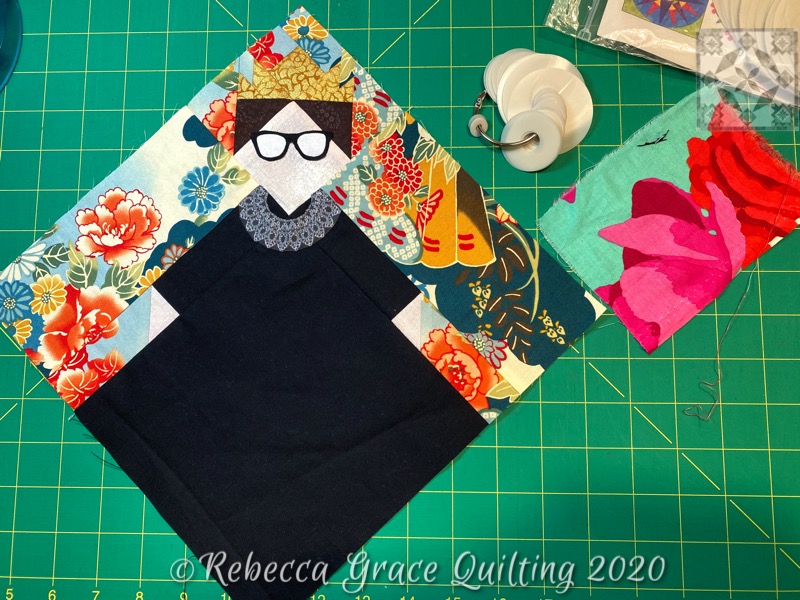
Foundation Paper Piecing + Needle Turn AppliquƩ: The Notorious R.B.G. is Ready to Join Her International Sisters

Do you remember seeing "a little secret sewing" on my to-do list last week?  I had SEW much fun making this "Notorious R.B.G." block for my quilting friend Preeti, based on her popular International Sisters Block Tutorial (find it on her Sew Preeti Quilts blog here).  

My Notorious Ruth Bader Ginsburg Block, Ready to Join Her Sisters

If you haven't seen Preeti's International Sisters blocks yet, you should pop over to Preeti's tutorial to read how the block came about.  Preeti stumbled upon a quilt block called African Queen a few years ago and drafted her own 10" finished version of the block when she was unable to find a pattern or instructions for making it.  Then she started experimenting with all different skin tones and it became an International Sisters block.  Here are some of Preeti's lovely International Sisters:

Four of Preeti's "Sunshine Sisters" (blocks and photo by Preeti Harris, Sew Preeti Quilts)

One of the great things about Preeti's International Sisters blocks is how fabulously they showcase wildly colorful print fabrics, and I think that is a big part of their appeal.  But of course R.B.G. needed to wear a plain black Supreme Court Justice robe instead, so I used a Japanese print from my stash for her background to set off the black dress and help her to work in a quilt with other sisters blocks, should Preeti choose that.  (She can do whatever she wants with it, or nothing at all.  There are no strings attached).

Justice Ginsburg at the 2015 Elle Women in Washington Power List Dinner

The red and orange Japanese print from my stash reminded me of this gloriously colorful embroidered Chinese silk kimono jacket that Justice Ginsburg rocked at Elle magazine's Women in Washington Power List Dinner in 2015.

My Foundation Paper Piecing Pattern, Created in EQ8 Software

In order for this international sister to be recognizable as The Notorious R.B.G., I needed to swap the head wrap for Ginsburg's trademark swept back hairstyle, topped with a crown.  I recreated Preeti's International Sisters block in EQ8 software, carefully following her tutorial specifications so the block would finish the correct size and with the correct proportions.  Then I just subdivided what would have been the head wrap with some additional seam lines. 

Foundation Paper Piecing Ruth's Crown

Foundation Paper Piecing Completed

Once I'd finished foundation paper piecing the four units that make up the whole block, I starched and pressed them nice and flat before trimming away the excess fabric 1/4" from the seam lines.  Then I removed the paper foundations and joined the units together.

Needle Turn AppliquĆ© for the Broderie Perse Eyeglasses

I needed just a few more customizations for my R.B.G. block, and those were added with needle turn applique.  First, I cut out a pair of appropriately sized eyeglasses for my Supreme Court justice from Geekery "Spectacles" fabric (available from several Etsy sellers here).

Spectacles Fabric from RJR Fabric's Geekery Collection, Available on Etsy here

Back view of AppliquĆ© Stitches

The white seam allowance was pretty skimpy in the deep V of the nose bridge, so there are LOTS of tiny stitches there to ensure it doesn't unravel.  For reference, those machine stitched foundation paper piecing seams have a stitch length of 1.5 and the seams sewing the sections of the block together are stitch length 2.0.

The "dissent collar" was done the same way, cut out of a Spoonflower RBG's Dissent Collar fabric (created by jbtsparkle, available from Spoonflower here) with a fat 1/8" seam allowance and then added to the already-pieced block by needle turn appliquƩ.

But something was still missing:

Tiniest Perfect Circle Template + Scrap of Kaffe Fassett Fabric = Jade Earrings

Justice Ginsburg Never Went to Work Without Her Earrings!

I used the smallest size of my Karen Kay Buckley Perfect Circles templates and a scrap of backing fabric from a recently completed baby quilt to recreate Justice Ginsburg's iconic jade statement earrings.

Properly Accessorized, Justice Ginsburg is Ready for a Day in Court

This block was a fun little diversion after wrapping up the two baby quilts.  I'm scheduling this post so it won't publish until after Justice Ginsburg has been safely delivered to Preeti.  I hope she likes it!

PSST!!  I'd Love to Quilt for YOU!

By the way, if you or any of your quilty friends has a quilt top or two that needs quilting, I'd be delighted to quilt for you!  My turnaround for edge-to-edge quilting is currently running about 2 weeks, and you can click here to find out how to book your quilt with me.

I'm linking up today's post with the following linky parties:

THURSDAY

Needle and Thread Thursday at My Quilt Infatuation  

FRIDAY

Whoop Whoop Fridays at Confessions of a Fabric Addict

Peacock Party at Wendy’s Quilts and More

Finished Or Not Friday at Alycia Quilts

Off the Wall Friday at Nina Marie Sayre

 TGIFF Thank Goodness It’s Finished Friday, rotates, schedule found here: TGIF Friday

SATURDAY

UFO Busting at Tish in Wonderland

SUNDAY

FrĆ©dĆ©rique at Quilting Patchwork AppliquĆ©

Oh Scrap! at Quilting Is More Fun Than Housework

Slow Stitching Sunday at Kathy's Quilts


Sunday, September 27, 2020

A NewFO: Welcome Home, Baby

You guys, I started a new project yesterday!  I'm so excited!

42 x 42 Welcome Home, Baby, based on AQS Letter Home QAL

A few weeks ago, I shared in this post how I was playing around with resizing and recoloring the AQS Letter Home quilt along.  The original quilt from AQS finishes at 60" x 60" and you can find the free pattern and instructions for that here.  

AQS Coloring and Block Construction

Although I love the AQS design, unnecessary seams in blocks are a huge pet peeve of mine.  Why would they add a seam down the middle of a flying geese unit to turn it into two half square triangle units?!  I removed those seams, scaled the blocks down so my quilt would end up baby quilt sized, and customized the color palette.  Then, because I like to personalize quilts for little ones, I swapped out the plain square at the center of my quilt and will be replacing it with this 8" paper pieced "C" monogram block:


So far, I've prewashed and preshrunk all of my Kona Solid fabrics in HOT water, ironed them, and cut out all the pieces.  I even started piecing some of the 8" HST units (although I cut one of them twice and it's still too small, so I think I'm going to have to do that one over...)


This morning I printed out my foundation paper piecing patterns from EQ8 for the center monogram block.  This quilt is intended for the baby brother of my butterfly clam shell quilt recipient, and the new baby's due date is October 1st.  I need to get a move on!  

I'm linking up today's post with the following favorite linky parties:
SATURDAY

·       UFO Busting at Tish in Wonderland

SUNDAY

·       FrĆ©dĆ©rique at Quilting Patchwork AppliquĆ©

·       Oh Scrap! at Quilting Is More Fun Than Housework

·       Slow Stitching Sunday at Kathy's Quilts

MONDAY

·       Design Wall Monday at Small Quilts and Doll Quilts  

·       Monday Making at Love Laugh Quilt