Showing posts with label Dye Bleeding. Show all posts

Tuesday, November 16, 2021

Sarah's Chevron Memory Quilt, Lazy Day Quilt Progress + Pineapple Nostalgia Quilt Back from the Cleaners

Good morning and happy Tuesday, friends!  I have so much to share with you today, so let's dive into it.  First up is a lovely, snuggly flannel-backed Chevron Memory quilt that my client Sarah made in remembrance of her grandmother.

Sarah's Chevron Memory Quilt

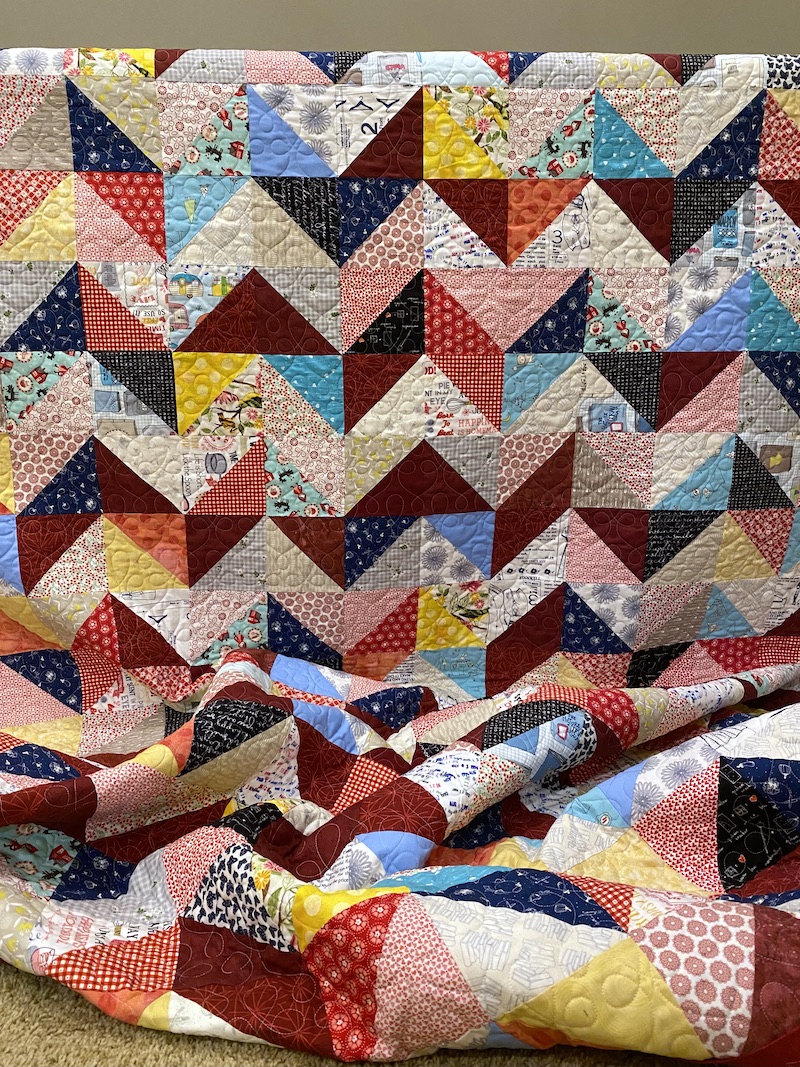
70 x 90 Chevron Memory Quilt with Filigree E2E Quilting

Sarah pieced this quilt while working through the flood of emotions following the sudden passing of her beloved grandmother, incorporating some of her clothing into the quilt top and pieced backing as well as new fabrics with novelty print themes that reminded her of her grandmother.  We chose the Filigree pantograph design because it reminded Sarah of her grandmother's lace tatting and I knew it would give Sarah the loosely quilted, old-fashioned feel she wanted for this project.

Sarah's Pieced Backing, Flannels and Regular Wovens, with Filigree E2E quilting

Okay, so when Sarah first reached out to me about this quilt, she warned me that it was only her second quilt ever when she started it three years ago, that it was "full of flaws" and learning experiences, etc.  I was bracing myself for there to be challenges for me to work around -- and then this beautifully pieced top and pieced backing showed up in the mail.  

Monday, June 3, 2019

Mission Impossible: COMPLETED, With Five Days to Spare!

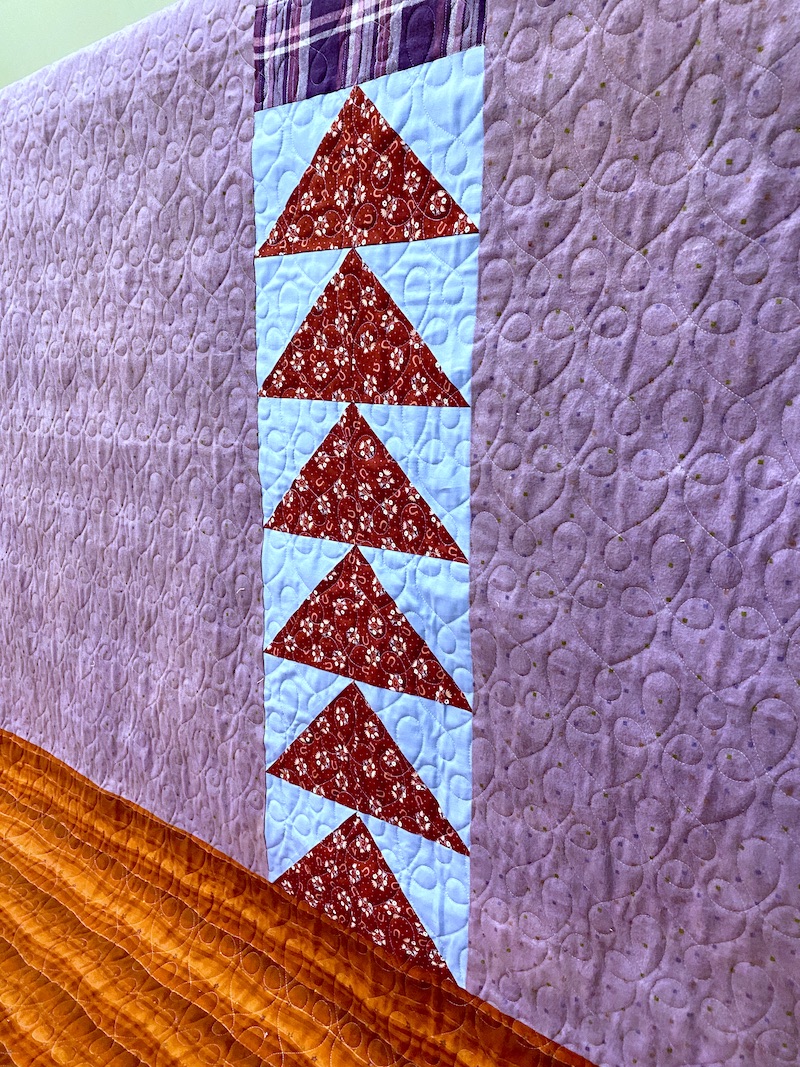
Ta-DONE: Mission Impossible, 68 x 90
Hello, Lovelies!  Happy Monday and Happy June to all of you!  I am happy to report that I DID complete the quilting on Lars's graduation quilt, Mission Impossible, in time for the church staff meeting last Tuesday!

Off the Frame!  Mission Impossible Quilting Completed, Ready to Trim
Memorial Day was my birthday, and I "celebrated" by spending 7 1/2 hours at the longarm machine in order to finish all of the SID (Stitch in the Ditch) around the flying geese so I could take the quilt off the frame before I went to bed.  

I had considered all sorts of options for jazzing up the flying geese triangles with additional quilting, but ultimately the calendar and looming deadline won out.  With all of the ruler work quilting that I did in the purple background plus just stitching in the ditches of the flying geese, the total quilting time for Mission Impossible clocked in at just over 45 hours -- plus the 8 or 9 hours that I spent marking the background design before loading the quilt on the frame.  Realistically, there just was not time to attempt embellishing the flying geese with additional quilting.


Boring But Time-Consuming Stitch In the Ditch Quilting
I used Superior's Monopoly invisible monofilament thread in Smoke for the SID (with a gray MagnaGlide prewound in the bobbin), and it was a wise choice.  Although the clear monofilament thread stood out and looked super shiny and obvious against my fabrics, the Smoke thread just melted into each fabric as if I'd changed threads to match each and every fabric.  SID is much more challenging on a longarm machine than it is on a domestic machine, in my experience, and I can assure you that I had plenty of wobbles and oopses along the way.  With the monofilament thread, those growing pains or whatever you want to call them really are invisible enough that I did not have to stop and rip out ANY of my SID quilting.  Also, if you look carefully in the photo above, you can see that my stitch regulator is performing erratically, making the 12-15 SPI (stitches per inch) that I've set it to in some directions and then making TINY little stitches when I move the machine in a different direction.  That's an issue I need to trouble-shoot with the awesome folks at APQS Tech Support, but I didn't want to go off on that tangent until I got Lars's quilt finished and off my frame.  That discrepancy in stitch length would have been really obvious if I'd attempted additional decorative quilting in a contrasting thread color.

So I picked the quilt up from church after the Tuesday morning staff meeting concluded and brought it home to work on the label and the binding.


Machine Embroidered Quilt Label for Mission Impossible
The label took me a day and a half; it's not "instantaneous" just because it's machine embroidered.  I designed the label in my Bernina v8 Designer Plus embroidery software on my iMac computer, which lets me lay out the lettering and position the text exactly the way I want it and preview it in an endless variety of fonts...  I went through a lot of options before settling on the two fonts you see in the photo above.  Then I spend time deciding which fabric and thread colors to use for the label, which stabilizers, sew out a sample, and then go back to my software to make adjustments before sewing out the design "for real."  To save myself some of that time and trouble for next time, here are the most common things that usually need to get tweaked after the first sample is stitched:


Rebecca's Best Practices for Machine Embroidered Quilt Labels:


  • Increase the spacing between the letters.  When the fonts are shrunk down to the size of a quilt label, the letters are almost always too close together and difficult to read.
  • Set the fabric type to "Lightweight Woven" in the design settings.  This lets the software automatically adjust pull compensation for my lightweight quilting cotton fabric.
  • At the sewing machine, lower the upper thread tension to 1.5.  Otherwise the bobbin thread gets pulled to the top side with these skinny little satin stitched letters
  • Reduce the embroidery speed at the machine 
  • Use a water-soluble topping, one layer of tearaway in the hoop (I'm currently loving Floriani Stitch 'N' Wash for quilt labels because a lot of what doesn't tear away will soften and dissolve in the wash), and another layer of tearaway floated beneath the hoop
  • Engage the hoop basting feature in my Bernina machine to secure all layers of fabric and stabilizers around the perimeter of the hoop before stitching out the design


Label is On, and Now For the Binding!
I put the final hand stitches in the binding around midnight on the evening of June 1st.  I'm counting that as "finished by the end of May" for last month's One Monthly Goal.  However, against my better judgement, I decided to run the finished quilt through the wash before going to bed so it would be REALLY finished...  

Now, there was never any question about whether this quilt would ever get washed.  It's a bed quilt for an eighteen-year-old boy's college dorm, for Pete's sake.  And I went through 3 or 4 cans of spray starch throughout its construction and made liberal use of Roxanne's Glue Baste-It washable glue to streamline the curved piecing, AND I marked the entire quilting design onto the quilt top with 3 or 4 different kinds of marking pen...  This quilt was always intended to be washable, and it would not have been 100% "finished" until I washed out all of the starch, glue, and pen marks.  

I tested each and every one of the Kona Solid fabrics used in the quilt top to ensure their dyes wouldn't bleed before I started the quilt, and I tested a swatch of the Spoonflower backing fabric as well.  Every one of those fabrics passed with flying colors.  I didn't notice anything when I pulled the wet quilt out of the washer at 1 AM and transferred it to the dryer.  But in the light of morning, I could see that my yellows were all dingy and there were dark blue streaks on some of them.   I couldn't even bring myself to take a picture of it; it was just too disheartening.  I had to just deal with it, RIGHT AWAY.

SO...  I looked up Vicki Welsh's Save My Bleeding Quilt tutorial, since her instructions saved me when I had bleeding red dye on my Jingle quilt blocks.  With Vicki's method, you don't need any expensive, difficult to obtain or toxic chemicals; just a big bathtub full of water and ordinary Dawn dishwashing liquid.


This Is What the Water Looked Like After Soaking My Quilt for Four Hours
Check out how much additional loose dye was released from this quilt AFTER that first run through the washing machine.  I emptied the tub and filled it with hot, soapy dishwater twice more after this photo was taken, until I could scoop out a glass of the water and confirm that it was clear.  Then the quilt went through several rinse cycles in my laundry machine to remove the Dawn detergent and I dried it again.


Fabrics Faded After Loose Dye Removed
The results?  Well, I'm pretty sure the culprit was the Spoonflower custom printed fabric that I used for the backing, which was printed with black and blue water based inks onto white Kona solid cotton base fabric.  Now that all of the loose dye is gone, the backing is considerably faded, but the fabrics in the quilt top itself have lost some of their vibrancy as well.  I love having the Bible verse printed all over the backing fabric so it's worth it to me in the end, but if I had this to do over again I would have soaked the backing fabric in my tub with the Dawn dish water until all of the extra dye was used BEFORE I loaded it onto my frame and quilted it to my quilt top.  I don't mind the fading of the backing fabric at all -- in fact, removing the excess dye made the backing softer and gave it kind of an appealing denim/chambray vibe.  The folks at Spoonflower did advise me in their care instructions to prewash their fabric before using it in a project, in their defense.  I thought that, if the swatch I dunked in boiling water didn't bleed, I'd be fine -- but perhaps their inks aren't colorfast only start bleeding once a mild laundry detergent is added to the mix?  Could a dye fixative like Synthrapol have helped, if I used it on the Spoonflower fabric before I put that fabric in my quilt?  Who knows -- these are questions for another day.  Because on THIS day, I'm just glad that my quilt is done a whole FIVE DAYS before the Quillow Service at church.  I even get to bring it to Show and Tell at my quilt guild on Wednesday night, to prove that I really am a quilter and not just a government spy infiltrating their meetings...  ;-)


Mission Impossible, 68" x 90"
So this quilt top was 72" x 96" before quilting, and after longarm quilting, machine washing, multiple hot water soaks, and machine washing again, the finished quilt ended up measuring approximately 68" x 90".  That was 6% shrinkage in the width and 7% shrinkage in length, using all unwashed 100% cotton fabrics and Hobbs 80/20 black batting.  Still generously sized to fit one of those 39" x 80" Extra-Long Twin dormitory mattresses, with a 16" drop on all three sides of the bed.


The Sexy Lawn Shot
Fading or no fading, I'm still pretty pleased with how this quilt turned out.  It looks just like my EQ8 design, it's going to fit the college dorm bed, it's done in time for this Sunday's Quillow Service, and it's a soft, snuggly quilt that will keep my son warm in his dorm room this Fall!  I learned a lot making this quilt, got lots of practice with the ruler work quilting, and am happy to report that those needle holes on the backing fabric closed up nicely, the quilt ended up perfectly straight and square, the lettering on the backing fabric was still straight after quilting, and there are NO pleats or tucks in the backing fabric.  Those are enough victories for me to consider this a win.


The Rear View

PSST!!  I'd Love to Quilt for YOU!

By the way, if you or any of your quilty friends has a quilt top or two that needs quilting, I'd be delighted to quilt for you!  My turnaround for edge-to-edge quilting is currently running about 2 weeks, and you can click here to find out how to book your quilt with me.

I'm linking up today's post with:

MONDAY

·      Design Wall Monday at Small Quilts and Doll Quilts http://smallquiltsanddollquilts.blogspot.com 
·      Main Crush Monday at Cooking Up Quilts http://www.cookingupquilts.com/
·      Monday Making at Love Laugh Quilt http://lovelaughquilt.blogspot.com/

TUESDAY

·      Colour and Inspiration Tuesday at http://www.cleverchameleon.com.au

WEDNESDAY

·      Midweek Makers at www.quiltfabrication.com/
·      WOW WIP on Wednesday at www.estheraliu.blogspot.com

THURSDAY

·      Needle and Thread Thursday at http://www.myquiltinfatuation.blogspot.com/  

FRIDAY

·      Whoop Whoop Fridays at www.confessionsofafabricaddict.blogspot.com
·      Finished Or Not Friday at http://busyhandsquilts.blogspot.com/
·      TGIFF Thank Goodness It’s Finished Friday, rotates, hosted this week by Lynette at http://whatahootquilts.blogspot.com  

Monday, April 23, 2018

Jingle Update: The Bloody Quilt Wrecker Has Been Apprehended and Disarmed!

Good happy morning to you, stitchy friends!  Look who survived the bloodbath of Friday the 13th and is back on my design wall, ready to become a quilt top again!  It's the Jingle BOM (Block Of the Month) designed by Erin Russek, my first-ever applique project, which I started back in 2012.  In Quilters' Terminology, that makes it my oldest UFO (UnFinished Object) or WIP (Work In Progress).


YESSS!!!!  My Jingle Blocks Aren't Bleeding Anymore!
fabric haemophilia. /ˌhiːməʊˈfɪlɪə; ˌhɛm-/ noun. 1. an unpredictable disease, usually affecting only dark fabrics but lethal to any light colored fabrics sewn adjacent to them in a quilt, characterized by loss or impairment of the normal clotting ability of commercially dyed or hand dyed fabric such that a minor splash of water or the gentlest of laundering may result in fatal bleeding of loose fabric dye all over the white and light colored fabrics in your quilt.  Can be fatal if not treated immediately.

I just realized I never followed up with my scary nightmare post about the quilting bloodbath.  I am happy to report that there were NO casualties!  It turned out that my favorite Hoffman poinsettia fabric was the bleeder after all.  These are seriously haemophiliac flowers, you guys, but ordinary Dawn Ultra dishwashing liquid was the Rasputin who saved my bleeding quilt.


The Villainous Bleeder: Hoffman "Winter Magic" Style G8562
So, when I wrapped up my last post about this I had successfully eliminated all of the loose, shedding dye from my pieced and appliqued blocks as well as from the appliqued center medallion of this languishing UFO, but I still didn't know which of my red fabrics was the bleeder.  

I had already cut all of my setting triangles out of this red poinsettia fabric (also used in some of my pieced blocks that bled) but was reluctant to soak and agitate the triangles for fear of fraying and distorting the bias edges.  Yet all the work I did to eliminate the dye bleed in the blocks would be for nothing if I sewed the non-bleeding blocks to red fabric that was still bleeding.  

I confirmed that the poinsettia fabric was definitely the bleeder by soaking a small scrap of this prewashed fabric in a bowl of hot, soapy water.  The water turned dark red almost immediately.  


Just a Scrap Of Poinsettia Fabric Turned the Soapy Water Red
No way could I use those setting triangles with that much loose red dye in them, so I proceeded to soak all of them in the dishpan the same way I had done with my blocks.  I have to show you how much dye released from the setting triangles into the dishpan in the first soak:


Yikes!!  My Fabric Bleeds Chicken Blood!
Isn't that gross?  My husband said it looked like sudsy Kool-Aid, but I think it looks like chicken blood!  I just kept dumping the water and refilling the dishpan with fresh hot, soapy water, squeezing the suds through my blocks or cut triangles or yardage or whatever I was dealing with, until the water remained clear after several hours of soaking.  Then I rinsed them under cool running water, gently squeezing to remove the suds, and laid them flat to dry on white bath towels.


The Setting Triangles Survived Their Bloodbath!
But the main takeaway is that Vicki Welsh's method of prolonged soaking in hot, soapy Dawn dishwater was really easy, and it successfully removed all excess dye from the bleeding fabrics in my blocks, and now even if the finished quilt gets thrown into a boiling lake full of angry demons, I am confident that the dye won't run.  Yippee!  

I had to use the blue Original Dawn Ultra dish soap for my first go at this, because that was the "plainest" Dawn dish soap that my local grocery store carried.  I wasn't thrilled about that, though, because blue Dawn tints my soapy water blue and that makes it harder to tell whether blue or green fabrics are bleeding.  Also, the manufacturer of Dawn is only intending for customers to use their product on dishes, so they won't have tested whether their blue dye would transfer to or interact negatively with fabric in any way.  So I was delighted to discover that Dawn makes a Free and Gentle version of their Ultra dish soap that is completely dye free, and that's what I'm using from now on.  I found it on Amazon here, two 21.6 oz bottles for $12 with free Prime shipping, and I stocked up so I can test and treat every new fabric that comes home with me.  


Yes, there are plenty of other chemicals and soaps that quilters swear by for dealing with bleeding dyes in commercial fabrics, but they are all much more expensive harder to find.  

So, back to the Jingle quilt.  Here is designer Erin Russek's original setting for these blocks:


Designer Erin Russek's Setting for Jingle, Finished Size 76" x 76"
I want to do mine differently, with the center medallion set straight rather than on point.  


Tweaking the Setting On My Design Wall.
This would eliminate the giant green setting triangles around the medallion, and give me the opportunity to add a border or multiple borders between the center medallion and the on point pieced and appliqued blocks.  I may also eliminate or reduce the size of that outer green border, since I'm intending this quilt for seasonal wall display and don't need it to be quite as big as Erin's 76" x 76" design. 

I'm currently considering replacing the inner red poinsettia setting triangles with green ones to accentuate the zigzag effect of the on point block border, as well as ensuring that I have  a nice Christmasy balance of red and green in the finished quilt.  I found a mottled tonal green fabric nearly identical to one of the fabrics I used for some of my appliqued leaves, and I prewashed it AND checked it for color fastness, so it's ready to go.


New Emerald Green Fabric for Inner Setting Triangles
I LOVE IT!!  I am going to have SO MUCH FUN quilting this on my longarm machine, and I can't wait to enjoy it as part of my Christmas decor in 2018.  That's right, you heard me -- I am setting another goal.  Jingle is going to be finished by Thanksgiving of this year so I can hang it up when I decorate for Advent!

But meanwhile, I'm nearly finished with Pineapple Log Cabin Block #36 of 42:


Block 36 of 42 Currently In Progress
...and I've got a fantastic idea ready to test out for quilting some fancy feather designs on my Tabby Mountain quilt:


Auditioning Feathers for Felines
This quilt is intended for a dear friend whose birthday is coming up soon, so once I wrap up Pineapple Block #36 I'll be focusing on Tabby Mountain again in order to get it done on time.

Have a wonderful, productive, and beautiful day!  I'm linking up with:

Thursday, April 12, 2018

Nightmare On Quilter's Corner: "There's SO MUCH BLOOD!!!!!"

That sounds like something out of a horror movie, doesn't it?  And it should, because what I'm about to share with you is a quilter's most gruesome nightmare.  This blog post might not be appropriate for young quilters, or for squeamish quilters, or for quilters who faint at the sight of bleeding fabric dye threatening to destroy hours and hours AND HOURS of painstaking hand stitching.  But I think it's gonna have a happy ending, so bear with me!


My Freshly Bathed Jingle Applique Blocks This Morning.  So Far, So Good!
Quick recap: You are looking at my very first applique project, a BOM (Block of the Month) project designed by Erin Russek of One Piece At a Time back in 2012.  I spent hours studying Erin's awesome tutorials for preturned, hand stitched applique, more hours carefully selecting the fabrics for every block, and it took me an unbelievable amount of time to stitch these blocks because I was paranoid about having my stitches too far apart and made them very, very tiny instead.  I was so excited about being able to make three-dimensional PICTURES out of fabric!  I was so proud of my nice little points and smooth curves!  

I struggled with many of the pieced blocks for this project, too.  My seam ripper and I became besties, but I persevered and ended up with an assortment of blocks that I was really happy with.  Seriously, I must have had at least a hundred hours of time invested in these blocks by this point.  You can read through the trials and tribulations of this project in my older posts about it by clicking here.


My Jingle BOM WIP, Last On the Design Wall in June of 2014
But alas! -- As my final blocks neared completion and I got ready to cut out my setting triangles so I could join those blocks into an honest-to-goodness quilt top, this lighthearted romantic film took a turn for the worse.  I happened to set my red poinsettia setting triangle yardage down on top of the edge of a piece of white paper, and noticed that my selvages were PINK instead of white.  


Pink Selvages?!  NOOOOOO!!!!!  MURDER, She Wrote!!!
Like the good little beginner quilter that I am, I had followed the directions and prewashed all of my fabrics for this quilt before cutting out a single piece, thinking that would take care of shrinkage as well as rinsing away any excess fabric dyes.  I prewashed all of my reds in the same warm water laundry load, and apparently at least one of those fabrics was a bleeder.  The thought of spending additional time setting the blocks into a quilt top, and then even MORE time quilting the whole thing, only to have it come out of the first wash with all of my off-white backgrounds turned pink, was just too much for me to bear.  So I put all of my finished blocks, setting triangles, and the finishing directions in a lovely wire drawer bin and stashed it away under my cutting table for...  FOUR YEARS.  


Hidden Away For Four Long Years
However, enough time has passed now that I feel like I have more to gain than I have to lose by getting Jingle out again.  I mean, blocks in a drawer are worth nothing, but if I take them out, I can use them for educational purposes, to experiment with bleeding dye issues.  Even if the ivory background fabric all turns pink and I can't stop the bleed, I can still get good practice with all kinds of custom longarm quilting, including stitching around all the applique shapes.  My overall quilting objective for 2018 is to become proficient with my longarm machine so my husband doesn't make me sell it (Yes, Lover Ducky -- I know what's going through your mind!).  And so, my Jingle blocks were ready for their blood bath!

There are quite a few methods out there on the Internet for addressing the problem of excess dye leaching out of quilting cottons when wet, everything from Color Catcher laundry sheets to Synthrapol and other chemical fixatives.  My blogging buddy Karen at Quilts... etc. recommended Vicki Welsh's Save My Bleeding Quilt method using ordinary Dawn liquid dish soap, and that's the method I'm using on my Jingle blocks right now.


Can Vicki's Method Save My Bleeding Quilt Blocks?
I used the blue Dawn Ultra, Original Scent, this time because that was the most "plain" Dawn that my local grocery store stocked.  However, because I'm using more more dish soap than I would use for washing dishes, the blue dish soap annoyed me by tinting the soapy water blue.  That would make it a lot more difficult to tell if blues, purples, or deep greens were shedding dye into the sudsy water.  Plus, the whole reason we're doing this is to get RID of extra dye, not add MORE dye!  So I was very excited to find this colorless version of Dawn Ultra called Free & Gentle, with no added dyes or perfumes, on Amazon.  I got a nice, big bottle of it and I'll be using this clear Dawn Ultra next time:


Notice that's TWO bottles of Dawn, each of them 21.6 oz, for just $12 and free shipping with Amazon Prime.  And that's ALL I needed for this method - no Synthrapol, no vinegar, no Retayne, no Color Catchers.  It's cheap and it does the job, leaving more money in my pocket for fabric shopping.  

Vicki's Save My Bleeding Quilt tutorial walks you through her process for dealing with dye that's bleeding on a finished quilt, and she recommends a 12-hour soak in a bathtub full of hot, soapy Dawn dish water.  Since my quilt blocks haven't been assembled into a top yet, much less quilted, I was able to use a dishpan instead.  First I soaked my 8 applique blocks together.  I put them in their hot bath first thing in the morning, and left them there until after dinner time:


Applique Blocks After a 12-Hour Soak
An hour or two after I put the blocks in the hot, sudsy water, I dumped out all the water and refilled the pan with more hot sudsy water, to get rid of the excess dye that had leached out fairly quickly.  I was surprised to see that one or more of my emerald green leaf fabrics was leaching out more excess dye than any of the red fabrics in these blocks.  


First Bloodbath Finished!
Just as Vicki promised, the Dawn detergent prevented any of the excess dye from readhering to my off-white background fabric.  Interestingly, you can see that the hot soak in soapy water did NOT wash away the little dots of Roxanne's Glue Baste-It that I used to position my applique leaves and petals when stitching them down.  I didn't agitate much, though, because I'd already trimmed these blocks to size and I was afraid of fraying the raw edges of the fabric.  I just stirred them around gently with a wooden spoon.  I'm sure the glue will wash away when I wash the finished quilt (and if it doesn't, I don't care).  I laid the sopping wet blocks out on a fluffy white towel and pressed down from above with another towel, then allowed them to air dry overnight.  When I picked them up this morning, there were no pink or green marks on the white towel, so it looks like the blood bath was a success.  HOORAY!!!


These Blocks Survived Their Bloodbath!
I am sure that I did not get all of the Dawn soap out.  I rinsed them as best as I could without overhandling them, draping each one over the back of my hand while I sprayed it with water.  Again, the quilt will be washed as soon as it's finished and any dish soap left in the quilt will be removed at that point, when there are no more raw fabric edges in danger of unravelling!

So, feeling greatly encouraged, I set up another boiling, soapy bloodbath for the nine pieced blocks after dinner.  This time, the red dye started to leach out into the bathwater right away.


AHA!  Pink Bathwater!!
I dunked a clear plastic beverage cup into my sudsy water after about an hour of soaking, and it looked like pink zinfandel with foam on top!  I dumped out that tub of water and refilled the bloodbath with fresh, hot, sudsy water, stirred it up for a few minutes with my wooden spoon, and then headed up to bed, hoping for the best.


Good Morning, Blood Bath!
Happily, this is what I discovered in my sink this morning.  That water looks pretty clear to me, so I must have gotten all the excess dye out in that first couple of hours, before I refilled my tub of water.  


Post Blood Bath, Drying On the Towel
I was more worried about the applique blocks, but actually the pieced blocks are more of a pain in the butt because all of my nicely pressed seam allowances have unpressed themselves and I'm going to have to fiddle a bit to figure out which way they're supposed to go when the blocks are dry and I have to press them back into shape.  But the main thing is that NOTHING IS BLEEDING ANYMORE.  My third and hopefully final blood bath for this quilt is the large center applique medallion, which is soaking in the dishpan right now.  

The thing is, I thought for SURE that one of my red batik fabrics was the bloody culprit, either the fabric I used for my stuffed berries or one of the batiks that I used for my red cardinals.  But if that was true, I should have seen red dye running in the applique blocks' bath water.  I only saw green dye in that bath.  It was the pieced blocks' bathwater that turned pink from loose red dye.  I am such a sleuth, you guys.  I feel like Nancy Drew!


Nancy Drew and the Case of the Bleeding Quilt Fabric
I have five or six different red fabrics in my pieced blocks besides the applique batiks, so perhaps I have already solved the problem for this quilt...  Unless the bleeder was that poinsettia fabric with the pink selvage that first clued me in.  
Hoffman Winter Magic, How Could You Betray Me?
This is my favorite fabric in this whole quilt.  It's in several of my pieced blocks, but not in any of my applique blocks.  And it's the fabric for my setting triangles, which are all cut out and ready to go.  I hope it's not the bleeder!!  I need to go find a scrap of it to test.  If it bleeds, there's no way around it -- I'm going to have to soak all of my setting triangles, too.  I'm using those setting triangles, come hell or high (hot, soapy) water, because that's how much I love it.

By the way, I sat down at the computer to write this "quick" blog post update at 8 AM, and have only stepped away from the computer to make tea, throw the tennis ball for my dogs for a bit, and to check on my soaking quilt blocks.  It's NOON already...  Ah, the SHAME!!!  Just think how much sewing I could get done if I didn't feel compelled to chronicle every single step on this blog!

Today I'm linking up with: 
·       Needle and Thread Thursday at http://www.myquiltinfatuation.blogspot.com/ 

Monday, February 20, 2017

Ta Da; I Made a Star! And Perhaps, Have Saved Two More

So, here's what I have to show for myself so far: 

A 4" Finished Sawtooth Star Block
I made one so far.  Way too much going on last week, and not enough fabric therapy!  I paper pieced this block, and only had to rip out seams twice.  Once, because I misaligned a fabric patch before sewing it down and when I pressed it open, it didn't completely cover the paper.  But the second boo boo was evidence that sleep deprivation is catching up to me, addling my brain:

What's Wrong With This Picture?

Nice, right?  First lesson, day one, Sewing 101:  We sew with RIGHT SIDES TOGETHER!!!  And such a shame, too, because I nailed the triangle points at that seam intersection.  Well, when you're sewing it's not that important that you always get it right the first time.  You just need to get it right the LAST time.  And this is why the seam ripper is such a blessing; it gives us do-overs!

Seam Ripper to the Rescue!
I spent most of today doing paperwork and other housekeeping in my home office, supervising the academic labors of kids who have Presidents' Day off and "forgot" about homework due tomorrow, and finishing up laundry.  Now that I've finished up what I need to get done today. I am DYING to get up to the studio for some fabric therapy and see if I can't sew a few more of these little star blocks -- especially since the baby was born a week ago.  But first, a few other things I wanted to share before I forget:

Bernina LED Lights Reflecting Off the Needle
See that white "line" of light?  The LED lights on my Bernina are so bright, they actually reflect off the machine needle to create a guideline.  I want my paper pieced seams to go all the way through both seam allowances, but instead of having to draw those lines in or eyeball them, I can just line that white light line up with the beginning of the printed stitching line on my foundation paper pattern and know that I'm perfectly straight and centered and good to go.  Love that!


As you can see in the photo above, a sawtooth star block cannot be pieced with a single foundation pattern.  I have four separate patterns to paper piece individually before I remove the foundation papers and join them using traditional piecing techniques. 

Once I've covered all of my foundation papers with fabric patches, I give them a final pressing and then I starch them twice so they are nice and stiff.  I have to flip them over and trim them paper side up, and I can't have flimsy fabric sliding around under the paper, misbehaving where I can't see it when I'm slicing away with my rotary cutter!

When I trim my foundation sections, I do NOT just cut on that solid line on the outside of the block.  Even though it is the cutting line.  Even though it is supposed to give me a 1/4" seam if I do that.  Nope, I trim my sections the exact same way I would measure and rotary cut fabric for a traditionally pieced block, in the way I know I can get precisely accurate blocks.  I line the 1/4" pink line of my ruler up on the dotted SEAM LINE that is printed on the paper pattern when I trim these sections. 

How I Line Up My Ruler to Trim Foundation Sections
Sometimes my rotary knife blade comes down right on the solid "cutting" line when I do it this way, sometimes the slice is just inside or just outside of the solid line -- but when I sew the trimmed pieces together after cutting them this way, using my 1/4" foot with the guide screwed into the machine bed, everything matches up perfectly and the block finishes the right size.

After trimming the starched pattern sections, this is what I need to sew together to complete the block:

Paper Pieced Foundation Sections Starched, Trimmed, Ready to be Assembled
See?  They are just like tidy little rectangles.  Precisely the right size, nice straight edges with no stray threads or wobbly nonsense to watch out for, and all seamlines are exactly the same kind of 1/4" away from the cut fabric edges.

How I Pin Seam Intersections
So then the papers come off, and matching seamlines get nested tightly together and pinned like so, with a pin just to either side of the already stitched seams that need to match up.  Notice my pins do not extend past the raw edge of the fabric, and the pin heads are pointing to the LEFT as this unit goes through the sewing machine.  This way my seams stay locked together without shifting, the pins don't get in the way of my patchwork seam guide, and I can easily remove the pins as I go.

Bernina #97D 1/4" Patchwork Foot for 9 mm Machine, with Seam Guide
That nifty seam guide takes all of two seconds to screw down or to remove.  I LOVE IT.  I just push it right up against the right toe of presser foot #97D, screw it in place, and I'm good to go.  This gives me nice, straight, even feeding for precision patchwork on my 9 mm Bernina, with the Dual Feed feature engaged, and I don't have to play around with moving my needle one click to the right or left or any other fiddling like that.  As long as I use the CENTER of the line printed on my ruler lined up on the CENTER of the seam line when I cut, this foot with this guide give me perfect results every time. 

How Much Do I Love Those Triangle Points?
However, if you CUT differently, you may need to PIECE differently to get the same results -- that's why you hear so many different people telling you to move your needle one click, or to sew a scant 1/4" or whatever.  I like to keep it simple, so I adjusted my cutting habits to work with my equipment.  That makes the most sense to me, because I've invested in really nice equipment!  :-)  Your mileage may vary...

New 4" Star On Design Wall Amid 10 1/2" Bear Paw Blocks
So another thing I wanted to say before I forget: When I printed off these sawtooth star foundation patterns from EQ7, the software gave me the option to number the piecing order myself.  I decided to just take it the way EQ generated the numbering.  This was a minor mistake.  I should have taken a moment to think through which way all the seam allowances would go before I printed the patterns.  I ended up with perfectly nesting seams on the right side of the block, where EQ7 had me start with the big white QST in the center of the foundation pattern.  But on the left side of the block, EQ7 had me start with the white square at the top of the foundation pattern, and that created one seam allowance that nested with the seam allowance on the center foundation and one seam allowance that stacked.  Stacked seam allowances don't lock together, so they are more prone to shifting and misalignment during stitching in addition to creating unwanted bulk in the block.  But I managed just fine with this block, and I'll change the stitching order for that left unit on all of my remaining blocks:

Foundation Pattern with Stitching Order Correction for Left Side Unit
Oh, I lied -- I have another thing to say before I go upstairs to sew.  Remember how bummed I was that those first two RED sawtooth star blocks that I made so long ago weren't colorfast?  Well, it annoys me that I worked so hard to make them, achieved such precise results, and then can't use the blocks.  So amid all of my other activities today, I conducted some experiments with those blocks involving soaks in hot water followed by rinses of cold water and squeezing between white paper towels.  I think that perhaps they had excess dye that I was able to rinse out, and I am hoping I can still use them in the quilt if they stop bleeding.  What do you think?

Bathing My Bleeders
I plan to repeat the hot water/cold water/paper towel squeeze routine some more just to be sure.  But wouldn't it be great if this worked?  If it works for these hand marbled bleeders, maybe something similar can save my Jingle BOM blocks made with bleeding red batik fabric.  Ah, but I get ahead of myself.  One quilt at a time! 

Can you believe I had SO MUCH TO SAY, despite how little I've accomplished?  ONE LITTLE BLOCK.  Imagine how much sewing I could get done if someone took away my computer!